Monday, December 27, 2010

Scotch Bars

I have a lot of posts in progress so I best get started. It is a snowy day here. We got a lot of snow throughout the night and it is not over yet.
Here is the view from my porch. The drooping tree is a River Birch that needs some snow knocked off its branches. I will be doing that later. We have a few more birches closer the the street so I will be busy today!


But back to the Scotch Bars. I found this recipe in magazine about tea. http://www.teatimemagazine.com/
The ingredients and method are the same as the original recipe but I changed the pan size because I like a thicker bar. This is a very rich bar and I ended up getting about 36 pieces from it. I love it with a strong cup of coffee in the afternoon. The bars keep really well. I think they are actually better the second and third day they are made. Go make a batch. They take very little time to make and you don't even have to get out your mixer!
Mm mm, look at that chocolaty richness.


Here is the recipe:


1 1/2 cups semisweet chocolate chips
1 can sweetened condensed milk
1 cup butter, plus 2 TBSP, melted
2 1/4 cups light brown sugar
2 eggs
2 cup flour
1/2 cup chopped pecans
1/2 cup coconut flakes
1 teaspoon salt
1 teaspoon vanilla extract


1. Preheat the oven to 350 degrees.
2. In a large microwave safe bowl, combine the chocolate chips, sweetened condensed milk, and 2 tablespoons melted butter. Microwave on high at 20 second intervals, stirring well with a spatula, until chocolate is melted and smooth.
3. In a separate bowl,combine the remaining one cup of melted butter, brown sugar, eggs, flour, pecans, coconut, salt and vanilla extract. Stir thoroughly with a wooden spoon  to combine.
4. Spread approximately half of the dough on an ungreased 13x9x2 inch pan. Drizzle the chocolate mixture over the dough, then drop small spoonfuls of the remaining dough over the chocolate. Gently drag the back of  the wooden  spoon around the mixture creating a swirl pattern
5. Bake for 25 to 30 minutes or until the bars have a light golden brown color. Remove from oven and cool on a rack to room temperature. Cut into bars.

Wednesday, December 15, 2010

Apple Muffins


I made apple muffins with my niece who visited recently. She is eleven years old and very excited about cooking. Her family visits every year and I usually have an array of breakfast things to feed them but this particular morning, I had nothing really of interest. I thought I would head to the store before they all woke up but then I remembered this recipe and I had some leftover apples. I got the recipe from King Arthur Flour web site but I  tweaked it quite a bit! It was great fun making these muffins with my niece and I look forward to their next visit when we can "play" in the kitchen again.


Scraping the bowl is an important step in mixing the batter!
We filled these muffin tins quite a bit as there is not a lot of rising in the oven.

Yummy muffins! This breakfast got people out of bed.
 Here is the recipe. Find an enthusiastic eleven year old and enjoy!

Apple Muffins

2 cups all-purpose flour
1 teaspoon baking powder
1 Teaspoon baking soda
1/8 teaspoon salt
1 tablespoon cinnamon
1/2 cup unsalted butter
1/2 cup sugar
3/4 cup dark brown sugar
1 large egg, lightly beaten
1 cup buttermilk
2 large apples, peeled, cored and chopped

1. Preheat the oven to 375 degrees. grease and flour 12 cup muffin tin or line with papers.


2. Mix together the flour, baking powder, baking soda, salt, cinnamon and set aside. In a separate bowl, cream the butter and add the granulated sugar and a 1/2 cup of the dark brown sugar. Beat until fluffy. add the egg and mix well; stop once to scrape the sides and bottom of the bowl. Mix in the buttermilk gently. stir in the dry ingredients. and fold in the apple chunks.

3. Divide the batter among the prepared muffin cups, sprinkling the tops with the remaining brown sugar. Bake for 15 to 20 minutes or until a tooth pick inserted in the middle of a muffin comes out with a few crumbs attached. Remove from oven, cool the muffins for 5 minutes in the tin then remove muffin into a rack to cool completely.
Yields 12 muffins


Monday, November 15, 2010

Hermits


I love Hermits once the weather starts to turn cooler. They are really easy to make and the aroma will scent your home nicer than any candle you will find. I wanted to make something for the bake sale at my son's school recently. I knew from experience there would be a lot of chocolate chip cookies and cupcakes. I wanted to make something a little bit different yet still in the comfort food zone. Oh yeah...and easy to crank out. Hermits are a New England favorite and it is said they originated here. Food Lover's Companion says they were named for their long keeping qualities and they are better when hidden away like a hermit for a few days.
                  Try that!!
 I can barely keep them for a few days. I save all the heel ends of the bars for afternoon tea. Hmm? I wonder if I have time to get some going now?

Here is the recipe:

Hermits
Makes about 18 Bars

Ingredients:
2 cups all-purpose flour
2 teaspoons baking soda
1/4 teaspoon salt
2 teaspoons ground cinnamon
1 2/3 teaspoons ground cloves
1 2/3 teaspoons ground ginger
5 ounces unsalted butter, softened
1 cup light brown sugar
1 large egg
1/4 cup molasses
3/4 cup raisins
1/3 cup confectioner's sugar
1 tablespoon milk
2 drops orange extract

Method:
1. Line a jelly roll pan or half sheet pan with parchment paper.
2. Sift together the flour, baking soda, salt, cinnamon, ginger and cloves.
3. Cream together the butter and brown sugar for at least 3 minutes, scraping often.
4. Add the eggs one at a time and mix until blended.
5. Add the molasses and mix until blended.
6. Add the dry ingredients and the raisins and mix on medium speed until the dough comes together, about one minute.
7. Portion the dough into 13 ounce logs about the length of the pan and position on sheet pans with at least 2 inches between logs. Use a little flour if the dough gets sticky.
8. Chill the logs for about 20 minutes. Preheat oven to 325 degrees F.
9. Bake the logs for about 20 minutes. The dough will flatten out as the logs bake.
10. Cool the logs on the sheet pan. Glaze. Allow the glaze to set for about 30 minutes to an hour; then slice into bars.
Glazed logs ready to cut into bars
Glaze: Stir confectioner sugar, milk and orange extract until smooth gently with a whisk. Thin glaze with more milk if necessary.
11. Brush the glaze thickly over the top of the bars with a pastry brush. Allow the glaze to set for about 30 minutes to an hour; then slice into bars.


Ready for the bake sale!

Friday, November 12, 2010

Muppet Me

I had a great experience recently when I went to The International Sugar Art Collection in Atlanta, GA and learned how to make an edible muppet. Lauren Kitchens with  her team, Ashleigh and Karie, taught the classes with style and humor. I started the first day off muppetizing myself on a cake. Lauren had said that it was difficult to muppetize oneself and she was right. I relied on her suggestions and came away with an acceptable piece.


The second day, I muppetized my hubbie as an edible statue. I felt more confident in my skills and had a better idea of areas to emphasize. I had so much fun putting all the pieces together. I was delighted with the results and so was my husband.


The plane ride home was nerve wracking. The Monday morning transient crowd was not pleased to see me in line with my boxes of fragile items. The airline was wonderful though and everything got home intact.
If you are able to take one of Lauren's classes, you will not be disappointed. I am very excited to start muppetizing friends and family. As a bonus, I now have a profile picture that's muppet me!

Sunday, October 31, 2010

New England Beauty

I waited a bit too long to catch this year's leaf peeping. We went to Borderland State Park near my house recently and caught a last glimpse of full color. It was a very warm day, around 74 degrees, as we walked the Pond Edge Trail.


The path was very quiet and peaceful.
Pebbles took a last dip in the water concerned with the little fish swimming around.
I love the reflection of the trees in the water at the top of the picture.
As I look out of my window today, I see the now brownish leaves dropping fast and flying in swirly circles to the ground where they leave a blanket of muted color. I feel the quietness that starts to envelope New England . The birds and animals are disappearing. The bugs are all but gone. I know they will all be back but I miss them already.
As we look towards colder days rather than cooler days, I will come back to this post for the warmth of that last really warm Fall day when the colors and company was perfect.


Monday, October 25, 2010

Thai Dinner Delight

When a close friend of ours married a Thai girl several years ago, we were delighted to welcome his smart and beautiful wife into our clan. Little did we know that the two would make beautiful food together as well.

We were lucky to be treated to dinner recently at their house and it was a memorable meal.

We had Mieng Kam Gai to start the meal. It was spicy, very moist with plenty of veggies to give it color and taste. We were instructed to spoon a bit onto a lettuce leaf, top with a sprig of cilantro, roll it into a little parcel and munch away. The lettuce made a nifty pouch and I loved crunching into the little wrap. These were addictive and I had to tell myself to stop as I watched our friend add the gorgeous shrimp to our next course.


This next dish, Tam Yum Goong, was what I envision Thai comfort food to be like. The aroma of kaffir leaves and lemon grass was intoxicating. The soup was served with a side dish of rice.
The shrimp and mushrooms in the soup absorbed the heady flavors of the broth. We also spooned a bit of the broth onto the rice and ate it along with the soup.


It was very filling...or maybe the Mieng Kam Gai was catching up to me. I managed to finish the whole bowl but I was too full for the Egg Custard with Shredded Coconut. I had a few bites...I am not sure what happened to my camera so no pictures I am sad to say.

Recipes? Well, I asked but I think they made the dishes without a recipe. If they should write one down, I will edit the post. In the meantime, I did a bit of research. I found a nice recipe for the Tam Yum Goong if you will follow this link: http://www.thaitable.com/Thai/recipes/Tom_Yum_Goong.htm
As to the Mieng Kam Gai, I did not find a specific recipe but several versions of minced chicken wrapped in lettuce. It seems to be a dish open to interpretation so choosing one with favorite ingredients may be the order to follow.

I am looking forward to making both these dishes this winter. I can almost smell the lemon grass now!


UPDATE!!!

My friends shared their recipe. You can find it here Mieng Kam Gai

Saturday, October 23, 2010

Fungi Foto

Is anyone else a little frightened by what is proliferating in my yard? I know it has been raining a lot lately but seriously, a family of mushrooms???

Thursday, October 21, 2010

Cake Decorating Display


I did a display cake recently for one of the new Michaels Arts and Crafts stores. It represents many of the techniques that are taught in the Wilton cake decorating courses. The cakes are actually Styrofoam but the decorations are made from royal icing, fondant and gumpaste.
I love making the gumpaste roses that are at the bottom tier of the cake. They are elegant and showy.
I usually have one of these display cakes on view at the store where I teach. I am currently working to restore the current one. People are always touching the cake and it takes a bit of abuse. I don't mind as they are fun to do. Perhaps I will do a Fall/Winter theme for the new version.

Saturday, October 16, 2010

Grilled Chicken with Soba Noodles and Cucumber Salad


This is a very easy dish. I have also made it with boneless pork ribs and it is just as tasty. I make a double recipe of the green salad because I love the flavor. It goes well the next day tossed with cottage cheese and a little leftover chicken for a light lunch.
The soba noodles can be a challenge to find down here in the suburbs but they are worth the effort. The earthy flavor of the noodles balance the meal. Sometimes I want to extend the dish into a healthier version. I then toss a handful each of raw chopped sugar snap peas and sliced carrots in with the chicken and noodles just before adding the sauce. The color is vibrant and the crunch is delightful.
I found this dish online from Kitchen Daily
Here is the recipe!

Spicy Peanut Sauce
1/2 cup sesame oil, toasted
4 each garlic cloves, minced
1 tablespoon fresh ginger, minced
1 tablespoon sriracha sauce
3 tablespoons honey
1/2 cup peanut butter
2 tablespoons lemon juice
1/4 cup low sodium soy sauce
1/4 cup hot water
Chicken and Noodles
4 Cups chicken breast, grilled and shredded (about 3 single, medium sized chicken breasts)
1/2 Pound soba noodles
Green Salad
1/2 hothouse cucumber, thinly sliced
3 ribs celery, thinly sliced on the bias
1 cup cilantro, chopped
3 scallions, thinly sliced on the bias
1 tablespoon rice vinegar

Spicy Peanut Sauce
In a small saute pan, heat sesame oil over low heat. Add garlic and ginger to gently fry until fragrant- about 1 minute. Pour into a blender and add all remaining sauce ingredients. Blend until smooth adding more hot water if necessary to achieve a rich saucy consistency.
Chicken and Noodles
Cook soba noodles according to package suggestions, drain and pour into a large mixing bowl. Add shredded chicken and dress with spicy chicken sauce. Toss gently to coat thoroughly with sauce.
Green Salad
In a small mixing bowl, combine the cucumber,celery, cilantro, and scallions. Toss gently with the vinegar to combine.

Divide the chicken and noodles among the bowls. Top with a handful of the salad.
Serve extra sauce on the side.
Serves 4-6 depending on the extras you may add!


Monday, October 11, 2010

Red Velvet Cake


Red Velvet cake is one of those cakes that elicits a lot of emotion. Some people, including me, do not like the food color in the batter. Some people do not seem to care about the color issue at all.

I have been tweaking a red velvet cake recipe that I got from a Fannie Flagg cookbook(not a Fannie Farmer cookbook) with good success. It does not have any food color so I call it a Velvet Cake.


I saw a recipe in the September issue of Cake Central magazine for red velvet cupcakes that was interesting. The color came from cooked beets! I just happened to have some beets in the fridge that I got at the farmers market. My husband loves beets so I tend to make them frequently.


I made the recipe into 12 standard sized cupcakes and 6 jumbo cupcakes and had a little bit of batter to spare. I told a couple of testers about the beet addition and the response was not good. But I got a handful that made a point of telling me how good they were. They were amazed to learn that there were beets in the batter.
The cupcakes were very dense and moist but not oily. The batter was thick and very red.
After they cooked, they had a fudge-like ... almost brownie look to them.


Here is the recipe from the Cake Central /September magazine issue.I think my preference is just how the magazine article recommends it to be served...with a little confectioner sugar dusted on top.
Red Velvet Cupcakes

1 3/4 cups all-purpose flour
1 1/2 Teaspoons Baking Powder
1/2 Teaspoon baking soda
1/2 cup unsweetened cocoa
1 1/4 cups sugar
1 1/3 cups buttermilk
1/2 cup unsalted butter, softened
4 eggs
2 teaspoons vanilla extract
2 cups beets
confectioner's sugar

1. Preheat the oven to 350 degrees F.
 
2. Boil beets until soft. Allow the beets to cool a bit, then peel off the skins and puree the beets in the blender or food processor.
 
3. Sift the flour, baking powder, baking soda and cocoa together, mixing well.
4. Add sugar and stir. Slowly add the buttermilk, stirring constantly.
5. Beat in the butter, vanilla eggs, and beet puree with a mixer on medium speed.
6. Fill muffin pan lined with cupcake liners to about 2/3's capacity for each cavity.
7. Bake for 17 minutes or until cupcakes test done. My test is when a tooth pick inserted in the center comes out with a few moist crumbs attached.
8. Remove cupcakes from oven when done and cool on a rack for five minutes. Remove cupcakes from pan and cool to room temperature before decoration.
Recommended decoration: Sift a thin layer of confectioner sugar on top of each cupcake.
Yield: About 18 standard size cupcakes.


Thursday, October 7, 2010

Sweet Potato Bundt Cake

I am already thinking about Thanksgiving. I met my husband on Thanksgiving so I have a lot to celebrate! Our guest list has been growing the paste few years and I love introducing new dishes to keep the it interesting. I am excited about this year's addition of Sweet Potato Bundt Cake with a Rum Glaze. This is a recipe from a book called in the Sweet Kitchen by Regan Daley.The recipe calls for golden raisins but I love dates so I used half chopped dates and half golden raisins. Otherwise I left the recipe alone as it is moist and light and turns out perfect every time.
I will most likely go with all raisins on Thanksgiving as I like the look of the cake with all raisins.

I was thinking...
this cake
with a scoop of
Sweet Scoops Ginger Frozen Yogurt
and a strong black cup of coffee!


Here is the recipe!

Cake Batter
3/4 cup golden raisins
1/2 cup dark rum
2 large sweet potato
4 large eggs
2 cups granulated sugar
1 cup vegetable oil, mild flavored
2 teaspoons vanilla extract
3 cups all-purpose flour
1 teaspoon baking powder
1 teaspoon baking soda
1/2 teaspoon salt, plus extra for salting the water
1 1/2 teaspoons cinnamon
1/2 teaspoon fresh nutmeg
3/4 cup buttermilk
Glaze
1/2 cup dark brown sugar, tightly packed
4 tablespoons unsalted butter
3 tablespoons whipping cream
remaining rum macerating from raisins
1. Preheat the oven to 350 degrees. Grease and flour a 10-inch Bundt pan. In a small nonreactive bowl, soak the raisins in the rum for at least 30 minutes or several hours. meanwhile peel the sweet potatoes, cut them in half and then into 4-inch slices. Place the slices in cool water, bring to a boil and cook until the potatoes are tender. drain off the water and allow the potatoes to air dry for a few minutes, then use a masher or large fork to roughly mash them. Measure out 2 cups of the mash and set aside to cool.
2. In a large bowl with a whisk or a stand mixer with the paddle attachment, beat the eggs just a little bit just to break them up. add the sugar and beat until the mixture is thick and pale, about 2 minutes with a mixer, 3 if whisking by hand. Add the vegetable oil and vanilla, then beat to blend. Drain the raisins and set aside , but add 1/4 cup of the rum macerating liquid to the batter. Add the mashed sweet potatoes and mix thoroughly combined, scraping down the sides and the bottom of the bowl.
3. Into a separate bowl, sift the flour, baking powder, baking soda, salt, cinnamon, and nutmeg. Add the flour mixture to the batter in three additions, alternating with the buttermilk in two additions, beginning and ending with the dry ingredients. fold in the raisins.
4. Pour the entire batter into the Bundt pan. bake in the center of the oven for one hour to one hour and 20 minutes or until a wooden skewer inserted comes out clean and the cake is just beginning to pull away from the sides of the pan. Cool the cake in the pan set on a wire rack for 10 minutes, then invert onto the rack. Set the rack over a baking sheet or large plate to catch the excess glaze. This cake must be glazed while still warm so it absorbs the maximum syrup.
5. For the glaze, combine the brown sugar, butter and cream in a heavy bottomed saucepan. Bring to a boil over medium heat, stirring until the sugar dissolves. Continue to boil until the mixture thickens somewhat, about three minutes, stirring often. remove from heat and stir in the rum. With a long skewer poke holes all over the cake, concentrating on the top. Spoon about half the warm glaze over the cake and let the cake and remaining glaze cool for 10 to 15 minutes, until it has thickened slightly.
6. Pour the rest of the glaze over the cake, letting it dribble down the sides, then allow the cake to cool completely before cutting and serving or wrapping and storing.


Wednesday, September 29, 2010

Birthday Cake


It was my husband's birthday recently...not a big one but another one and he was wanting some comfort cake to sweeten it.
I have a great recipe for Red Velvet Cake but I am nervous about all that dye in food. Plus has anyone noticed the price of red food color?? It would have been about $7.00 for the color alone.
So I have been playing with just a velvet cake recipe and this one is the best so far. I am posting the recipe for the cake. I filled the cake with ganache and seedless raspberry jelly. I iced the cake with a regular American style buttercream. You can fill and frost with just about anything. I am working through a peanut butter/cream cheese filling and frosting that I might just Elvis up with bananas. YUK, you might say but so far I am getting good reviews. I will post that recipe when I feel it won't elicit the scrunched nose effect.
The cake is very light and almost melts in the mouth. It has a rich chocolate flavor without overwhelming. I love the apple cider vinegar in it that adds depth to the chocolate. I think this is a keeper for an easy birthday cake and here's how you make it!
Velvet Cake

1/2 Cup Shortening
1 1/2 Cups Sugar
2 Eggs
2 Cups All-purpose Flour
2 Tablespoons Cocoa Powder
1/2 Teaspoon Salt
10 Ounces Buttermilk
1 Teaspoon Vanilla Extract
1 Teaspoon Baking Soda
1 Tablespoon Apple Cider Vinegar

1.Preheat the oven to 350 degrees. Make sure all ingredients are room temperature. Grease two 8-inch pans and line the bottom with parchment paper.
2. Cream shortening. Add sugar and beat well with electric mixer. Add eggs one at a time beating well after each addition.
3. Sift together the flour, cocoa and salt. Combine the buttermilk and the vanilla . Add dry ingredients to the creamed mixture alternatively with the buttermilk mixture beginning and ending with the flour mixture.
4. Dissolve the baking soda into the vinegar. Stir into the batter. Pour the batter into the prepared pans.
5. Bake for 20 to 25 minutes. Cool in pan for 10 minutes, Remove cake layers from the pans, peel of the parchment paper and cool completely on wire racks. Fill and frost with favorite icing.


Monday, September 20, 2010

Coconut Macaroons for a Sweet Boss

My hardworking boss made a plea for some coconut macaroons.
She has been working day and night, most of the time with a smile on her face. She is always available to help me with what I need so I was looking forward to making her something.
I admit that I love to make these cookies because they are so darn easy! The recipe is right on the back of the bag of Bakers coconut. After trying a few different recipes, I always come back to the one on the back of the bag...and not JUST because I am lazy.
I spent a little over an hour from start to finish and that includes cooling time which I spent nibbling errant coconut crumbs. I dipped some of them in chocolate and left some plain.
I find that there are a lot of good recipes lurking on the packaging of products. Butter packages have yummy recipes and don't get me started on the the Corn Flake recipes.
Well, here is the recipe and I hope you like them as much as Ms. C. did. If you lose the recipe, just remember to look on the back of the bag.

7 ounces coconut flakes (the whole bag)
1/3 cup sugar
3 tablespoons all-purpose flour
1/8 teaspoon salt
2 egg whites
1/2 teaspoon almond extract
6 Ounces Semisweet Chocolate Squares

1. Preheat oven to 325 degrees. Line a cookie sheet with parchment or non-stick liner.
2. Mix together first four ingredients in a bowl with a large fork, making sure coconut is not clumping together.
3. Add egg whites and extract. Mix together well.
4. Drop by tablespoonfuls onto prepared pan. I use a small ice cream scoop for uniformity.
5. Bake 20 minutes turning once during cooking. Remove from oven and using a spatula, transfer to a rack to cool completely.
6. Melt the six ounces chocolate in a bowl over a saucepan of hot water, stirring gently and frequently. Dip the bottom of the macaroons in melted chocolate. Set aside on wax paper until the chocolate becomes firm. Store in a cool place. Make about 18 cookies.

Sunday, September 19, 2010

Sipping Pretty at Legal Sea Foods


Recently, my son and I dined at Legal Sea Food for lunch. It was a 90+ degree day and the air conditioning in the place was working hard. I wanted something refreshing, not too sweet and maybe just a little tart. The Arnold Palmer caught my eye among the other drinks that sounded more like martinis without the alcohol. The Arnold Palmer is a large glass of half iced tea and half lemonade garnished with a plump lemon wedge and lots of ice to swirl with the mega straw. I love to see ice tea on a menu and the lemonade sparked the little girl in me.


The drink was as good as it sounded. I sipped through the straw slowly so I could make it last the whole meal. The Swordfish Reuben I got with it was not beautiful but it was very tasty, the almost buttery taste of the fish and melted cheese was the perfect accompaniment to my delicious drink. Next week starts the Oyster Festival and I am looking forward to more visits. Legals has so many choices for food that I rarely get the same thing twice but I am set with the drink order now, thanks to Arnie.

Sunday, September 12, 2010

Chicken Breasts with Cider and Caramelized Apples

The Jewish New Year was last week and there was a great recipe in the local newspaper featuring apples that are a part of the New Year tradition. Have a Sweet New Year along with a big smile and even bigger hug was a popular greeting.
The recipe looked really interesting and not too tough.
Here it is below alongside some sauteed Honey Gold corn tossed with assorted wild mushrooms.
It has grown chilly up here in New England and this dish made a grand entrance into Fall.


To make this lovely chicken dish for 6 people:


1/2 cup golden raisins
1/2 cup Madeira
1/2 cup water
6 chicken breast halves, with skin on
1 tablespoon five-spice powder
2 teaspoons sea salt
ground black pepper, to taste
7 tablespoons unsalted butter, divided
3 Granny Smith apples, peeled, (peels reserved)cored and cut into eighths
2 tablespoons all-purpose flour
3/4 cup apple cider
2 cups chicken stock
1/4 cup honey
1/2 lemon, juiced
2 tablespoons flat leaf parsley, chopped
1 tablespoon orange zest

1.In a small saucepan, combine the raisins, wine and water. Bring to a boil over medium high heat; remove from heat and let stand for 20 minutes, or until the raisins are fully plumped.
2. Preheat the oven to 450 degrees F.
3. Season the chicken breasts with 1 1/2 teaspoons of the five spice powder, 2 teaspoons of salt and black pepper to taste.
4. In a large ovenproof saute pan, melt 3 tablespoons of the butter over medium high heat. Place the chicken breasts, skin side down, in the pan and cook until well browned and most of the fat has cooked out of the skin, about 5 minutes. Turn the breasts over and pour off any excess fat.
5. Add the apple peels to the pan, slipping them under the chicken breasts. Place the pan in the oven and bake until the chicken breasts are opaque and cooked throughout. Transfer to a warmed serving platter and cover to keep warm. Leave the peels in the pan.
6. Dust the apple peels with flour. Cook over medium heat, stirring often for about 5 minutes. Pour in the cider and deglaze the pan, stirring to dislodge any bits stuck to the pan bottom. cook until the liquid is reduced by half, about five minutes. Add the stock, bring to a boil, and decrease the heat to medium so the liquid simmers gently.
7. In a second saute pan over medium high heat, melt 3 tablespoons of the butter is brown and smells brown and toasty, 2 to 3 minutes. Add the apples, honey, lemon juice, and the remaining 1 1/2 teaspoons of the five spice powder. Saute the apples, turning them as needed, until they are a rich, even brown color and are tender, 5 to 8 minutes. Season with pepper.
8. Pour any juice released from the chicken into the pan with the apples. Arrange the chicken on the platter and top with the caramelized apples. Drain the raisins and sprinkle on top of the chicken.

Wednesday, August 4, 2010

Finally...Something Sweet to Eat

I have a scone recipe to share. I found it in a Williams Sonoma catalog. I had to tweak it,but only a little bit. I find that most recipes need adjustments because it is hard to generalize recipes to a whole country.

Don't these look tasty?
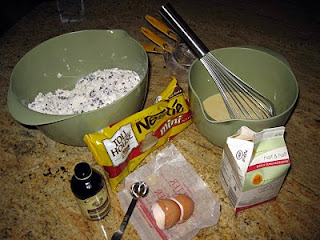
Mini Chocolate Chip Scones


2 3/4 cups All purpose flour
1/3 cup sugar
3/4 teaspoon salt
1 tablespoon baking powder
1/2 cup cold butter cut into pats
12 ounces mini chocolate chips
2 large eggs
2 teaspoons vanilla extract

Glaze:

3 1/2 cups confectioners' sugar

7 tablespoons water -or enough to make a thin glaze

1 teaspoon vanilla extract


Method:

Whisk together the dry ingredients. Cut in the butter (rub flour and butter between fingers) until the mixture is crumbly. Don't overdo this part...there should be uneven lumps of butter. Stir in the chips.In a separate bowl, whisk together the eggs, vanilla and 1/2 cup half and half. Stir the liquid ingredients into the dry adding more half and half if the mixture seems dry.
Scrape the dough onto a well floured work surface and pat into an 8" square, about 3/4 inch thick. Cut the squares into sixteen 2" squares and then in half to make 32 small triangular scones.


Transfer the scones to a parchment lined baking sheet and chill in the freezer for 30 minutes, uncovered.Bake the scones in a preheated oven for about 15 to 20 minutes or until they are golden brown. remove from oven and transfer the scones to a rack to cool completely.


Stir together the glaze ingredients. Spoon the glaze over each scone to coat the top. Allow the glaze to set. These are best eaten the day they are made.

Yield: 32 scones


Tuesday, July 20, 2010

Summer Day in New England

Today was a perfect summer day here in New England. The sun was shining, the humidity was low and the bugs were lying low!!


Pebbles, my best dog buddy, and I took a walk and got a glimpse of Nature hard at work.

We walked along the path of the Sheep Pasture in Easton, MA. Pebbles was definitely wanting to play with the ducks who had managed an escape from their pen to the pond nearby, but I spotted another frolicking creature in the pond and I was fascinated/a little bit terrified by the sight.
That is a snake and a few minutes later, it jumped a green frog who was not paying attention!

No, I did not stick around to see what happened.

Further on down the walk, we found the split rock. I have lived in this town for 18 years, visited the Sheep Pasture at least once a year and I have never seen this rock before.

It looks to me like the tree is sitting there reading something but that could be the pollen talking!

Check out the wildlife on the right side of the picture. This little chippitymunk wanted to be in the picture and kept hanging out no latter how close I got. Ham!


Have I lost you yet or can you stand one more picture??

The turtles are out and about and mowing each other down. Here is a go-gettem turtle who was not gonna let a napping turtle on a log slow him down.


Monday, July 19, 2010

Blooming Beautiful


These hydrangea bushes have been in my front yard for the last ten years and have bloomed once in all that time. This year my hydrangeas, along with every other one in the neighborhood, have gone wild with blooms. While some are the usual blue and pink, mine have decided to lean towards the purple. I am not complaining. I love them! Even though the weather here in the northeast has been the hottest ever, I make the trip daily to my bushes to admire the blooms.
While in the backyard...
I don't even remember buying these lilies! I love the Stargazer lily and I am sure that I did buy this plant but I can't for the life of me remember when or where. All the blooms have opened now but I prefer this picture where the fresh new flowers have emerged and the promise of more beauty is a bud away.


Friday, July 16, 2010

Sweet Summer Reading


Well, I have waited long enough to post!
I was waiting for something to talk about that I felt would be worthy of a first post. I found it on vacation in Florida last month. I have a book recommendation.
It is The School of Essential Ingredients by Erica Bauermeister.


There is a small bookstore called SunDog Books in Seaside Florida, a small resort town that we have been going to since 1992. The books in the store seem to be in no real order there. There are sections like biography, travel, cooking and such but that is about as far as it goes in organization. It is not the kind of a bookstore where you walk in to find the book you are looking for and walk straight to it. It is the sort of bookstore that you wander around for a while and look at all the different selections as you would at a really great farmers market and then hone in on the one that catches your eye. I have to say that I have always found something unique and totally wonderful to read from that bookstore. It is as though the store knows what I want and patiently waits for me to find it .


I found the book The School of Essential Ingredients while spending the week in Seaside last month. I was on my annual shopping excursion through town looking in each shop for a take home treasure that would remind me of how much I love Seaside or maybe a gift for someone that would reduce my Christmas list. Many stores were gone, perhaps due to the economy, and I stopped into SunDog Books to while away some time. I was not wild about the book I had brought from home to read. I was ready to ditch it if something better came my way. I have had a lot of luck with the employee favorites section of the store. In this section, you can find Lee's favorites or Dan's favorites books. I have never met any of the employees that recommend these books and the ones working don't wear name tags or tell you their name. But I have found that I drift toward the one person who seems to have read books that I have liked...quirky books. I found my book in Celia's favorites section.
The School of Essential Ingredients is about many things, food and relationships being the primary ingredients if you will. The book is perfect beach reading but I warn you to apply extra sunscreen because it will captivate and keep you at the beach for much longer that you plan. The book is set around a cooking class held at a restaurant. Each chapter explores a different student with glimpses into their life both in and out of class. While there are predictable portions of the book, the story is heartwarming and tender. The interweaving of food into our lives is beautifully crafted in this story and foodies will love the rich attention given to the culinary lessons.
The book is easily read in a couple of days although some people have told me that they read straight through because they could not put it down.
I usually give my books away to friends after I have read them. I am a "one time read" only girl. I wanted to share this book with my friends but I somehow cannot let go of it, wanting to keep it within view to remind me that I love to cook and I cook with love.