Showing posts with label fall. Show all posts

Sunday, September 27, 2015

THE DARING BAKERS’ SEPTEMBER, 2015 CHALLENGE: IRISH SODA BREAD


For the month of September Meredith from the Poco Loco Olsons challenged us to experiment with soda bread. Here is the link to the Daring Bakers Challenge as presented to us. I am so excited to share this recipe with you as a truly quick bread that is delicious.

There is a lot of history to Irish Soda bread which was not, according to many sources, developed by the Irish. Here is a link to The Society for the Preservation of Irish Soda Bread. It gives a good reading on the history of soda bread.

Here is a link to a site that is called European Cuisines and discusses Soda Bread. I found it very informative about the European take on Soda Bread.

There are many variations on soda bread and the ones considered true soda breads are quite plain. The dough rises through a chemical reaction between the soda and buttermilk. Adding dried fruit or orange zest or nuts does make a tasty bread but these are considered tea breads, not soda breads.

The bread is crazy easy to put together. Irish soda bread is a good one to teach children for a first baking experience. The hardest part is waiting for it to cook as the bread needs about 45 minutes to an hour. I am happy to report that eating a slice as soon as it is cool enough to handle is a delightful reward for patience.
 I was amazed how delicious the bread was because I was a big skeptic.. I thought it would be really dense and heavy tasting. Instead the bread was light, bright tasting and very tender. Having some sharp cheddar cheese and a dab of orange marmalade made my afternoon tea a real pleasure.
The bread does not keep though and after a day, its fate was croutons which I tossed in olive oil and lots of herbs so it tasted completely different.

Having great success with Meredith's recipe, I thought I would experiment with others to get some perspective. I found a web site that was so interesting,I bookmarked it. It is the  called Bord Bia-Irish Food Board and they had a recipe for Brown Soda Bread that I just had to try. The bread tasted very different than Meredith's recipe. It was a bit heavier and rich tasting with a hint of sweetness from the honey. I am thinking some rum soaked raisins mixed into the batter would put it over the top for taste and make a wonderful morning toast. I put some local jelly on it, Dalby Farms Strawberry Butter. It is really a jelly, not a butter but it was so smooth and creamy tasting with a powerful strawberry flavor, that the mouthfeel was definitely butter.

I am keeping Meredith's recipe handy. I love fresh bread with dinner, especially stews. As Autumns is giving us cooler evenings, I am looking forward to whipping up a loaf of this bread to get those delicious broth from a hearty vegetable soup.


Irish Soda Bread (I halved this recipe to make a smaller loaf)

Ingredients:


  •  2½ cups (625 ml) sour milk or buttermilk
  • 2 cups (500 ml) (300 gm) (10½ oz) whole wheat four (see note above on how to measure flour) 
  •  4 cups (1000 ml) (600 gm) (21 oz) all-purpose (plain) flour (see note above on how to measure flour) 
  • 2 teaspoons (10 ml) (10 gm) baking soda 
  •  1 teaspoon (6 gm) salt

Directions:
 1. Preheat oven to hot 450°F/ 230°C/gas mark 8 and line a baking sheet with parchment paper.
 2. Mix the dry ingredients in a medium-sized bowl. (I do this by hand, but you could use a mixer if you’d prefer.)
3. Make a well in the middle of the dry ingredients.
4. Pour the sour milk/buttermilk into the well.
5.Mix the dough until the flour is completely incorporated. (It will be very stiff. I find it helpful to knead the dough by hand a few times while it is still in the bowl to make sure all of the flour is incorporated before moving on to the next step.)
6.Transfer the dough to the prepared baking sheet.
7. Pat or roll the dough into a circle shape that is approximately 1 inch (2½ cm) thick.
Using your fingertips or the blunt end of a wooden spoon handle, make several dimples in the top of the dough. (This is very similar to the technique used when making focaccia bread.)

8. Place the baking sheet on the middle rack of the preheated hot oven and bake for 30 minutes.
 9. Reduce the heat to moderately hot 400°F/200°C/gas mark 6. Pull the baking sheet out from under the dough, so the parchment is directly on the oven rack. Bake for 10 more minutes or until the top is golden brown.


 Traditional Brown Soda Bread


  • 250g whole wheat flour
  • 200g all purpose flour
  • 1 teaspoon baking soda
  • 1 teaspoon salt
  • 1 egg
  • 350 ml buttermilk
  • 1 teaspoon honey
  • Optional Topping: 1 tablespoon sesame seeds or pinhead oats
Directions:
Preheat the oven to gas mark 6. 200 degrees C(400F)
Mix the flour, baking soda and salt in a bowl. combine the egg with the buttermilk and honey, then mix into the flour. Add more buttermilk if the batter seems dry-it should be a soft dough. Put the dough in a lightly oiled bread pan. Sprinkle with the sesame seeds or oats, if using.
Bake for 45 minutes to an hour- it will sound hollow when it is fully cooked.( Evelyn's tip: use an instant read thermometer to determine doneness and the temp. should be around 200 degrees F.)Remove from the pan and wrap the bread in a clean dish towel to keep the crust soft. I did not do this step because I like the slight crunchiness of the exterior.


Sunday, October 27, 2013

October Daring Bakers' Challenge - Savory Pot Pies


I was very excited to have pot pie as our challenge this month. I just love pot pies but my sweet husband does not love them. Neither one of us grew up eating pot pies and took very different directions with the concept at adulthood. He veered towards the "I don't know what's in there and I am not gonna eat it" and I veered towards the "I love everything all mixed up in there and there's pastry everywhere...yum." With such different viewpoints, I found that I just did not make them often. BUT now I had a good reason and I was going to make the most of it.
Hannah of Rise and Shine was our October 2013 Daring Bakers’ hostess and she challenged us to bake our own double crusted savory pot pies. Using any from-scratch crust and filling we choose, We were allowed to get completely creative with our recipe, showing off the savory flavors and fillings from our own home or region.

 We could basically do anything we wanted as long as there was a top and bottom crust to it. With all that freedom, I opted for the most traditional type of pot pie, turkey pot pie. Because to me, a pot pie should coincide with a refrigerator cleansing opportunity. I found bits and bobs of veggies leftover from farmers market excursions. Pieces of vegetables  that were not enough to make it on their own for a side dish but enough to add with others for a nice medley. 

I have a'tried and true' pie crust that I use for everything pie related. From quiche to banana cream pie, I use this recipe and tweak it a bit for the preparation. I located some fresh thyme to use in the pastry from under the massive amount of falling leaves that are everywhere here in New England this time of year.

For the filling, I started with  a turkey stock with a couple of turkey thighs and lots of onion along with some celery leaves and carrots.
I also used the pot pie as an excuse to get a nice bottle of sherry and add it to the pot pie sauce for flavor. I did have to taste test it and can report that a good quality sherry is a beautiful thing.
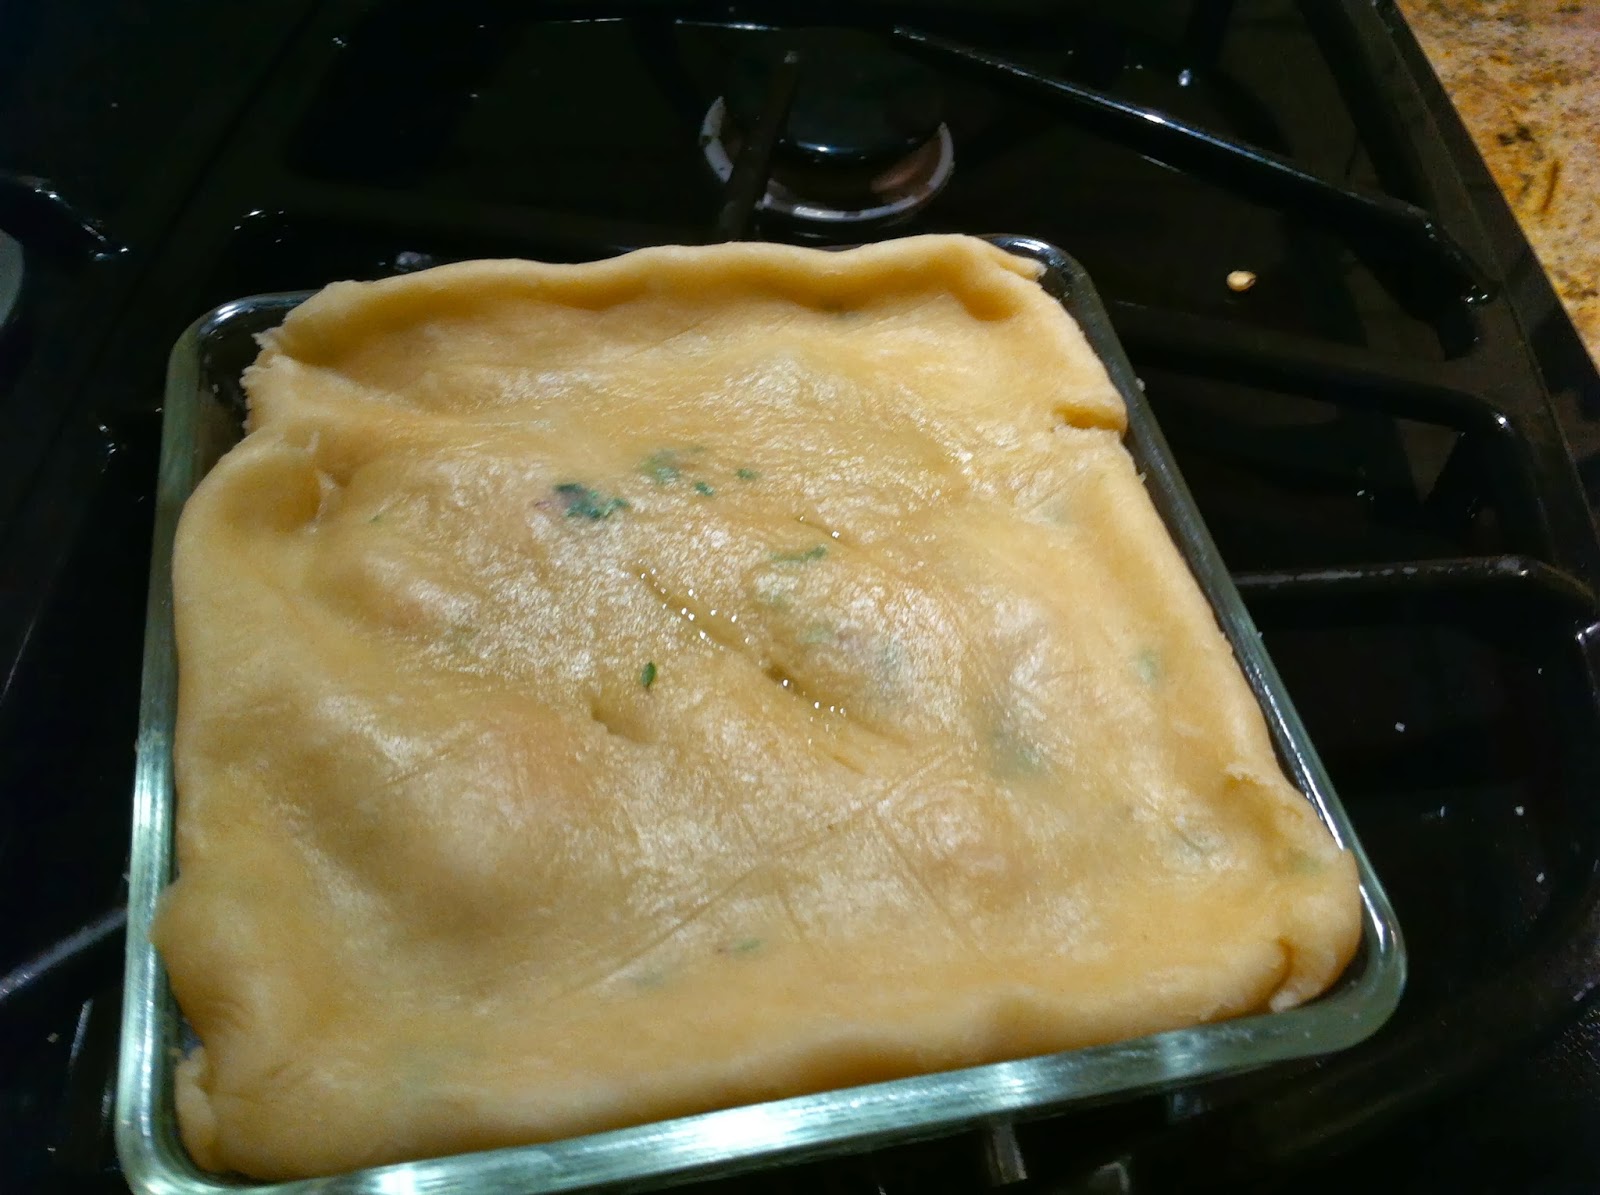
I made the pot pie in some square glass casserole dishes that I bough years ago because they were cute. I was so thrilled to be able to use them as a personal pot pie vessel.
As predicted, my hubbie ate a bit of the pot pie and pushed the rest of it around the plate while inquiring about any ice cream in the freezer...sigh... I did not win him over this time . I loved it but the personal pie dish was a little big for me and I saved a healthy portion for next days lunch.
As winter quickly approaches, I think I will attempt the pot pie again. I am thinking a lobster pie for next time...My husband is a huge lobster lover...that might do the trick.


Pastry :
2 cups flour
2/3 cup vegetable shortening
6 tablespoons ice water
1 teaspoon salt
1 teaspoon fresh thyme, chopped
Filling:
2 tablespoons olive oil
1/2 onion, chopped
1 stalk celery, chopped
1/4 green pepper, chopped
1/2 yellow pepper, chopped
1 carrot, chopped
2 tablespoons butter
2 tablespoons flour
1/4 cup sherry
1 1/2 cups turkey stock, or chicken stock
2 cups cooked turkey, chopped

Directions:

Filling:
Heat the olive oil in a medium skillet over medium high heat. Add the onion, celery, peppers and saute for about five minutes, stirring periodically.


Add the butter and garlic. When the butter has melted and the garlic has become aromatic, add the flour. Cook the flour stirring constantly for a few minutes. Add the sherry to deglaze the pan.
Add the stock slowly , stirring constantly. Reduce the heat to medium low and cook for about 20 minutes . Season with salt and pepper. Add the chopped turkey.
Set filling aside to cool slightly before adding to pastry.

Pastry:
Pre-heat the oven to 450 degrees.                                                                                                                                                                                                                                                                                                                                                                                               Mix together the flour and salt. Add the shortening and crumble with fingers til almost mixed. Add in the thyme.
Add the water and lightly mix together to form a loose dough. Turn out onto a flour dusted surface and knead the dough lightly. Do not over work the dough. 
 Roll one quarter of the dough between two sheets of wax paper to about 1/16th inch thickness. Line the dish with the dough. 


Trim the edges  along the top with a sharp knife.
 Repeat for a second dish. 
Place a sheet of foil on top of the dough in each dish. 
Add some baking beans to weight the foil. Bake the
pastry for about 8 minutes.


Remove from oven and remove foil with baking beans. Allow to cool for several minutes. Brush bottom pastry with whole grain mustard. 

Divide the filling among the two dishes. 


Split the remaining pastry into two parts and roll each one between sheets of wax paper to less than 1/16th inch thickness. top each filled dish with pastry and fold in the edges to seal. Using a sharp knife, make a couple of slits in the top pastry to create air vents.


Place dishes in 450 oven and immediately reduce the temperature to 350 degrees. Cook until top pastry is golden brown, about 25 minutes. Cool slightly and serve.


Thanks Hannah!!


Saturday, October 27, 2012

October 2012 Daring Bakers Challenge - Puff Pastry


Well, I have been living a lie.
For many years, I have been buying  puff pastry instead of making it myself with the excuse that the frozen version actually tasted better than my homemade. I have never been good at the laminated (layered) dough. They always turned out a little tough.
But this month's challenge has changed my mind. I am never going back to frozen again.

Our October 2012 Daring Bakers’ challenge was hosted by Suz of Serenely Full. Suz challenged us to not only tackle buttery and flaky puff pastry, but then take it step further and create a sinfully delicious Mille Feuille dessert with it!

I had a rough start because I tried to make the puff pastry on an afternoon when I was really tired, I was not in tune with the dough and as silly as it may sound, I firmly believe that you have to be empathetic to your dough to understand what it needs for success.
Here is a picture of the puff pastry failure. Note the oozing butter through the dough. That is not a good thing.

BUT it got better from there. I started on an afternoon when I was not tired and had no other real pressing tasks.
I decided early on in the month that I wanted to make a Caramel Apple Napoleon. It is Autumn here in New England and the apples are everywhere. The days are getting shorter in daylight time but the temperature is still mild. I wanted to make something homey but still light.

Here is the recipe for Puff Pastry as Suz wrote it. It is a great recipe if you follow her suggestions:

Puff Pastry:
Servings: Makes 8-10 mille-feuille (yields: 675g pastry)
Ingredients
1¾ cup (250g) plain/all-purpose flour
Scant ¼ cup (55 ml) (1¾ oz)(50g) unsalted butter, chilled and cubed
1 teaspoon (5ml) (6 gm) salt
½ cup plus 2 tablespoons (5/8 cup)(150 ml) cold water
14 tablespoons (210 ml) (7 oz) (200g) butter (for the beurrage), room temperature
3½ tablespoons (55ml) (30g) plain flour (for the beurrage)
Additional flour for rolling/turning
Directions:
1. Cut the larger quantity of butter into smallish pieces and set aside at room temperature.
2. Put the larger quantity of flour into a bowl with the salt and the cold, cubed butter.
3. Lightly rub the butter and flour between your fingertips until it forms a mealy breadcrumb texture.
4.Add the cold water and bring together with a fork or spoon until the mixture starts to cohere and come away from the sides of the bowl.
5. As the dough begins to come together, you can use your hands to start kneading and incorporating all the remaining loose bits. If the dough’s a little dry, you can add a touch more water.
6. Knead for three minutes on a floured surface until the dough is smooth.
7. Wrap in clingfilm and refrigerate for at least 30 minutes.


8. While the dough is chilling, take your room temperature butter and mix with the smaller amount of plain flour until it forms a paste.
9. Place the butter paste between two sheets of clingfilm, and either with a rolling pin or your hands (I found hands easiest) shape it into a 4.5”/12cm square. You can use a ruler (or similar) to neaten the edges.

10. Refrigerate for about 10-15 minutes so the butter firms up slightly. If it’s still soft, leave it a bit longer. If it’s too hard and inflexible, leave it out to soften a touch. You want it to be solid but still malleable.
11. Once the dough has chilled, roll it out on a floured surface into a 6”/15cm square. Place the square of butter in the middle, with each corner touching the centre of the square’s sides.
12. Fold each corner of dough over the butter so they meet the centre (you might have to stretch them a little) and it resembles an envelope, and seal up the edges with your fingers. You’ll be left with a little square parcel.
13. Turn the dough parcel over and tap the length of it with your rolling pan to flatten it slightly.
14. Keeping the work surface well floured, roll the dough carefully into a rectangle ¼ inch /6 mm in thickness.
15. With the longest side facing you, fold one third (on the right) inwards, so it’s covering the middle section, and ensure that it is lined up .
16.Then, fold the remaining flap of dough (on the left) inwards, so you’re left with a narrow three-layered strip.
17. Repeat steps 14, 15, 16.
18. Wrap up in clingfilm and chill for at least 30 minutes.
19. Repeat steps 14, 15, 16 twice.
20. Wrap up in clingfilm and chill again for at least 30 minutes.
21. Repeat steps 14, 15, 16 two final times.
22. Wrap in clingfilm and chill 30 minutes or until ready to use.

I made a Caramel Pastry Cream that was a little complicated but turned out delicious. 
3/4 cup (6 oz,177ml)sugar
1/3 cup (80ml) water
1 1/3 cup (330ml)milk
2 large egg yolks
2 TBSP (1/2 oz, 14 gm) cornstarch
3/4 cup (6 oz,177ml)  heavy/whipping cream 

Preparation:
In a saucepan over medium-high heat, tilt and stir sugar with water until melted then turn heat to high and cook until amber-colored, 8 to 10 minutes. Pour onto a sheet of foil (about 12 by 18 in.) and let cool to room temperature, about 20 minutes. Peel off foil and break caramel into chunks; put in a food processor or blender and whirl into a fine powder. Try to use right away as it will clump if not. If it clumps, just disolve it a bit with the milk and proceed.


  1. Combine milk and caramel powder in a 1 1/2- to 2-quart pan; stir over medium heat just until caramel is dissolved (it will form lumps, then melt; do not boil), 9 to 10 minutes.


  1. In a small bowl, beat egg yolks to blend. Add cornstarch and 
  2. whisk until smooth. Pour about 1/2 cup of the hot milk mixture into yolks and whisk until blended, then whisk yolk mixture into pan and stir over medium-high heat just until mixture boils and thickens, 3 to 4 minutes.
  3.  Rub pastry cream through a fine strainer set over a bowl; discard residue. Cover pastry cream and chill about 1 hour, or nest bowl in ice water and stir until cool, about 30 minutes.
I got this cool metal elevation tray at an Asian grocery store-perfect for colling things quickly.

  1.  In a large bowl, with a mixer on high speed, beat the whipping cream until it holds soft peaks. Gently stir the whipped cream into the cool pastry cream.

Mille-Feuille/ Napoleon/ Custard Slice
Servings: Makes 8- 10
Ingredients
1 x batch pâte feuilletée/puff pastry (see above)
1 x batch creme patissiere/pastry cream (see above)
2 ¾ cups (660 ml) (12⅓oz) (350gm) icing sugar
2 teaspoons (10 ml) lemon juice
1 TBSP Meringue Powder( dried egg whites)
½ cup (2¾ oz) (80gm) caramel sauce

Directions:
1. Preheat oven to moderately hot 200 °C /400°F/gas mark 6.
2. Lightly dust your work space with flour and remove your dough from the fridge.
3. Roll into a large rectangle, the thickness of cardboard. The recipe I followed specified no other dimensions, but I rolled mine to about 12”/30cm x 18”/46cm.
4. Cut into three equal pieces and place on a baking tray. If you don’t have space for all three, you can bake them separately.
5. Prick the pastry sheets all over with a fork.
6. Place another sheet of greaseproof paper over the top and then a heavy baking tray. This will prevent the layers from puffing up too much. I also used a Pyrex dish to add more weight.
7. Bake each sheet for about 25 minutes in a moderately hot oven 200 °C /400°F/gas mark 6, removing the top layer of greaseproof paper/tray 10 minutes before the end for the tops to brown. Keep an eye on them periodically and lower the temperature if you think they’re browning too much.
8. Remove the baked sheets from the oven and leave on a wire rack to cool.
9. Once the pastry has cooled, you’re ready to assemble your mille-feuille. Get a sturdy flat board, your pastry and the chilled crème patissiere from the fridge.
10. Lay one sheet on the board and spread half the crème patisserie evenly over the top.
11. Take the second sheet and place it on top, pressing down lightly with your hands to ensure that it sticks to the filling.
12. Spread the remaining crème patisseries and place the last sheet of pastry on top, pressing down again. (Don’t worry if there’s some oozing at the sides. That can be neatened later.)
13. Pop in the fridge while you prepare the icing /caramel sauce.
14. Make a caramel with 1/2 cup sugar and 1/4 cup water, add 1/2 cup heavy cream to the caramel and cook over low heat to melt the caramel and thicken sauce.


15. To make the icing,  Whisk  about (2 cups) 300gm of the icing sugar on a low setting with the meringue powder and about 1/4 cup water until smooth and combined,, adding more water if necessary to achieve a thick pourable consistency The mixture should be thick enough to leave trails on the surface. If it’s too thin, whisk in a bit more icing sugar.


17. Once ready, immediately pour over the top of the mille-feuille and spread evenly. I found that I didn’t quite need all of the icing.


18. Still working quickly, pipe a row of caramel sauce along the widest length of your pastry sheet  You can make them as far apart/close together as you like.


19. STILL working quickly (phew), take a sharp knife and lightly draw it down (from top to bottom) through the rows of chocolate. A centimeter (½ inch) or so further across, draw the knife up the way this time, from bottom to top. Move along, draw it down again. Then up. And so on, moving along the rows of caramel until the top is covered in a pretty swirly pattern.

20. Once you’ve decorated your mille-feuille, with a sharp knife, trim the edges and cut your slices.


Constructing the dessert was not complicated but time consuming and I was impatient. It is not a pristine version of a  Napoleon but it was really yummy.
And I had leftover pastry! So, I cut it into strips, wrapped it around some jalapeno stuffed olives and baked them for about 20 minutes in a 425 degree oven.


They were so good with that ice cold beer that I ruined my appetite for dinner. Thank goodness I got it back for dessert.


Sunday, October 31, 2010

New England Beauty

I waited a bit too long to catch this year's leaf peeping. We went to Borderland State Park near my house recently and caught a last glimpse of full color. It was a very warm day, around 74 degrees, as we walked the Pond Edge Trail.


The path was very quiet and peaceful.
Pebbles took a last dip in the water concerned with the little fish swimming around.
I love the reflection of the trees in the water at the top of the picture.
As I look out of my window today, I see the now brownish leaves dropping fast and flying in swirly circles to the ground where they leave a blanket of muted color. I feel the quietness that starts to envelope New England . The birds and animals are disappearing. The bugs are all but gone. I know they will all be back but I miss them already.
As we look towards colder days rather than cooler days, I will come back to this post for the warmth of that last really warm Fall day when the colors and company was perfect.


Sunday, September 12, 2010

Chicken Breasts with Cider and Caramelized Apples

The Jewish New Year was last week and there was a great recipe in the local newspaper featuring apples that are a part of the New Year tradition. Have a Sweet New Year along with a big smile and even bigger hug was a popular greeting.
The recipe looked really interesting and not too tough.
Here it is below alongside some sauteed Honey Gold corn tossed with assorted wild mushrooms.
It has grown chilly up here in New England and this dish made a grand entrance into Fall.


To make this lovely chicken dish for 6 people:


1/2 cup golden raisins
1/2 cup Madeira
1/2 cup water
6 chicken breast halves, with skin on
1 tablespoon five-spice powder
2 teaspoons sea salt
ground black pepper, to taste
7 tablespoons unsalted butter, divided
3 Granny Smith apples, peeled, (peels reserved)cored and cut into eighths
2 tablespoons all-purpose flour
3/4 cup apple cider
2 cups chicken stock
1/4 cup honey
1/2 lemon, juiced
2 tablespoons flat leaf parsley, chopped
1 tablespoon orange zest

1.In a small saucepan, combine the raisins, wine and water. Bring to a boil over medium high heat; remove from heat and let stand for 20 minutes, or until the raisins are fully plumped.
2. Preheat the oven to 450 degrees F.
3. Season the chicken breasts with 1 1/2 teaspoons of the five spice powder, 2 teaspoons of salt and black pepper to taste.
4. In a large ovenproof saute pan, melt 3 tablespoons of the butter over medium high heat. Place the chicken breasts, skin side down, in the pan and cook until well browned and most of the fat has cooked out of the skin, about 5 minutes. Turn the breasts over and pour off any excess fat.
5. Add the apple peels to the pan, slipping them under the chicken breasts. Place the pan in the oven and bake until the chicken breasts are opaque and cooked throughout. Transfer to a warmed serving platter and cover to keep warm. Leave the peels in the pan.
6. Dust the apple peels with flour. Cook over medium heat, stirring often for about 5 minutes. Pour in the cider and deglaze the pan, stirring to dislodge any bits stuck to the pan bottom. cook until the liquid is reduced by half, about five minutes. Add the stock, bring to a boil, and decrease the heat to medium so the liquid simmers gently.
7. In a second saute pan over medium high heat, melt 3 tablespoons of the butter is brown and smells brown and toasty, 2 to 3 minutes. Add the apples, honey, lemon juice, and the remaining 1 1/2 teaspoons of the five spice powder. Saute the apples, turning them as needed, until they are a rich, even brown color and are tender, 5 to 8 minutes. Season with pepper.
8. Pour any juice released from the chicken into the pan with the apples. Arrange the chicken on the platter and top with the caramelized apples. Drain the raisins and sprinkle on top of the chicken.