Showing posts with label bread. Show all posts

Sunday, September 27, 2015

THE DARING BAKERS’ SEPTEMBER, 2015 CHALLENGE: IRISH SODA BREAD


For the month of September Meredith from the Poco Loco Olsons challenged us to experiment with soda bread. Here is the link to the Daring Bakers Challenge as presented to us. I am so excited to share this recipe with you as a truly quick bread that is delicious.

There is a lot of history to Irish Soda bread which was not, according to many sources, developed by the Irish. Here is a link to The Society for the Preservation of Irish Soda Bread. It gives a good reading on the history of soda bread.

Here is a link to a site that is called European Cuisines and discusses Soda Bread. I found it very informative about the European take on Soda Bread.

There are many variations on soda bread and the ones considered true soda breads are quite plain. The dough rises through a chemical reaction between the soda and buttermilk. Adding dried fruit or orange zest or nuts does make a tasty bread but these are considered tea breads, not soda breads.

The bread is crazy easy to put together. Irish soda bread is a good one to teach children for a first baking experience. The hardest part is waiting for it to cook as the bread needs about 45 minutes to an hour. I am happy to report that eating a slice as soon as it is cool enough to handle is a delightful reward for patience.
 I was amazed how delicious the bread was because I was a big skeptic.. I thought it would be really dense and heavy tasting. Instead the bread was light, bright tasting and very tender. Having some sharp cheddar cheese and a dab of orange marmalade made my afternoon tea a real pleasure.
The bread does not keep though and after a day, its fate was croutons which I tossed in olive oil and lots of herbs so it tasted completely different.

Having great success with Meredith's recipe, I thought I would experiment with others to get some perspective. I found a web site that was so interesting,I bookmarked it. It is the  called Bord Bia-Irish Food Board and they had a recipe for Brown Soda Bread that I just had to try. The bread tasted very different than Meredith's recipe. It was a bit heavier and rich tasting with a hint of sweetness from the honey. I am thinking some rum soaked raisins mixed into the batter would put it over the top for taste and make a wonderful morning toast. I put some local jelly on it, Dalby Farms Strawberry Butter. It is really a jelly, not a butter but it was so smooth and creamy tasting with a powerful strawberry flavor, that the mouthfeel was definitely butter.

I am keeping Meredith's recipe handy. I love fresh bread with dinner, especially stews. As Autumns is giving us cooler evenings, I am looking forward to whipping up a loaf of this bread to get those delicious broth from a hearty vegetable soup.


Irish Soda Bread (I halved this recipe to make a smaller loaf)

Ingredients:


  •  2½ cups (625 ml) sour milk or buttermilk
  • 2 cups (500 ml) (300 gm) (10½ oz) whole wheat four (see note above on how to measure flour) 
  •  4 cups (1000 ml) (600 gm) (21 oz) all-purpose (plain) flour (see note above on how to measure flour) 
  • 2 teaspoons (10 ml) (10 gm) baking soda 
  •  1 teaspoon (6 gm) salt

Directions:
 1. Preheat oven to hot 450°F/ 230°C/gas mark 8 and line a baking sheet with parchment paper.
 2. Mix the dry ingredients in a medium-sized bowl. (I do this by hand, but you could use a mixer if you’d prefer.)
3. Make a well in the middle of the dry ingredients.
4. Pour the sour milk/buttermilk into the well.
5.Mix the dough until the flour is completely incorporated. (It will be very stiff. I find it helpful to knead the dough by hand a few times while it is still in the bowl to make sure all of the flour is incorporated before moving on to the next step.)
6.Transfer the dough to the prepared baking sheet.
7. Pat or roll the dough into a circle shape that is approximately 1 inch (2½ cm) thick.
Using your fingertips or the blunt end of a wooden spoon handle, make several dimples in the top of the dough. (This is very similar to the technique used when making focaccia bread.)

8. Place the baking sheet on the middle rack of the preheated hot oven and bake for 30 minutes.
 9. Reduce the heat to moderately hot 400°F/200°C/gas mark 6. Pull the baking sheet out from under the dough, so the parchment is directly on the oven rack. Bake for 10 more minutes or until the top is golden brown.


 Traditional Brown Soda Bread


  • 250g whole wheat flour
  • 200g all purpose flour
  • 1 teaspoon baking soda
  • 1 teaspoon salt
  • 1 egg
  • 350 ml buttermilk
  • 1 teaspoon honey
  • Optional Topping: 1 tablespoon sesame seeds or pinhead oats
Directions:
Preheat the oven to gas mark 6. 200 degrees C(400F)
Mix the flour, baking soda and salt in a bowl. combine the egg with the buttermilk and honey, then mix into the flour. Add more buttermilk if the batter seems dry-it should be a soft dough. Put the dough in a lightly oiled bread pan. Sprinkle with the sesame seeds or oats, if using.
Bake for 45 minutes to an hour- it will sound hollow when it is fully cooked.( Evelyn's tip: use an instant read thermometer to determine doneness and the temp. should be around 200 degrees F.)Remove from the pan and wrap the bread in a clean dish towel to keep the crust soft. I did not do this step because I like the slight crunchiness of the exterior.


Monday, July 27, 2015

THE DARING BAKERS’ JULY, 2015 CHALLENGE: YAFAWI SFEEHA


The July Daring Bakers’ Challenge was brought to us by Manal from Manal’s Bites. She introduced us to an authentic Palestinian dish from Java that is served as a main meal along with a bowl of soup or a salad. The “Yafawi Sfeeha” or also known as “Milwayeh” which means twisted, is crispy yet tender and full of flavor.Click here for the link to the background information and original recipes from the challenge.

I was nervous about this challenge and especially nervous about getting the shape done. The dough seemed very thin and I saw disaster in my kitchen looming. So, I did a bit of research to see if perhaps there was another acceptable shape that I could manage. I was surprised and happy to see that one of our own in Daring Bakers, The Food Doctor, had blogged about meat pies and had a nice(easy) shape to mimic. So, I am admitting that this may not be a true Yawafi Sfeeha but it is a Sfeeha and it is a fun way to spend a lazy Sunday afternoon.

The Sfeeha look impressive and made the house smell divine. My hubby kept lurking about waiting for me to turn my back so he could  taste test. He loved them but he likes a sauce with most everything and I knew he would want one with these. They don't need them but he was dipping away and said they were really good. I used a Peanut Coconut Sauce from Whole Foods. I put a link on the name to Amazon in case you do not have a Whole Foods nearby but want to try it. Here is a picture of the sauce.
Now back to the Sfeeha. I want to give a suggestion about the baking. Because the Sfeeha bake at a very high temperature, I used two baking pans nested to help insulate. This proved to be a vital step. When I removed the Sfeeha from the oven, two of them were not yet golden brown on the bottom(they were the first two I shaped also) so I removed the others and put the two back in the oven for a few more minutes. When I put them in though, I did not double pan them as I did initially. Within a minute, my oven was smoking. I took them out and they were burned, the parchment paper was burned and here is what they looked like. The underside was black.
No Good :(
But let's talk about the other successful eight! The pastry was crispy outside and cloud like tender inside. The meat was juicy and flavorful, the spices worked well together not overpowering each other or the dish. I served them with braised broccoli rabe and Russian kale but I think a fresh cold salad would have been a better choice. 
All in all, I think these will make a nice pot luck and I plan to bring some to the next book club meeting. They will travel well and don't really need a knife and fork.
Manal has some great versions that are sweet as well. Perhaps you are braver than I am and will give them a try.
Below is the recipe for Sfeeha that I made:

SFEEHA

Ingredients
Dough
2  to 2 1/2 cups flour
1 teaspoon yeast
1/2 teaspoon salt
1/2 teaspoon sugar
3 tablespoons olive oil
3/4 cup water
Filling
1 pound ground beef
1 medium onion, chopped fine
2 tablespoons olive oil
1/2 teaspoon allspice
1/4 teaspoon cardamom
1/4 teaspoon ground cinnamon
1 tablespoon tahini
1 tablespoon sour cream, or Labana
1 tablespoon pomegranate molasses
salt, to taste
1 1/2 teaspoons dried mint flakes

Procedure


    Dough:

    
Proof the yeast by mixing the yeast, sugar and warm water and allowing it to sit for about 5 to 10 minutes until the mixture starts to bubble and foam. 


In a bowl, whisk together the flour and salt. Add the oil and rub the mixture with your fingers to make a coarse looking meal.


Add the water/yeast mixture and knead the dough until it forms a smooth soft dough that does not stick to your hands.


 Lightly coat a clean bowl large enough to allow the dough to expand and put the dough in it. Cover with a towel and allow the dough to double in size. At my house, in 72 degree Fahrenheit, it took a little over an hour. The warmer the room the faster the dough will rise. 


Punch down the dough and cut into 10 balls. Cover them with a towel and allow to rest for about 10 minutes.


Filling:


In a large saute pan over medium heat, saute the onions in the 2 
tablespoons olive oil until translucent, about 5 minutes.


Add the ground beef and spices and continue to cook, stirring constantly, until the beef is browned. Turn off the heat.


Add the molasses, tahini, sour cream or labaneh and mint. Mix well.


Grease your baking sheets or line with parchment paper. Place the oven rack in the center of the oven. Heat the oven to 500 degrees Fahrenheit. The recommended temperature was 270 degrees Celsius(518 degrees F.) but I was uncomfortable cooking higher than 500.  I also double panned my baking sheets for extra insulation.


Roll the dough into a small(I did a 4-inch) circle. Place the filling in the center. Wet your fingers and pinch two sides of the dough circle with your index finger and thumb. Repeat on the other side so that you have four corners
Transfer to the prepared baking sheet and allow to rest 10 minutes.
I you are making a large amount of meat pies, cover the pies with a cloth while they are resting to prevent the surface from drying which will result in cracked surfaces at baking.
Just before baking, re-pinch the corners to , making sure they are sealed tightly. Brush the pastry surface with an egg wash optionally. I mixed an egg with 1/4 cup milk and brushed the pastry using a pastry brush.


Bake the pies for about 10 minutes or until the underside is golden. If they are golden on the bottom but not on top, you can put them under the broiler to brown the tops. i did not have to do this and the egg wash helped promote browning. Transfer to a wire rack and cool slightly. These are delicious warm.


Sunday, July 26, 2015

Sourdough Starter Makes Sourdough Crackers


My sourdough starter is a couple of years old now. I feel as though it deserves a post. I got my starter from a great friend and have somehow managed to keep it alive. My mother also gave me some starter from King Arthur Flour Company and I keep the two separate but use them both. The King Arthur starter seems a little sweeter although I am not sure why. Sourdough starter gives bread that tang that is really delicious. King Arthur Flour gives a nice history and wonderful ideas for sourdough so hop over to their site for background information. For those of you considering the commitment of a starter, it is far less work than you think. If you leave it out at room temperature, especially a warm room temperature, you will have to feed it at least every day. I keep mine in the refrigerator and feed it about once a week if I am not in the baking mood. For just a little technical background, it is important to know that when you feed the starter, you remove some before adding some. The starter I remove has been traditionally been going down the drain, sadly. But then I came across a recipe from King Arthur flour that solved my guilty conscience,Sourdough Crackers.

Making these crackers is quick and fun. I have trouble keeping them on hand because they are so popular. You will need sourdough starter but if you have gotten this far, I am guessing you may have some already. A quick whirl around Google shows a lot of recipes for these type of crackers and I think most of them are using King Arthur Flour's recipe. I am using the recipe too with of course a personal spin. I eliminate the salt from the dough because I like the effect that sprinkling the kosher salt on top before baking the crackers gives to the texture and flavor. Having the salt in the dough and again on top made them a little too salty. Also, I used some herbs that I bought in the Laurentian Mountains while vacationing in  Montreal. If you do not have access to these wonderful organic melange of herbs, use whatever you fancy. The reason I used mine is because it was a mixture of lemon peel, thyme, garlic and a little salt. I like to serve these crackers with smoked salmon pate and the herb/spice blend is perfect. Click here for the information about the company and area in case you are interested. If you are nearby, head over to St. Sauveur and visit one of the sweetest little ladies who will not pass judgement on your lacking french skills but talk to you like a neighbor over the fence.
Below is the cracker recipe and then Smoked Salmon Pate recipe. I am thinking you will make a personal twist to the recipe so let me know what you have substituted. I am always amazed by a cook's creativity.

Here is the adapted recipe from King Arthur Flour

Sourdough Crackers

1 cup Sourdough Starter
1 cup all-purpose flour
1/4 cup unsalted butter
1 tablespoon mixed herbs, dried
2 tablespoons olive oil
1 tablespoon kosher salt

Mix all the ingredients together in a Kitchen Aid mixing bowl with the dough hook on Speed 2 for about 5 minutes or until it forms a soft smooth dough. If mixing by hand, this should take about ten minutes. And after that, put a Kitchen Aid on your birthday wish list.

Wrap the dough in plastic wrap and chill for about 30 minutes and up to 2 days. 

Preheat the oven to 400 degrees Fahrenheit.
Remove the dough from the fridge. Cut in half and roll each half to about 1/16th inch thickness. Brush with olive oil and sprinkle with kosher salt. Prick with a fork all over. 

Using a pizza cutter or pastry wheel, cut the dough into strips about 1-inch wide, then across into 1-inch squares. Note the width of a ruler is about an inch so I just trace my ruler. You can cut any shape you please but make sure all the shapes are about the same size for even cooking.

Bake the crackers for about 20 minutes. After about 10 minutes of cooking, rotate the pan 180 degrees to promote even baking. Remove from oven and transfer crackers to a wire rack to cool.
Mis en Place
Store in airtight bag. 
Make sure all the ingredients are room temperature for best mixing


Cut any shape you want but try to keep the same size so they cook evenly


Smoked Salmon Pate

4 ounces smoked salmon
8 ounces cream cheese
2 tablespoons heavy cream
1 tablespoon lemon juice
1 tablespoon chives, chopped
salt and pepper, to taste
Put all ingredients in a food processor and pulse till combined. Taste for seasoning. Serve chilled.
Yes! It is that easy. And it is good on the morning toast too.

Good Gosh, I sound like a King Arthur groupie...wait a minute, I am!!! I went there on the way to and from Montreal and they crowned me their Queen(in my dreams)


Wednesday, August 27, 2014

Daring Bakers'  August, 2014 Challenge: 
 Tubular and Coiled Treats: KürtÅ‘skalács /Chimney cake and Ensaimada /Spanish Pastry


KürtÅ‘skalács on left  and Ensaimada on right


The August Daring Bakers' Challenge took us for a spin! Swathi of Zesty South Indian 
Kitchen taught us to make rolled pastries inspired by Kurtoskalacs, a traditional 
Hungarian wedding pastry. These tasty yeasted delights gave us lots to celebrate!

I started the challenge by deciding to make just the Kurtoskalacs (chimney cakes) since they were the most visually dazzling and unusual. The preparation for the Kurtoskalacswas so easy  that I went for the Ensaimada as well. I stayed traditional for the Kurtoskalacs but played around with a filling for the Ensaimada. Hands down, the family loved the Kurtoskalacs best. I did not get to have a full panel of judges, though, because the family, well mainly my husband, ate everything but a few crumbs of Ensaimada. 
I think these pastries will be a great addition to the breakfast buffet at Thanksgiving. They look like a lot of work and expertise when really truly they are very easy. Also, they are light and flavorful. 
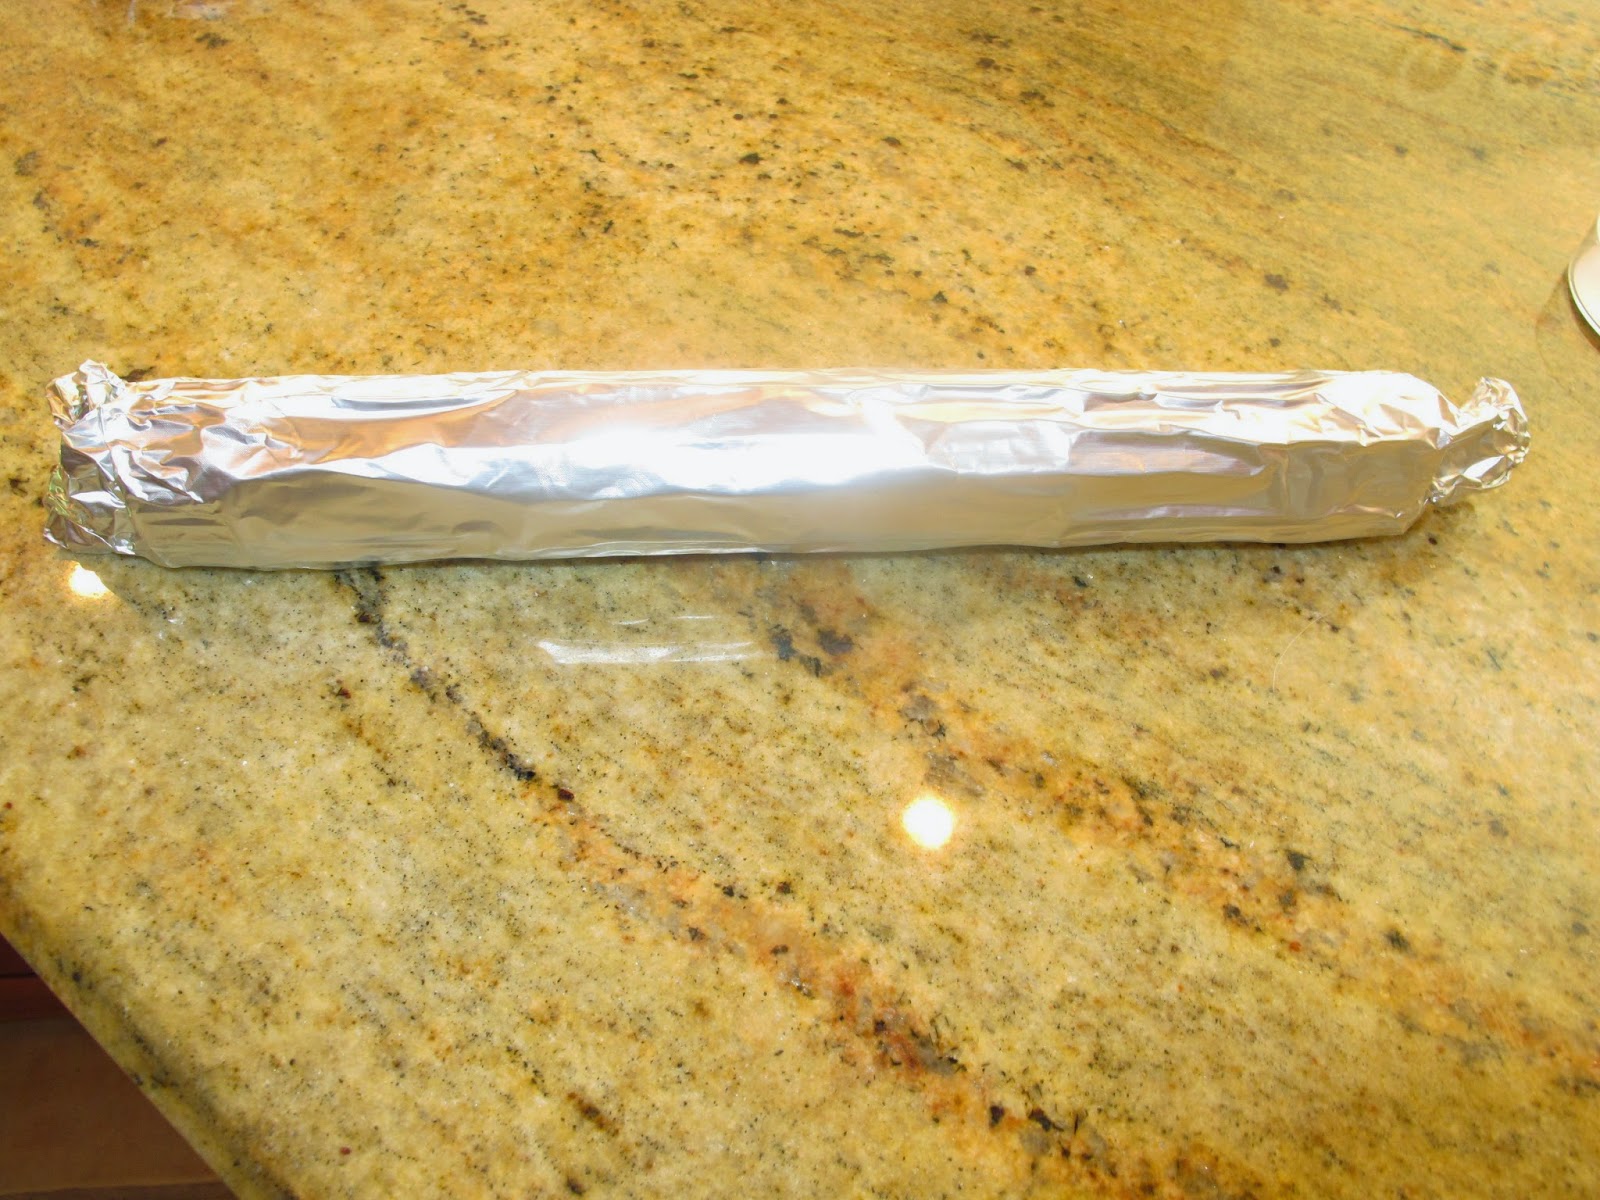
The hardest part of the whole thing was finding cylinders to wrap in foil for molding the chimney cakes. Read on to see what I found in my kitchen drawer...

Kurtoskalacs

Ingredients
 
For the dough:
2¼ teaspoons (1 packet) (7 gm) active dry yeast 
1/2 cup (120 ml) milk, lukewarm temperature
1¾ cups (8½ oz) (240 gm) all-purpose (plain) flour
2 tablespoons (1 oz)(30 gm) sugar
1/8 teaspoon (3/4 gm) salt
1 large egg, room temperature
3 tablespoons (1½ oz) (45 gm) melted butter
2 teaspoons (10 ml) (1/4 oz) (6 gm) sugar mixed with an 2 teaspoons (10 ml) (1/4 oz.) (6 gm) of spice ( I used pumpkin pie spice)

Directions:

Using active dry yeast, add ½ teaspoon sugar to lukewarm milk and set aside for 
5-10 minutes until it proofs (becomes foamy).
In a large bowl combine, flour, sugar and salt. To this add egg, milk, melted butter, and 
yeast.
 Stir the mixture until it comes together to form a dough, and then knead for about 
five minutes. Transfer to a well greased container.
 Allow the dough to rise for 60 minutes at room temperature until doubled in volume 
Prepare the rolling pins by covering them with aluminum foil, do at least two or three layers, to protect the pins from burning in the oven. I used a non stick foil so I did not have to grease the foiled covered pin. 
I used a sushi mat!


Punch down the dough and divide into 4 equal parts about 4 oz (115 gm) of each. 
On a well floured surface spread one portion of the dough Shape into 1/6 inch (4 mm) thick square-shaped sheet.Using a pizza cutter cut the dough into a long ribbons of about 1/2 inch (13 mm) wide.Wrap one end of the dough strip around the spit/rolling pin, tucking in the end so the dough doesn't unwind.

Keep the dough very thin (under ¼ inch (6 mm)) as you stretch and wind it on the rolling 
pun. Then roll the whole thing slightly on the counter top to flatten it/press it together. Brush with melted butter.  I sprinkled it with the pumpkin pie spice which was a mixture of ground cinnamon, ginger and allspice. 
Place in roasting pan and bake in a preheated moderately hot oven 375°F/190⁰ C/gas 
mark 5 for 25 minutes.
 
You may want to flip them halfway through cooking so they brown evenly.
Remove from oven and cool a few minutes til you can handle the pins.
Tap the mold on a table top to release the cake and set it up right to cool. I trimmed the bottoms slightly so they would stand upright.


Ensaimada

Dough
2½ cups (10½ oz) (300 gm) all-purpose (plain) flour
2¼ teaspoons (1 packet) (7 gm) active dry yeast OR 2 teaspoon instant yeast OR 14 gm (½ 
oz) fresh yeast
1/2 cup (120 ml) warm water
1 large egg
½ teaspoon (3 gm) salt
¼ cup (60 ml) (2 oz) (60 gm) granulated sugar
2 tablespoons (30 ml) olive oil
3 tablespoons (55 ml) (1 3/4 oz) (50 gm) butter, softened
3 tablespoons (55 ml) (1 3/4 oz) (50 gm) goat cheese, softened
2 tablespoons (1oz) (17 gm) fresh basil, chiffonade (thinly sliced)
Olive oil/canola oil for greasing bowl and work place.


Directions:
Using active dry yeast, add ½ teaspoon sugar add to lukewarm water and set 

aside for 5 minutes. To this add flour, salt and yeast mixture. Knead for 6 minutes if using kitchen aid mixer or 10 minutes by hand, until you get a soft and pliable dough. I had to add about 1/4 cup (60ml) more water to make a soft dough for this recipe.
Transfer the dough to a well greased bowl and covered with plastic wrap or covered with 
a cloth. Let rise for 2 hours or until the dough doubles in volume. Punch down the dough and divide into 4 equal parts and then shape into balls. Lightly oil the work place and place a ball of dough, using a rolling pin roll out the ball into a long thin rectangle about 12x4 inch (30x10 cm) piece. Divide your butter to 4 pieces. Place a butter portion on the rolled out dough and spread it into a thin layer.


Take pieces of dough between your fingers and try to gently stretch the dough to be even 
thinner and larger about 16x7 inches (40 x18 cm)Roll the dough from the long end to into a tube. Then roll the tube again into coil shape similar to a snail shell.


Make sure to keep the coil loose so that there is space in between the layers, this will help 
the dough to rise.
Repeat for the other three dough balls and butter portions. 
Place the snails onto a baking sheet lined with parchment paper. Slightly press the sides 
with your hand.Cover the baking sheet with a clean cloth and let rise for 1 hour. During the end of second rising, pre-heat oven to 180⁰ C/350⁰ F/Gas mark 4
Bake Ensaimadas for about 15-20 minutes. Watch them closely during the end of baking 
time. They should be golden brown in color.
When baked immediately place the Ensaimadas onto cooling racks. I then brushed a little melted butter on top and sprinkled with a coarse sea salt.

Friday, June 27, 2014

Daring Bakers Challenge June 2014 - Sweet Rolls


This month the Daring Bakers kept our creativity rolling with cinnamon bun inspired treats. Shelley from C Mom Cook dared us to create our own dough and fill it with any filling we wanted to craft tasty rolled treats, cinnamon not required! 

I was a bit ahead of the game on this one as I have spent the last couple of months working on a sourdough  cinnamon roll. I felt like, with this challenge, I would omit the cinnamon and go for something different. That's when I started dreaming about the orange rolls from The Club in Birmingham, Alabama.  My grandmother, Mimi, was a member of The Club ( pronounced Thee Club), a dancing and dining venue on top of a big hill overlooking downtown Birmingham.
 The Club was considered very luxurious and added to your cache if you belonged there,which of course needed mentioning to anyone who may not have been informed of the prized membership.
 I loved The Club for the food. Well maybe I did not love all the food...maybe just the orange rolls. They were super sweet and my grandmother would say they were more a dessert than a side bread. She said this while waiting for lunch to arrive and munching on them with sweet tea that was so sweet, it made your head hurt. My Mimi loved her sweets. I got to go to lunch with her each year when the doll show came to The Club. My grandmother loved looking at the antique and modern doll displays with their fancy dressings. She towed me along as the excuse to attend. I loved it too.
Let's get back to today though. I found a recipe online for the authentic The Club orange sweet rolls. They were easy to prepare and did not take much time. No one liked them...not even me. They were sickening sweet to me. We don't eat like that anymore and they just tasted like sugar. So, I started tweaking a bit. I halved the filling of coconut and sugar and whirled it in the food processor so it was finer textured. I increased the amount of liquid in the glaze as well as doubling the glaze.The recipe said that it made twelve rolls but I cut them so they made twenty four. They were smaller...cuter and popped right in the mouth.
The new version of orange rolls were a huge hit with family and co workers. I ate one just after the glaze set but still warm. The roll melted in my mouth yet I did not feel like I just ate one of the most decadent breads ever. These rolls are well worth the minimal effort. Make them fresh. I made a batch and formed the rolls leaving them in the fridge overnight. I gave the rolls about 30 minutes outside of the fridge before baking and they were delicious for breakfast.

 Here is my adapted version to what I am sure was an adapted version of The Club's Orange Sweet Rolls. I am not great with conversions for those of you outside of the U.S. but I gave it a big effort!


Orange Sweet Rolls


 - adapted from a recipe called The Club Sweet Rolls

1/4 ounce (6 gm.) dry yeast, 1 package
1/4 cup warm water, about 125 degrees
1/3 cup (60 ml) (2 oz) (50 gm) unsalted butter, melted
1 cup p (240 ml) (8 oz) (200 gm) sour cream
1/4 cup (60 ml) (2 oz) (50 gm) sugar
2 eggs
1 teaspoon (5 ml) (1/4 oz) salt
3 1/2 cups (840 ml) (12 oz) (450 gm) all-purpose flour
1/4 cup (60 ml) (2 oz) (50 gm) sugar
1/2 cup (120 ml) (4 oz) (100 gm) coconut, flaked
2 teaspoons (10 ml) orange rind, grated
2 tablespoons (30 ml) unsalted butter, melted
Glaze:
1 cup  (240 ml) (8 oz) (200 gm) confectioner's sugar
1 tablespoon (15 ml) orange rind, grated
3 tablespoons (45 ml) fresh squeezed orange juice


  1. Dissolve the yeast in warm water in a large bowl. Add the next five ingredients, mix well. Gradually stir in enough flour to make a soft dough. mix well.
  2.  Place dough in a greased bowl turning to grease the top.
  3.  Cover and let rise until double in bulk, about 90 minutes to 2 hours.
  4. Combine sugar, coconut and orange rind in a food processor and use the pulse feature to make a finer texture,set aside.(If you don't have a food processor, chop the flaked coconut a bit with a knife to make a finer texture.)
  5.  Punch down the dough. Knead until smooth and elastic on a floured surface.
  6.  Divide the dough in half. Roll each half into a rectangle(I rolled it to about 12 inches by 10 inches).
  7.  Brush the rectangle with melted butter. Sprinkle coconut and orange rind mixture over top. 
  8. Roll up from the long side. Cut into approximately 1 inch pieces (30 mm), turn on end and place in a greased pan. Cover with wax paper and let rise until doubled, about 30 minutes. 
  9. Bake in a preheated oven at 350°F/180°C/gas mark 4 degrees for about 20 minutes.
  10. Cool 5 minutes. Turn out onto a rack.
  11. While still warm, drizzle with glaze.


I like to use active dry yeast

Just throw the dough ingredients in a bowl!

I mixed with a dough hook on low speed for about 3 to 4 minutes.

Getting ready to rise!

The dough has arisen!!!!

Pulsing in the processor gives the rolls a finer filling texture.

Ready to roll!

Slathered in melted butter.

This smells amazing, by the way!

Ready for second rising..you can chill at this point for later baking.

Glaze in progress!

Fresh from the oven...only lightly browned!

Glistening with glaze

You know you want one!!!


Your turn to make them, Enjoy!