Showing posts with label baking. Show all posts

Wednesday, January 27, 2016

THE DARING KITCHEN JANUARY, 2016 CHALLENGE: CAKE DESIGNING


Daring Bakers is evolving and now will be called The Daring Kitchen. The main change is that the challenges will extend out side the scope of baking. I am very excited about this change and look forward to lots of fun in the kitchen with my daring friends. This month, Shillpa Bhaambri from Cakeline the Journey, a Baker and Cake designer living in Mumbai, India is hosting the challenge. Her challenge is a cake design challenge. Here is the link to her challenge with lots of great ideas and recipes.

Here is the exciting part of Shillpa's challenge for me. I returned home yesterday from a course with Nicholas Lodge of International Sugar Art Collection in Atlanta GA. I took a PME certification course in Rolled Fondant Techniques. This visit was not my first to the school. I have been going every year for the last 18 years. I love the school and I always learn new techniques. I could go on and on about how wonderful the experience is there but I think you have to see for yourself. People  from all over the world come to learn from Nick and I have made some great friends at the school.

For the PME certification class, we worked with fondant, gumpaste and a combination of the two media. Having taken a lot of gumpaste classes with Nick, I have memorized his recipe. I find it very easy to make. Shillpa has the recipe in her challenge so hit that link above if you want to make it.
For fondant, I always buy it. I am not lazy...ok I am a little lazy. If I thought I could make fondant as nice as some of the commercial brands I use, then I would definitely make it. But I am loving the Renshaw brand of fondant and find it economical as well as delicious and easy to use.

Modeling chocolate aka candy clay and I have a love/hate relationship. I have moderate success in making it. I find it expensive to buy BUT when all the stars align, it is my favorite sugar medium to use. Modeling chocolate tastes like chocolate. Yum! Also, I can make decorations and not have to wait for them to dry as I would for fondant or gumpaste. Once they cool they are ready. Great news for the last minute, sort of lazy decorator that I am from time to time.

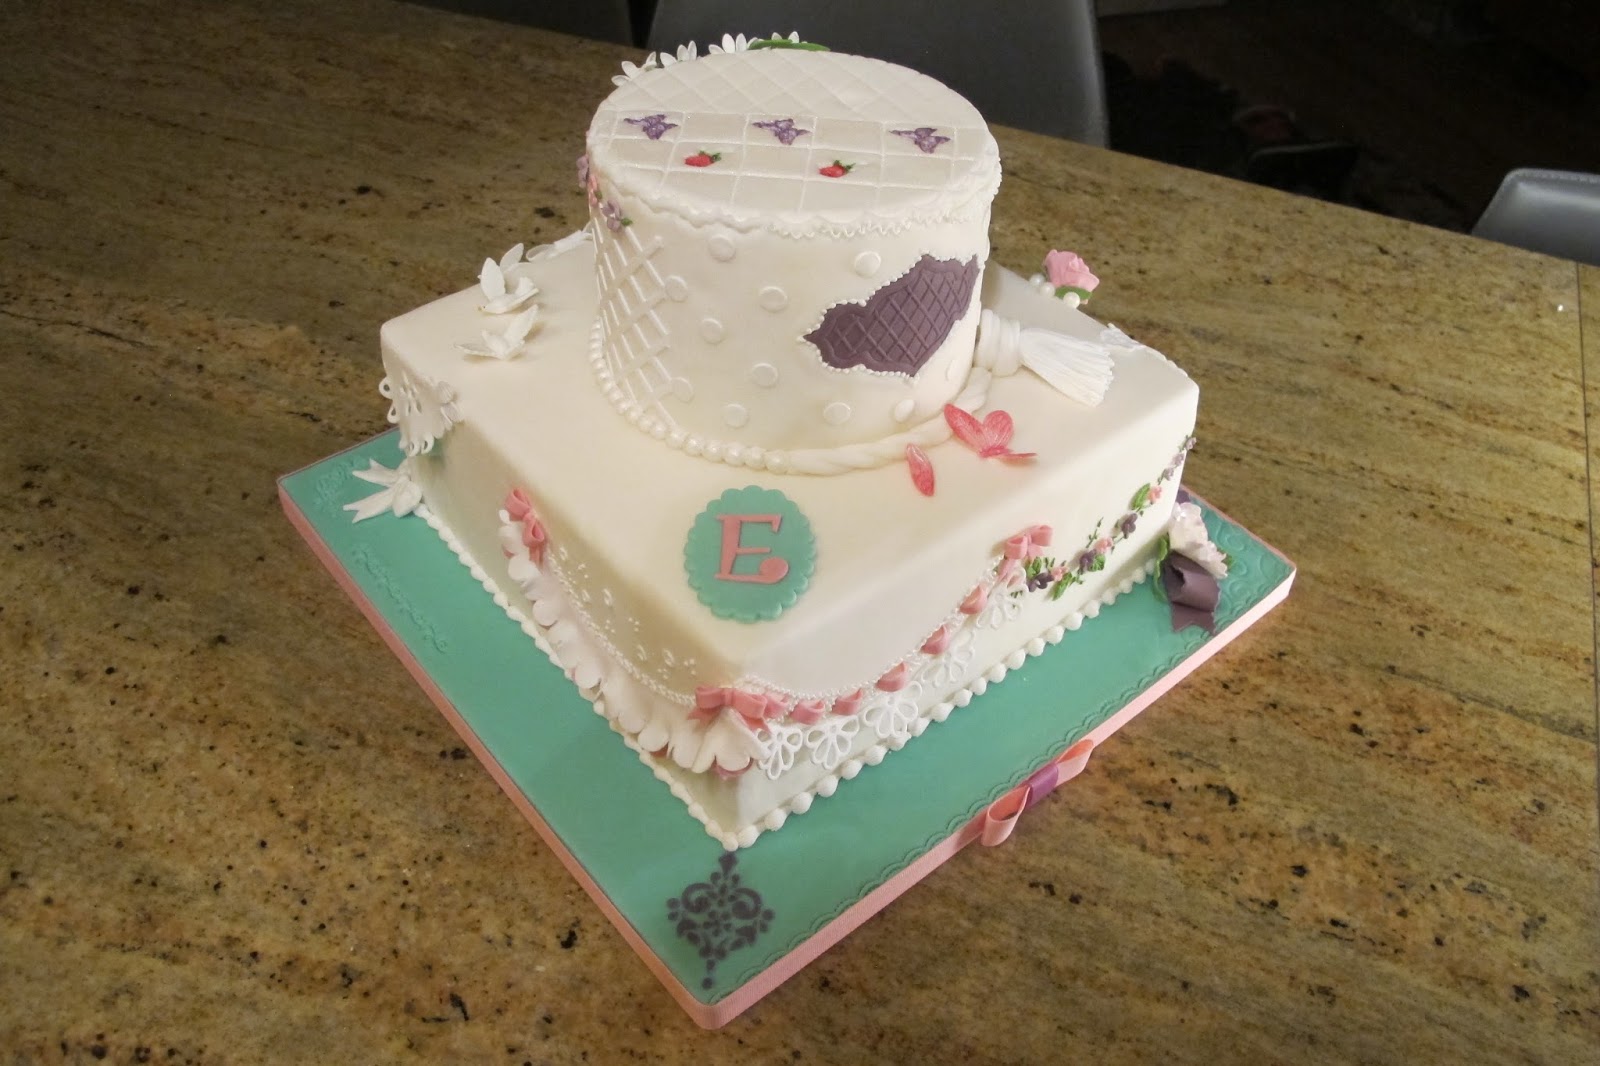
For this blog, I will talk about the cake that I did in class last week. The cake is a dummy cake which means that the parts that looks like cake are Styrofoam. I can keep this forever or until I turn my back and someone pokes on it breaking the decorations. Speaking of which, I would like to send nasty glares to the Atlanta TSA who somehow managed to start my cake, in its box, right side up through the scanner and return it to me upside down. There was minimal damage, thankfully, due to the fantastic packing job at I.S.A.C.
Below are some pictures the cake project. Hopefully, I will meet some of you in class someday. I am already saving my money for the next visit.


Gumpaste decorations drying in foam

As a sampler cake, we did many designs all over the cake.

Lovebirds?

Two kinds of draping- above and below


His talent is amazing. His generosity and kindness is  fantastic!

Friday, November 27, 2015

THE DARING BAKERS’ NOVEMBER, 2015 CHALLENGE: CHEESE CAKE CRUMBLE PIE


Today is the day after Thanksgiving. While I love Thanksgiving  with the gathering of friends sharing lots of food and fun, my most thankful feeling is that it is over. I cook too much. I eat too much and I make a monumental mess. The mess is not limited to the kitchen where thankfully my dear friends help straighten my mess. I will be sorting through piles of  mess throughout the house for a week.

Today is also Black Friday where everyone goes shopping and stands in line to save a penny. Not me!  I am waiting for Cyber Monday although I think Cyber Monday actually started last Thursday and Black Friday started last August. I find it hard to keep up as every business seems to have its particular spin on the dates and deals.
So what has this got to do with this month's challenge?? Umm nothing really, I am just ranting.

For the month of November Krista & Nicole of “Two Cups of Sugar.”challenged us to make our own version of cheesecake crumble pie.
This month's challenges was very interesting to me and I made the pie  early in the month. I did not make it for Thanksgiving because I experimented a bit, as challenged by Krista and Nicole, and found a cheesecake pie that worked a little better for me .


Here is the link to their challenge. The last recipe in the challenge, BLT cheesecake Pie,  is now on my bucket list.  I need to recover from cream cheese overload for a little while before I tackle the recipe so I am keeping the recipe on file for the rapturous time when tomatoes are in season here again.
Making the cheesecake pies is fairly easy. I used my usual pie crust recipe which works well for me.


Add caption


The filling recipe is really nice and there were no unsightly lumps of cream cheese floating in the batter. Yes, that sort of thing happens if I do not coddle and hover over my cheesecake batter.


 I used raspberries and blackberries and they seemed most appropriate for a crumble pie which is typically very sweet. The lemon zest in the recipe also blended nicely with the fruit. The recipe for the topping made a lot and seemed drier than the the challenge picture. I covered the pie as much as I thought useful and
kept the rest for another project. It should freeze well.

The pie came out really nice. The baking method is to start with a high heat, reduce the heat after 10 minutes and baking for an hour. Then, turn the heat off and  leave in the oven with the door ajar. for 30 minutes.


 I think that I should have turned the heat off in the oven  sooner. I think a little less cooking would have given creamier filling results though the longer cooking time created a nice pie crust and a lovely golden topping. The taste was sweet, fruity and very rich. Small slices of pie  are manageable which is great is you are serving a crowd.

The second pie recipe is Pecan Cheesecake Pie that I got from a Southern Living magazine and combines my two favorite desserts, pecan pie and cheesecake. There is a layer of cheesecake and a layer of pecan pie that magically transforms into a plate of pure joy. This pie has a couple of separate elements that at first sight might seem cumbersome but whip together easily.  I did serve this pie(along with a lot of other desserts) for Thanksgiving. This is one recipe I will make again next year.
When making the Pecan Cheesecake Pie, be sure to use a deep dish pie pan or else there won't be enough room for both fillings. I made that mistake on my first try with the pie. If you don't have a deep dish pan, then I recommend that you use all the cream cheese mixture, top with the pecans and  fill to the top with the corn/syrup egg mixture. You will have some leftover corn syrup/egg mixture but the pie will still be really good. I believe this is best served slightly chilled so I advise removing the pie from the fridge about an hour before serving. Unlike most cheesecakey desserts, this pie will keep well in the fridge for a few days or until you have sneaked enough "slivers" while cleaning up the Thanksgiving mess. Not that I would know anything about that!
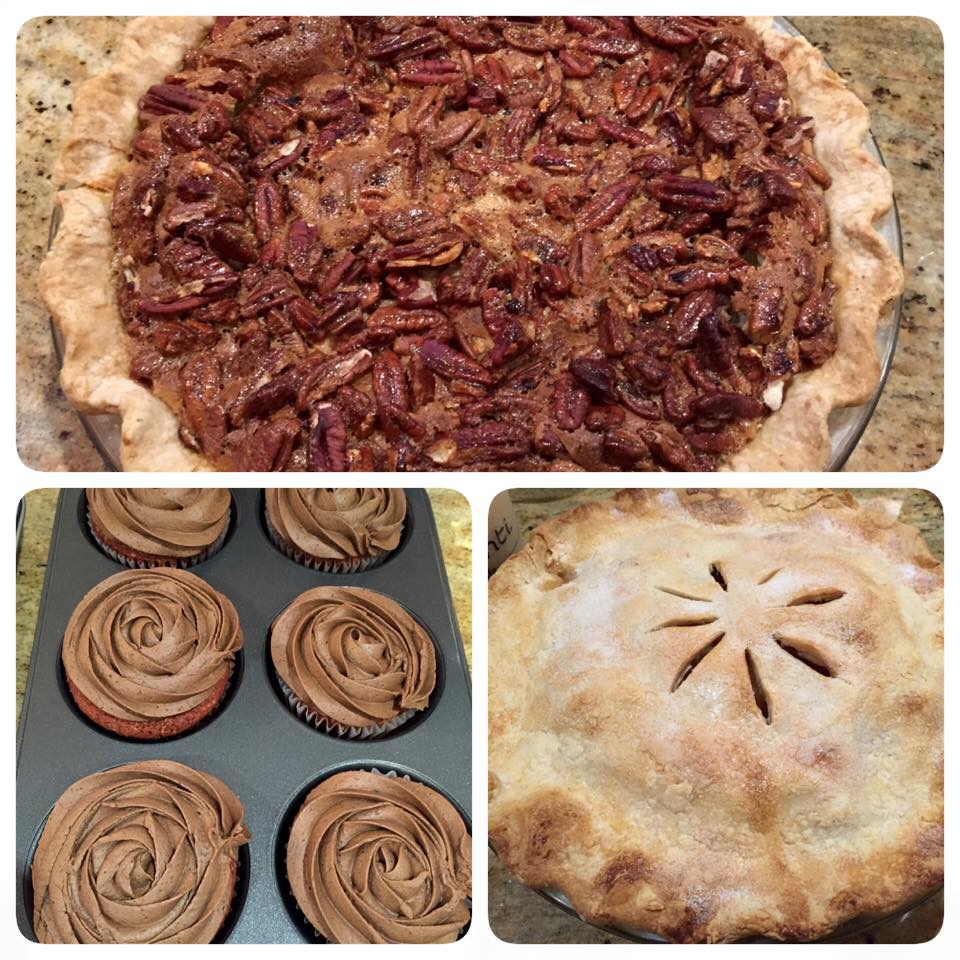
Pecan cheesecake pie is top picture and  top dessert dog over red velvet cupcakes and apple pie!

Sunday, September 27, 2015

THE DARING BAKERS’ SEPTEMBER, 2015 CHALLENGE: IRISH SODA BREAD


For the month of September Meredith from the Poco Loco Olsons challenged us to experiment with soda bread. Here is the link to the Daring Bakers Challenge as presented to us. I am so excited to share this recipe with you as a truly quick bread that is delicious.

There is a lot of history to Irish Soda bread which was not, according to many sources, developed by the Irish. Here is a link to The Society for the Preservation of Irish Soda Bread. It gives a good reading on the history of soda bread.

Here is a link to a site that is called European Cuisines and discusses Soda Bread. I found it very informative about the European take on Soda Bread.

There are many variations on soda bread and the ones considered true soda breads are quite plain. The dough rises through a chemical reaction between the soda and buttermilk. Adding dried fruit or orange zest or nuts does make a tasty bread but these are considered tea breads, not soda breads.

The bread is crazy easy to put together. Irish soda bread is a good one to teach children for a first baking experience. The hardest part is waiting for it to cook as the bread needs about 45 minutes to an hour. I am happy to report that eating a slice as soon as it is cool enough to handle is a delightful reward for patience.
 I was amazed how delicious the bread was because I was a big skeptic.. I thought it would be really dense and heavy tasting. Instead the bread was light, bright tasting and very tender. Having some sharp cheddar cheese and a dab of orange marmalade made my afternoon tea a real pleasure.
The bread does not keep though and after a day, its fate was croutons which I tossed in olive oil and lots of herbs so it tasted completely different.

Having great success with Meredith's recipe, I thought I would experiment with others to get some perspective. I found a web site that was so interesting,I bookmarked it. It is the  called Bord Bia-Irish Food Board and they had a recipe for Brown Soda Bread that I just had to try. The bread tasted very different than Meredith's recipe. It was a bit heavier and rich tasting with a hint of sweetness from the honey. I am thinking some rum soaked raisins mixed into the batter would put it over the top for taste and make a wonderful morning toast. I put some local jelly on it, Dalby Farms Strawberry Butter. It is really a jelly, not a butter but it was so smooth and creamy tasting with a powerful strawberry flavor, that the mouthfeel was definitely butter.

I am keeping Meredith's recipe handy. I love fresh bread with dinner, especially stews. As Autumns is giving us cooler evenings, I am looking forward to whipping up a loaf of this bread to get those delicious broth from a hearty vegetable soup.


Irish Soda Bread (I halved this recipe to make a smaller loaf)

Ingredients:


  •  2½ cups (625 ml) sour milk or buttermilk
  • 2 cups (500 ml) (300 gm) (10½ oz) whole wheat four (see note above on how to measure flour) 
  •  4 cups (1000 ml) (600 gm) (21 oz) all-purpose (plain) flour (see note above on how to measure flour) 
  • 2 teaspoons (10 ml) (10 gm) baking soda 
  •  1 teaspoon (6 gm) salt

Directions:
 1. Preheat oven to hot 450°F/ 230°C/gas mark 8 and line a baking sheet with parchment paper.
 2. Mix the dry ingredients in a medium-sized bowl. (I do this by hand, but you could use a mixer if you’d prefer.)
3. Make a well in the middle of the dry ingredients.
4. Pour the sour milk/buttermilk into the well.
5.Mix the dough until the flour is completely incorporated. (It will be very stiff. I find it helpful to knead the dough by hand a few times while it is still in the bowl to make sure all of the flour is incorporated before moving on to the next step.)
6.Transfer the dough to the prepared baking sheet.
7. Pat or roll the dough into a circle shape that is approximately 1 inch (2½ cm) thick.
Using your fingertips or the blunt end of a wooden spoon handle, make several dimples in the top of the dough. (This is very similar to the technique used when making focaccia bread.)

8. Place the baking sheet on the middle rack of the preheated hot oven and bake for 30 minutes.
 9. Reduce the heat to moderately hot 400°F/200°C/gas mark 6. Pull the baking sheet out from under the dough, so the parchment is directly on the oven rack. Bake for 10 more minutes or until the top is golden brown.


 Traditional Brown Soda Bread


  • 250g whole wheat flour
  • 200g all purpose flour
  • 1 teaspoon baking soda
  • 1 teaspoon salt
  • 1 egg
  • 350 ml buttermilk
  • 1 teaspoon honey
  • Optional Topping: 1 tablespoon sesame seeds or pinhead oats
Directions:
Preheat the oven to gas mark 6. 200 degrees C(400F)
Mix the flour, baking soda and salt in a bowl. combine the egg with the buttermilk and honey, then mix into the flour. Add more buttermilk if the batter seems dry-it should be a soft dough. Put the dough in a lightly oiled bread pan. Sprinkle with the sesame seeds or oats, if using.
Bake for 45 minutes to an hour- it will sound hollow when it is fully cooked.( Evelyn's tip: use an instant read thermometer to determine doneness and the temp. should be around 200 degrees F.)Remove from the pan and wrap the bread in a clean dish towel to keep the crust soft. I did not do this step because I like the slight crunchiness of the exterior.


Sunday, July 26, 2015

Sourdough Starter Makes Sourdough Crackers


My sourdough starter is a couple of years old now. I feel as though it deserves a post. I got my starter from a great friend and have somehow managed to keep it alive. My mother also gave me some starter from King Arthur Flour Company and I keep the two separate but use them both. The King Arthur starter seems a little sweeter although I am not sure why. Sourdough starter gives bread that tang that is really delicious. King Arthur Flour gives a nice history and wonderful ideas for sourdough so hop over to their site for background information. For those of you considering the commitment of a starter, it is far less work than you think. If you leave it out at room temperature, especially a warm room temperature, you will have to feed it at least every day. I keep mine in the refrigerator and feed it about once a week if I am not in the baking mood. For just a little technical background, it is important to know that when you feed the starter, you remove some before adding some. The starter I remove has been traditionally been going down the drain, sadly. But then I came across a recipe from King Arthur flour that solved my guilty conscience,Sourdough Crackers.

Making these crackers is quick and fun. I have trouble keeping them on hand because they are so popular. You will need sourdough starter but if you have gotten this far, I am guessing you may have some already. A quick whirl around Google shows a lot of recipes for these type of crackers and I think most of them are using King Arthur Flour's recipe. I am using the recipe too with of course a personal spin. I eliminate the salt from the dough because I like the effect that sprinkling the kosher salt on top before baking the crackers gives to the texture and flavor. Having the salt in the dough and again on top made them a little too salty. Also, I used some herbs that I bought in the Laurentian Mountains while vacationing in  Montreal. If you do not have access to these wonderful organic melange of herbs, use whatever you fancy. The reason I used mine is because it was a mixture of lemon peel, thyme, garlic and a little salt. I like to serve these crackers with smoked salmon pate and the herb/spice blend is perfect. Click here for the information about the company and area in case you are interested. If you are nearby, head over to St. Sauveur and visit one of the sweetest little ladies who will not pass judgement on your lacking french skills but talk to you like a neighbor over the fence.
Below is the cracker recipe and then Smoked Salmon Pate recipe. I am thinking you will make a personal twist to the recipe so let me know what you have substituted. I am always amazed by a cook's creativity.

Here is the adapted recipe from King Arthur Flour

Sourdough Crackers

1 cup Sourdough Starter
1 cup all-purpose flour
1/4 cup unsalted butter
1 tablespoon mixed herbs, dried
2 tablespoons olive oil
1 tablespoon kosher salt

Mix all the ingredients together in a Kitchen Aid mixing bowl with the dough hook on Speed 2 for about 5 minutes or until it forms a soft smooth dough. If mixing by hand, this should take about ten minutes. And after that, put a Kitchen Aid on your birthday wish list.

Wrap the dough in plastic wrap and chill for about 30 minutes and up to 2 days. 

Preheat the oven to 400 degrees Fahrenheit.
Remove the dough from the fridge. Cut in half and roll each half to about 1/16th inch thickness. Brush with olive oil and sprinkle with kosher salt. Prick with a fork all over. 

Using a pizza cutter or pastry wheel, cut the dough into strips about 1-inch wide, then across into 1-inch squares. Note the width of a ruler is about an inch so I just trace my ruler. You can cut any shape you please but make sure all the shapes are about the same size for even cooking.

Bake the crackers for about 20 minutes. After about 10 minutes of cooking, rotate the pan 180 degrees to promote even baking. Remove from oven and transfer crackers to a wire rack to cool.
Mis en Place
Store in airtight bag. 
Make sure all the ingredients are room temperature for best mixing


Cut any shape you want but try to keep the same size so they cook evenly


Smoked Salmon Pate

4 ounces smoked salmon
8 ounces cream cheese
2 tablespoons heavy cream
1 tablespoon lemon juice
1 tablespoon chives, chopped
salt and pepper, to taste
Put all ingredients in a food processor and pulse till combined. Taste for seasoning. Serve chilled.
Yes! It is that easy. And it is good on the morning toast too.

Good Gosh, I sound like a King Arthur groupie...wait a minute, I am!!! I went there on the way to and from Montreal and they crowned me their Queen(in my dreams)


Friday, June 12, 2015

Cherry Cheddar Muffins


Here in New England, it is strawberry season. I cannot go to the farmers market without being dazzled by these plump,still slightly stemmed, beauties. So, why am I cooking with cherries?I am also charmed by cherries(sorry, could not resist) and their season is short as well. When I saw some organic cherries in the market that did not break the bank, I took a strawberry break. 

Additionally, I started getting emails and coupons from Cabot Creamery in Vermont. I had gone on a field trip there years ago when I was a culinary student in Vermont and remembered it fondly. What would happen if I made something with cherries and cheddar...I just loved the way the two rolled off the tongue. I felt like a quick bread would be the best course to take. Google did not help much. Then looking through Cabot's recipes, I saw apple cheddar muffins that seemed quick and easy. I thought this time saver would assist me because I still had to pit all those cherries. I have a cherry pitter , yes, I think it is a necessity even if the cherry season is short. The cherry pitter works equally well for olives which are always in season at my house. One note about pitting. Go ahead and pit all your cherries. I did about a pound and stored the rest for snacking and oatmeal. After about three days, they were gone but they looked and tasted fine while they hung around the fridge.

I sipped a bit of Evodia Old Vine Grenache  while liberating the pits from the cherries. If you have not tasted it, Evodia is a Spanish red wine that has tastes of cherry to it. It is a great sipping wine.The ingredients come together easily. Be sure to incorporate the cherries throughout. I was not as careful and in a few of the muffins,there were pockets of cherries and then dead zones of nothing. They still tasted yummy but I was eating in a really weird way so as to get bites of cherry in every bit and I am sure I was not showing very good manners at all. The muffins are not very sweet  so they would even be good for cocktails or teatime.
The recipe makes 12 nice sized muffins. They are best served warm. If you don't eat all twelve at once and believe me I was tempted, reheat them a bit either in the oven or microwave a few seconds. The heat brings them back to life. And here is the good news that might get you pitting cherries, each muffin is less than 200 calories!

    
CHERRY CHEDDAR MUFFINS
2 cups all-purpose flour
2 tablespoons sugar
1 tablespoon baking powder
1/2 teaspoon salt
1 cup cherries, fresh, pitted
1 cup grated cheddar cheese, use sharp or extra sharp cheese
2 large eggs
1 cup milk
1/4 cup unsalted butter, melted
1. Preheat the oven to 400 degrees. Grease a 12-cavity muffin pan. Make sure all ingredients except melted butter are at room temperature before proceeding

2. In a mixing bowl, stir together the flour, sugar, baking powder and salt. Add the cherries and cheese.

3. cheese another bowl,whisk the eggs lightly. Whisk in milk and butter. Make a well in the center of the dry ingredients; add the milk mixture and gently stir together until just combined. 

4. Divide the batter among the muffin cups. Bake for about 25 minutes or until the muffins feel firm when lightly pressed on the top.

Yield: 12 muffins
              Recipe adapted from a Cabot Cheese Co. Recipe

Mis en Place

Dry vs. Wet

Stir just to combine or they will be tough muffins!

Perfect for a dozen


I know! You are looking for your cherry pitter now.
Go for it!


Friday, March 27, 2015

Daring Bakers' Challenge March 2015: Tarte Tatin

Welcome to March in New England...
Come on in and see what is cooking.


This month's daring Bakers' Challenge is a classic. For the March Daring Bakers’ Challenge, Korena from Korena in the Kitchen taught us that some treats are best enjoyed upside down. She challenged us to make a tarte tatin from scratch.
The last time I made a tarte tatin was in culinary school about a thousand years ago. I admit that I have become lazy with puff pastry and buy it when I need it. I justify my laziness by buying really good quality pastry,  Dufours,  and saying probably correctly that it is better than any I could make. But here is Korena daring us to make it from scratch and giving an "easy to use" recipe.

I loved the rough puff pastry recipe and it will be a keeper. I had some definite challenges with the rest of the recipe. For the recipe that we were given, Click here

I started by making a Pear Tarte Tatin. I used the recipe and had trouble right off the bat with the sugar/butter mixture crystallizing. I also did not cook the pastry long enough so the dessert was a bit doughy.

Pear Tarte Tatin
I did a bit of reading. I went back to my basic knowledge of how to work puff pastry and I saw this hilarious video of Julia Child making a Tarte Tatin. Click here if you want to see this video. She flips the tarte at 18:00 minutes and that is where your confidence will balloon. She is classic like the tarte tatin and a testament to life's beautiful imperfections.Watching her flip that tart onto the plate made me laugh out loud. I am a huge Julia lover mainly for her enthusiasm and her attitude towards fearless cooking. I was laughing with love. So, I went back for another try. I decided to stay classic this time. There is a reason the tart is done with apples. They have flavor and firmness. I used the puff pastry recipe from Korena. I just love this puff pastry and may never buy Dufours again. The only change I made was with the butter. I grated the butter and then put it in the freezer for 10 minutes before mixing. I find this method makes the mixture stay chilled and I don't have to work the mixture as much because the butter is already in small pieces.


For the filling, I made a few changes. I added 2 tablespoons of water to the cup
of sugar in the saucepan and cooked that on low heat until the sugar dissolved.


Then I increased the heat to high and cooked the sugar mixture without stirring until it became a light amber color, swirling the pan to evenly distribute the caramel color.
Then I lowered the heat to medium and added the butter that I had cut into tablespoon portions and let that melt, stirring all the while with a wire whip.


I add the apples and cooked according to Korena's instructions.


I let the mixture sit off the heat for about ten minutes while I rolled out the puff pastry and preheated the oven.


 I heated the oven to 425 degrees Fahrenheit which is different from the recipe. I have always cooked puff pastry at a high temperature to keep the butter from melting and weighing down the pastry before the trapped air pockets in the pastry have a chance to expand. I covered the apples with the pastry, cut the air vents and popped that pan in the oven. After fifteen minutes of cooking, I lowered the heat to 375 degrees and continued to bake it for another fifteen minutes. The pastry got a beautiful deep golden color and a crisp puffy texture. I was feeling good about my second try.


 I  waited for the bubbling caramel to subside and then flipped it onto the plate.


 It was really pretty.


 I served the tart with a scoop of candied ginger ice cream and I was transported to dessert heaven. 


My husband ate half the tart and I am sure he was not just being kind...he loved it. I did not mention the caloric content because he looked so happy. 
Tarte Tatin is a challenge. I hope you will try it but my advice is not to try it on the fly, that is, read about it, look at pictures and give yourself plenty of time. The classic dishes are beautiful, thoughtful  concoctions that will, I guarantee, give you a sense of place in the world. 

Looking for adventure? Make a Tarte Tatin. Thank you Korena!