Showing posts with label gumpaste flowers. Show all posts

Wednesday, January 27, 2016

THE DARING KITCHEN JANUARY, 2016 CHALLENGE: CAKE DESIGNING


Daring Bakers is evolving and now will be called The Daring Kitchen. The main change is that the challenges will extend out side the scope of baking. I am very excited about this change and look forward to lots of fun in the kitchen with my daring friends. This month, Shillpa Bhaambri from Cakeline the Journey, a Baker and Cake designer living in Mumbai, India is hosting the challenge. Her challenge is a cake design challenge. Here is the link to her challenge with lots of great ideas and recipes.

Here is the exciting part of Shillpa's challenge for me. I returned home yesterday from a course with Nicholas Lodge of International Sugar Art Collection in Atlanta GA. I took a PME certification course in Rolled Fondant Techniques. This visit was not my first to the school. I have been going every year for the last 18 years. I love the school and I always learn new techniques. I could go on and on about how wonderful the experience is there but I think you have to see for yourself. People  from all over the world come to learn from Nick and I have made some great friends at the school.

For the PME certification class, we worked with fondant, gumpaste and a combination of the two media. Having taken a lot of gumpaste classes with Nick, I have memorized his recipe. I find it very easy to make. Shillpa has the recipe in her challenge so hit that link above if you want to make it.
For fondant, I always buy it. I am not lazy...ok I am a little lazy. If I thought I could make fondant as nice as some of the commercial brands I use, then I would definitely make it. But I am loving the Renshaw brand of fondant and find it economical as well as delicious and easy to use.

Modeling chocolate aka candy clay and I have a love/hate relationship. I have moderate success in making it. I find it expensive to buy BUT when all the stars align, it is my favorite sugar medium to use. Modeling chocolate tastes like chocolate. Yum! Also, I can make decorations and not have to wait for them to dry as I would for fondant or gumpaste. Once they cool they are ready. Great news for the last minute, sort of lazy decorator that I am from time to time.

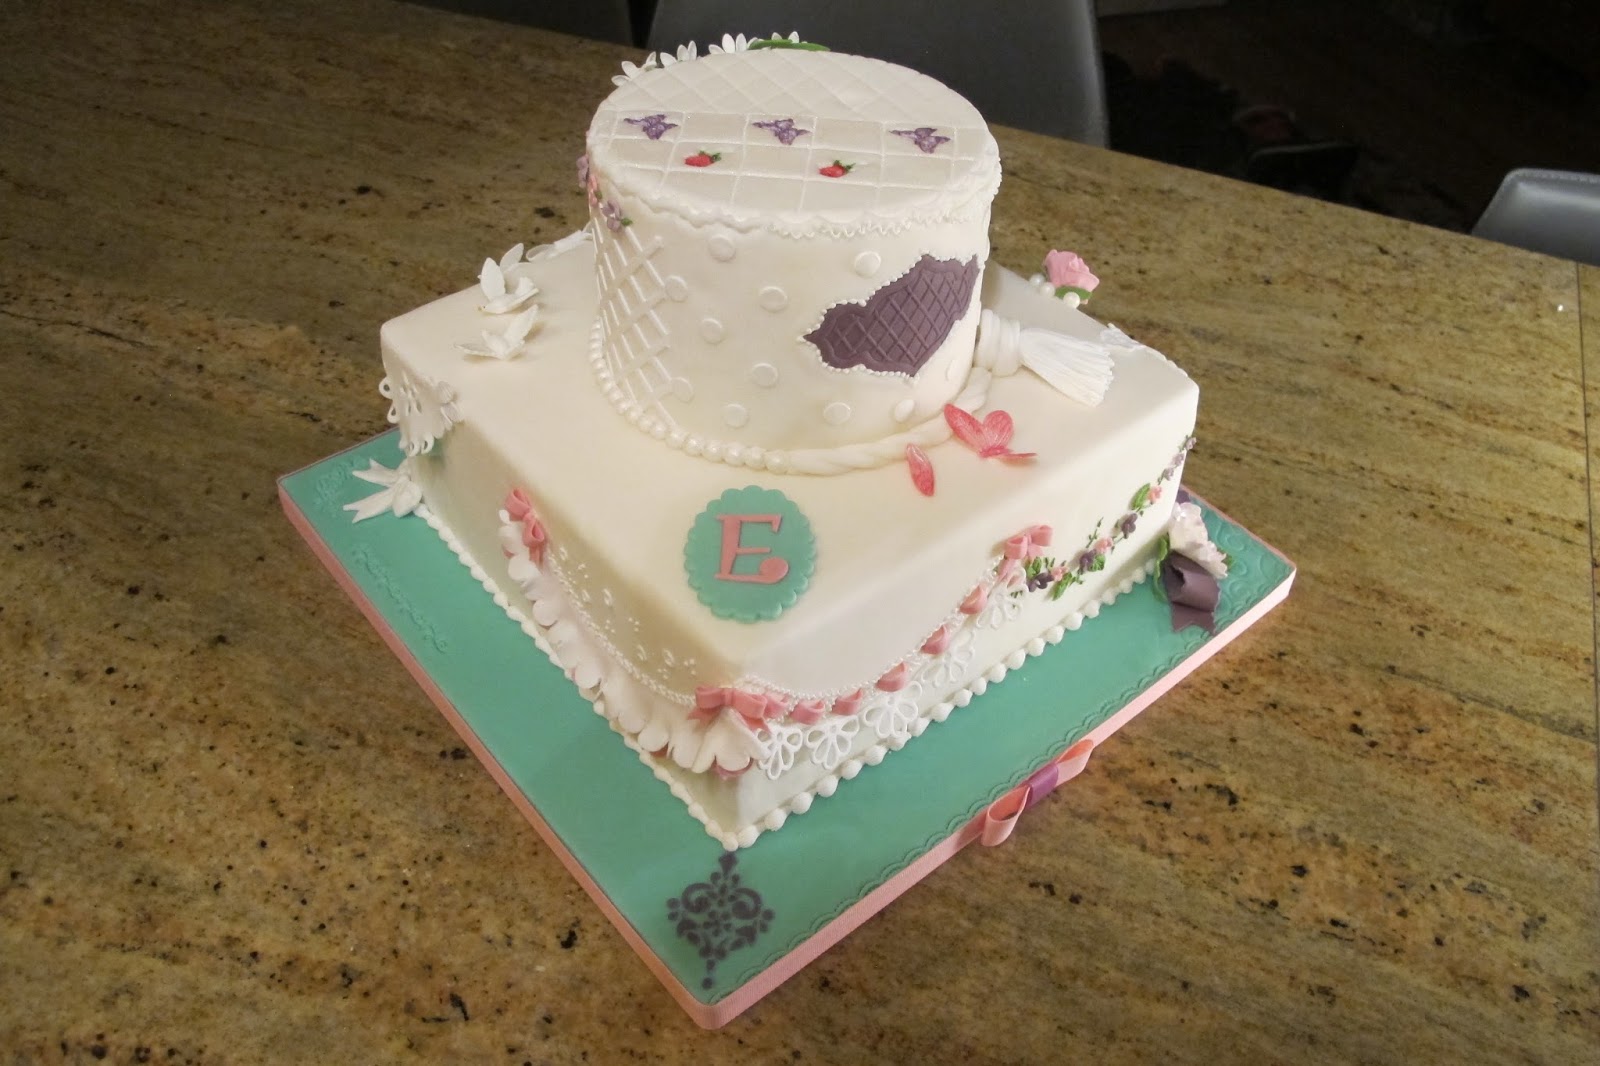
For this blog, I will talk about the cake that I did in class last week. The cake is a dummy cake which means that the parts that looks like cake are Styrofoam. I can keep this forever or until I turn my back and someone pokes on it breaking the decorations. Speaking of which, I would like to send nasty glares to the Atlanta TSA who somehow managed to start my cake, in its box, right side up through the scanner and return it to me upside down. There was minimal damage, thankfully, due to the fantastic packing job at I.S.A.C.
Below are some pictures the cake project. Hopefully, I will meet some of you in class someday. I am already saving my money for the next visit.


Gumpaste decorations drying in foam

As a sampler cake, we did many designs all over the cake.

Lovebirds?

Two kinds of draping- above and below


His talent is amazing. His generosity and kindness is  fantastic!

Monday, July 15, 2013

Gumpaste Iris Tutorial


I have uploaded a tutorial for making a gumpaste Dutch Iris. You can locate the video through this link:
Gumpaste Iris Part 1
and
Gumpaste Iris: Part 2

Here is the template for the Iris cutter if you do not have access to one of my cutter suggestions. Print the template on heavy card stock paper, cut it out and use it cut your gumpaste petals.Most of the tools that I used can be found at Nicholas Lodge or  Global Sugar Art.

Tools for Making the Gumpaste Iris

Artist Brushes for dusting – I like the nail art brush sets
Cel Board by CelCakes
Cel former Set #1 by CelCakes or Wilton flower former tray
Cel pad by CelCakes
Cel Shredderby CelCakes
Dusting colors: Canary yellow, Prairie Green, Royal Purple, Lilac, Cinnamon
Dusting pouch
Floral Tape
Floral Tape – I used light green
Florist wire: 22g., 24g. 26g.
Gel colors: brown and lemon yellow
Gum glue adhesive 
Iris Cutters – I used Framar cutters
Jem petal veiner
Jem Veiner Set #1
Long flat tweezers
Medium Cel pin by Nicholas Lodge
Petal pad by CelCakes
Practice board
Rolling pin
Thick foam and cosmetic sponge for cupping
Vegetable shortening
White gumpaste

Wilton Confectioners Tool Kit: ball tool, dog bone tool, pencil tool, 

Written Instructions are below.


Dutch Iris Instructions
*      Roll paste over three ridges of a grooved board to about 1/16th inch, remove paste and flip over.
*      Cut three of each Iris shape (standard petal, secondary fall petal, fall petal)
*      Store the petals under protective flap to prevent paste from drying out.

Fall Petals:
*      Insert a moistened 26 gauge wire about 1 inch into the base of the petal and pinch slightly at the base.
*      Using a cosmetic sponge, press the petal onto a veiner of choice, grooved side first, then the flat side.
*      On foam pad, using a ball tool, soften the petal, grooved side upwards, around the top edge of the petal almost down to the neck of the petal.
*      Using a petal veining tool (porcelain tool) or pencil tool, gently fold the base (neck) around the tool to form a hollow area.
*      Dry in the Styrofoam large Cel former or on a flower forming try with the flat side upwards.
*      Repeat with remaining two fall petals.

Secondary Fall Petals:
*      Insert a moistened 26 gauge wire about 1 inch into the base of the petal and pinch slightly at base to secure.
*      Using a cosmetic sponge, press the petal onto a veiner of choice, flat side first then grooved side.
*      With the dog bone tool on a foam pad, soften the two end pieces (rabbit ears)
*      Using flat tweezers create a deep ridge on in the center of the grooved side of the petal.
*      Again using the dog bone tool, Cup the two end pieces (rabbit ears) on the cosmetic sponge
*      Using the petal veiner tool (porcelain tool or a pencil tool, gently mold the base of the petal to form a hollow area.
*      Arrange the petal on top of a fall petal in the Cel former or dry on a flower former tray with the grooved side downwards. If using the Cel former, you may need to prop up the end of the petals with a bit of tissue.
*      Repeat with the two remaining secondary fall petals.

Standard Petals:
*      Insert a moistened 26 gauge wire about a third of the way into the base of the petal.
*      Using a cosmetic sponge, press the petal onto a veiner of choice grooved side first, then the flat side.
*      Using a ball tool on a foam pad, soften the petal edges slightly, using light pressure, so as not to create a frill. Using a ball tool on the cosmetic sponge, cup the end of the petal on the grooved side. Using the petal veiner (porcelain tool) or pencil tool, gently mold the base on the grooved side to form a hollow area.
*      Repeat with the remaining two standard petals.


Leaves:
*      Roll light green paste over three ridges of a grooved board, remove paste and flip over. Cut three leaves using a lily leaf cutter or other long slender leaf cutter. Insert a moistened 24 gauge wire about halfway into the leaf at the base and pinch at the base to secure.
*      Using a cosmetic sponge, press the leaf onto a cornhusk veiner (may also use a lily leaf or lily of the valley leaf veiner).
*      Using a ball tool on a foam pad, soften the leaf edge with grooved side upwards.
*      Using a veining tool on soft thick foam, slide the tool down the center of the leaf starting at leaf base and ending at leaf tip to create a center vein. Dry the leaf on top of crumpled foil. Tape the leaf at the base with ½ width floral tape. Dust the leaf with Prairie green dusting powder over large sections of leaf. Add accents of a darker green dusting powder in small sections if desired.

Dusting the Petals:
Use your creative flair for this please …here is what I did:
*      Fall Petals: Prairie Green petal dust in center of petal back and at base of petal front. Lilac petal dust on the petal edges and all over the back of the petal. Royal Purple petal dust for inner parts of the front of the petal brushed to form an arc shape and blended towards petal edge.
*      Secondary petal: Prairie green at the base of the petal. Royal Purple intensely brushed on groove of petal, center of petal back and gently blended towards petal edge. A quick brush with the lilac brush at petal edges.
*      Standard Petal: Brush front and back of petal with Lilac dusting powder. Brush petal edges in a few areas with the Royal Purple dusting powder.

To Assemble:
*      Tape all the petals with ½ width floral tape. Tape a Secondary fall petal to each fall petal so that the secondary fall petal rests atop the fall petal using ½ width floral tape.
*      Tape, using full width floral tape, the three Standard petals at the petals base to a 22 gauge wire with floral tape. The grooved side of the petals should face each other.
*      Add a Secondary fall/fall petal combination to the Standard petals, situating them so they rest in between each standard petal (see video for details).
*      Add two more 22 gauge wires at the base of the assembled petals and tape the length of the wires adding in leaves as desired.
*      Steam the Iris to set the color and give the flowers an attractive sheen.

Please email if you have any questions.  I hope you have fun making this flower.

Evelyn