Showing posts with label pie. Show all posts

Friday, November 27, 2015

THE DARING BAKERS’ NOVEMBER, 2015 CHALLENGE: CHEESE CAKE CRUMBLE PIE


Today is the day after Thanksgiving. While I love Thanksgiving  with the gathering of friends sharing lots of food and fun, my most thankful feeling is that it is over. I cook too much. I eat too much and I make a monumental mess. The mess is not limited to the kitchen where thankfully my dear friends help straighten my mess. I will be sorting through piles of  mess throughout the house for a week.

Today is also Black Friday where everyone goes shopping and stands in line to save a penny. Not me!  I am waiting for Cyber Monday although I think Cyber Monday actually started last Thursday and Black Friday started last August. I find it hard to keep up as every business seems to have its particular spin on the dates and deals.
So what has this got to do with this month's challenge?? Umm nothing really, I am just ranting.

For the month of November Krista & Nicole of “Two Cups of Sugar.”challenged us to make our own version of cheesecake crumble pie.
This month's challenges was very interesting to me and I made the pie  early in the month. I did not make it for Thanksgiving because I experimented a bit, as challenged by Krista and Nicole, and found a cheesecake pie that worked a little better for me .


Here is the link to their challenge. The last recipe in the challenge, BLT cheesecake Pie,  is now on my bucket list.  I need to recover from cream cheese overload for a little while before I tackle the recipe so I am keeping the recipe on file for the rapturous time when tomatoes are in season here again.
Making the cheesecake pies is fairly easy. I used my usual pie crust recipe which works well for me.


Add caption


The filling recipe is really nice and there were no unsightly lumps of cream cheese floating in the batter. Yes, that sort of thing happens if I do not coddle and hover over my cheesecake batter.


 I used raspberries and blackberries and they seemed most appropriate for a crumble pie which is typically very sweet. The lemon zest in the recipe also blended nicely with the fruit. The recipe for the topping made a lot and seemed drier than the the challenge picture. I covered the pie as much as I thought useful and
kept the rest for another project. It should freeze well.

The pie came out really nice. The baking method is to start with a high heat, reduce the heat after 10 minutes and baking for an hour. Then, turn the heat off and  leave in the oven with the door ajar. for 30 minutes.


 I think that I should have turned the heat off in the oven  sooner. I think a little less cooking would have given creamier filling results though the longer cooking time created a nice pie crust and a lovely golden topping. The taste was sweet, fruity and very rich. Small slices of pie  are manageable which is great is you are serving a crowd.

The second pie recipe is Pecan Cheesecake Pie that I got from a Southern Living magazine and combines my two favorite desserts, pecan pie and cheesecake. There is a layer of cheesecake and a layer of pecan pie that magically transforms into a plate of pure joy. This pie has a couple of separate elements that at first sight might seem cumbersome but whip together easily.  I did serve this pie(along with a lot of other desserts) for Thanksgiving. This is one recipe I will make again next year.
When making the Pecan Cheesecake Pie, be sure to use a deep dish pie pan or else there won't be enough room for both fillings. I made that mistake on my first try with the pie. If you don't have a deep dish pan, then I recommend that you use all the cream cheese mixture, top with the pecans and  fill to the top with the corn/syrup egg mixture. You will have some leftover corn syrup/egg mixture but the pie will still be really good. I believe this is best served slightly chilled so I advise removing the pie from the fridge about an hour before serving. Unlike most cheesecakey desserts, this pie will keep well in the fridge for a few days or until you have sneaked enough "slivers" while cleaning up the Thanksgiving mess. Not that I would know anything about that!
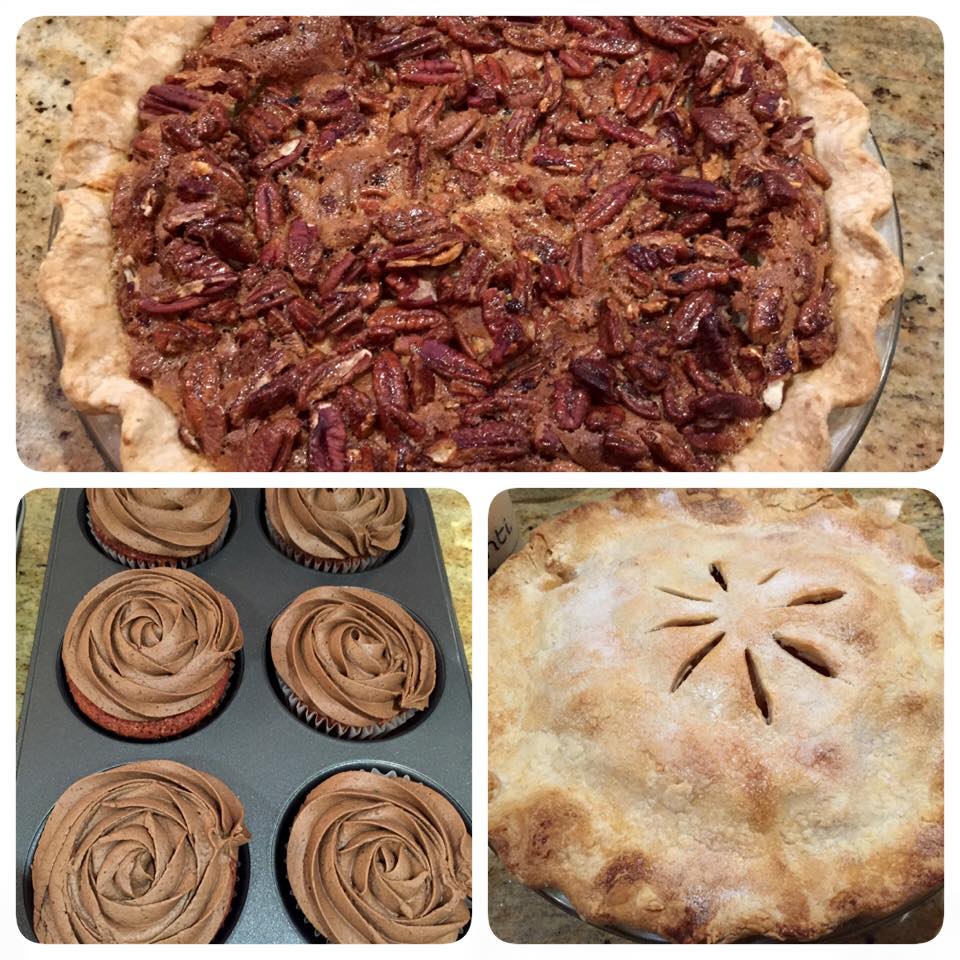
Pecan cheesecake pie is top picture and  top dessert dog over red velvet cupcakes and apple pie!

Sunday, October 27, 2013

October Daring Bakers' Challenge - Savory Pot Pies


I was very excited to have pot pie as our challenge this month. I just love pot pies but my sweet husband does not love them. Neither one of us grew up eating pot pies and took very different directions with the concept at adulthood. He veered towards the "I don't know what's in there and I am not gonna eat it" and I veered towards the "I love everything all mixed up in there and there's pastry everywhere...yum." With such different viewpoints, I found that I just did not make them often. BUT now I had a good reason and I was going to make the most of it.
Hannah of Rise and Shine was our October 2013 Daring Bakers’ hostess and she challenged us to bake our own double crusted savory pot pies. Using any from-scratch crust and filling we choose, We were allowed to get completely creative with our recipe, showing off the savory flavors and fillings from our own home or region.

 We could basically do anything we wanted as long as there was a top and bottom crust to it. With all that freedom, I opted for the most traditional type of pot pie, turkey pot pie. Because to me, a pot pie should coincide with a refrigerator cleansing opportunity. I found bits and bobs of veggies leftover from farmers market excursions. Pieces of vegetables  that were not enough to make it on their own for a side dish but enough to add with others for a nice medley. 

I have a'tried and true' pie crust that I use for everything pie related. From quiche to banana cream pie, I use this recipe and tweak it a bit for the preparation. I located some fresh thyme to use in the pastry from under the massive amount of falling leaves that are everywhere here in New England this time of year.

For the filling, I started with  a turkey stock with a couple of turkey thighs and lots of onion along with some celery leaves and carrots.
I also used the pot pie as an excuse to get a nice bottle of sherry and add it to the pot pie sauce for flavor. I did have to taste test it and can report that a good quality sherry is a beautiful thing.
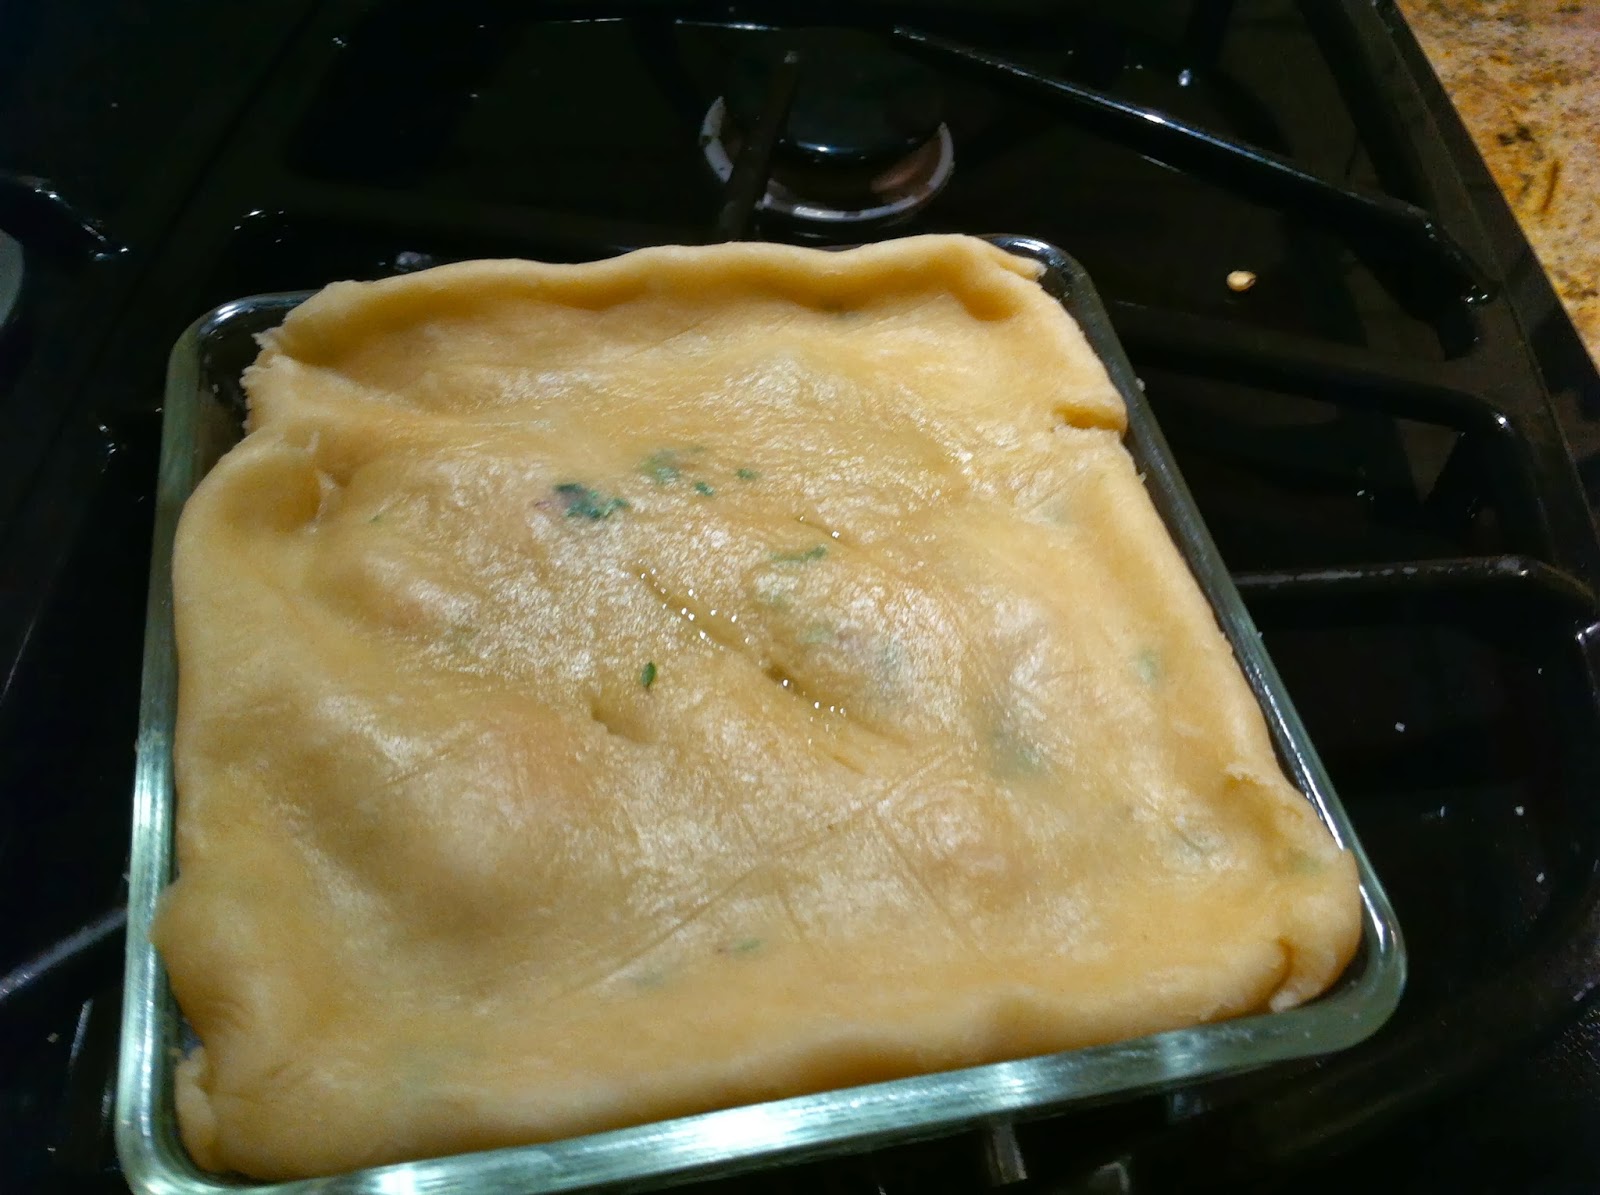
I made the pot pie in some square glass casserole dishes that I bough years ago because they were cute. I was so thrilled to be able to use them as a personal pot pie vessel.
As predicted, my hubbie ate a bit of the pot pie and pushed the rest of it around the plate while inquiring about any ice cream in the freezer...sigh... I did not win him over this time . I loved it but the personal pie dish was a little big for me and I saved a healthy portion for next days lunch.
As winter quickly approaches, I think I will attempt the pot pie again. I am thinking a lobster pie for next time...My husband is a huge lobster lover...that might do the trick.


Pastry :
2 cups flour
2/3 cup vegetable shortening
6 tablespoons ice water
1 teaspoon salt
1 teaspoon fresh thyme, chopped
Filling:
2 tablespoons olive oil
1/2 onion, chopped
1 stalk celery, chopped
1/4 green pepper, chopped
1/2 yellow pepper, chopped
1 carrot, chopped
2 tablespoons butter
2 tablespoons flour
1/4 cup sherry
1 1/2 cups turkey stock, or chicken stock
2 cups cooked turkey, chopped

Directions:

Filling:
Heat the olive oil in a medium skillet over medium high heat. Add the onion, celery, peppers and saute for about five minutes, stirring periodically.


Add the butter and garlic. When the butter has melted and the garlic has become aromatic, add the flour. Cook the flour stirring constantly for a few minutes. Add the sherry to deglaze the pan.
Add the stock slowly , stirring constantly. Reduce the heat to medium low and cook for about 20 minutes . Season with salt and pepper. Add the chopped turkey.
Set filling aside to cool slightly before adding to pastry.

Pastry:
Pre-heat the oven to 450 degrees.                                                                                                                                                                                                                                                                                                                                                                                               Mix together the flour and salt. Add the shortening and crumble with fingers til almost mixed. Add in the thyme.
Add the water and lightly mix together to form a loose dough. Turn out onto a flour dusted surface and knead the dough lightly. Do not over work the dough. 
 Roll one quarter of the dough between two sheets of wax paper to about 1/16th inch thickness. Line the dish with the dough. 


Trim the edges  along the top with a sharp knife.
 Repeat for a second dish. 
Place a sheet of foil on top of the dough in each dish. 
Add some baking beans to weight the foil. Bake the
pastry for about 8 minutes.


Remove from oven and remove foil with baking beans. Allow to cool for several minutes. Brush bottom pastry with whole grain mustard. 

Divide the filling among the two dishes. 


Split the remaining pastry into two parts and roll each one between sheets of wax paper to less than 1/16th inch thickness. top each filled dish with pastry and fold in the edges to seal. Using a sharp knife, make a couple of slits in the top pastry to create air vents.


Place dishes in 450 oven and immediately reduce the temperature to 350 degrees. Cook until top pastry is golden brown, about 25 minutes. Cool slightly and serve.


Thanks Hannah!!


Saturday, July 27, 2013

July Daring Bakers' Challenge - Choose your own Adventure


In a "celebration" of past Daring Baker and Daring Cook challenges, Lisa challenged all of us to search through the Daring Kitchen archives and pick any one we'd like! The REAL challenge was picking which delicious recipe(s) to try!
I got very excited with this challenge because I wanted to make pie for last months's challenge hosted by Rachael from pizzarossa but was unable to participate. We were off on a vacation adventure and I could not figure out how to blog from an IPAD. So, I made Peach Pie for this month's challenge and it is a happy pie time over here. The peaches were calling my name at the store. I smelled their sweet scent before I even saw them. I practiced the technique of putting them in boiling water for about 30 seconds before ice water shocking them. The skins just slipped away from the pulp for the most part. I had a couple of naughty ones that required manual peeling   I used the recommended crust recipe that our June host specified. I have a pie crust recipe that I have used for years but I actually prefer the recipe given for fruit pies.

Below is the recipe. Hurry to the market if you are in the summer side of the world and get some juicy peaches. If you are not, use what is in season at your spot in the world and bake yourself up a pie using this crust. You know you've been" pie"ning for one, hehehe.


Peach Pie

Crust:
2/3 cup (160 ml) (150 gm) (5-1/3 oz) unsalted butter 
1¾ cups (420 ml) (250 gm) (8-2/3 oz) all-purpose flour 
2 teaspoon (10 ml) (10 gm) (1/3 oz) sugar 
1/4 teaspoon (1½ gm) salt 
3-8 tablespoons (45-120 ml) cold water 

1 – 1½ kg (2¼ to 3-1/3 pounds) peaches (depending on the depth of your pie dish) 
1/2 cup (120 ml) (200 gm)4 oz) light brown sugar, lightly packed (more or less to taste) 
1/2 tsp ground cinnamon 
1/2 teaspoon grated fresh ginger
1 Tablespoon flour
1 - 2 teaspoons (5-10 ml) (5-10 gm) white sugar for sprinkling (optional)

Filling:
1. Weigh/measure out the correct amount of butter, wrap it in foil and freeze it for at least 30 minutes. 
2. Sift the flour, sugar and salt into a large bowl. 
3. Using the large holes on a box grater, grate the frozen butter directly over the flour in the 
bowl. Hold the butter by the foil to avoid warming it up too much and work as quickly as 
possible.  Using a table fork, toss the grated butter in the flour until it's all coated. 
 Alternatively, finely chop the butter and rub in with your fingertips, working quickly to avoid 
 warming it. This is best left to those lucky folk with cool hands! 
4. Sprinkle 3 tablespoons (45 ml) of cold water over the mixture and mix together with the fork. 
Add more water, spoon by spoon, as needed - it will depend on temperature, humidity and a 
million other factors, but the finished dough should be moist and starting to come together, 
but not wet. I used 7 tablespoons (315 ml). Use your fingertips to test if it's sticking together. 
5. Finish by using your hands to quickly bring the dough together into a ball. Just press, don't 
knead. 
6. Wrap dough in plastic and refrigerate for at least 30 minutes. 


1. Preheat oven to hot 220°C/425°F/gas mark 7 . Lightly grease a deep 9"/24cm ceramic or metal pie dish. Note that a dish this size results in quite a thin top crust - if you want a sturdier top which cuts more cleanly, then you should use a smaller dish so you don't need to roll it out so thinly. I like to use a glass pie plate so I can monitor the cooking of the bottom crust.
2. Take 2/3 of the pastry dough (I weighed my dough and 2/3 was about 12oz/340g) and roll out to fit pie dish, right up to the rim. Line the pie dish with it, prick all over the bottom with a fork and set aside.


3. Peel, pit  and chop the peaches into large chunks and place in a bowl. How tightly you can pack them into the pie depends on how thinly they are sliced - I like them chunky
4. Sprinkle the brown sugar , spice and flour over the peaches and toss well to coat. 


5. Pack the peaches tightly into the lined pie dish. The filling can come up above the rim of the dish in a mound. 


6. Roll out the remaining pastry dough to fit over the peaches. 
7. With a wet finger, moisten the edge of the pastry in the dish. Place the dough lid on the pie and press the edges together. Trim the edges as necessary and crimp the seam closed with your fingers or the back of a fork. 
8. With a pair of kitchen scissors, cut three vents in the top of the dough. You can either cut leaf shaped vents and use the pieces you removed to fashion decorative leaves, or you can cut straight vents and use any pastry trimmings to fashion decorations as desired. Moisten the back of the decorations with a wet finger and gently press onto the top of the pie. 
9. Glaze the top of the pie with a beaten egg or milk, then sprinkle the top with a little white sugar. 
10. Place pie dish on a baking sheet and put it into the center of the oven. Bake for 20 minutes, then reduce heat to moderate 180°C/350°F/gas mark 4 and bake for a further 30 minutes. The top should be light golden brown. The bottom should be golden brown as well.