Thursday, December 15, 2011

Cake Pops Snowmen


I have had cake pops on my "to do" again list because I wanted to experiment with the chocolate consistency and see if I could achieve an easier dip to coat the pops.
I decided to make some snowmen and I used the Pops!Sweets on a Stick  book  as a guide and inspiration.
Making the cake for the pops, I use a super simple batter adapted from the 500 Cupcakes book. It makes a really dense cake which is just what I need for making pops. You can substitute your favorite pound cake recipe for similar results.  A  half recipe listed below makes about 14 snowmen.

Here is the recipe  for the cake:
4 ounces unsalted butter, softened
1/2 cup sugar
2  eggs
1 teaspoons vanilla extract
1 cup cake flour
1 teaspoon baking powder
1/2 teaspoon salt
1/4 cup buttermilk
1.Put all ingredients in a mixing bowl. With the paddle attachment or beaters, mix on low to incorporate. Then beat on medium speed until mixture is smooth and light colored, about 2 to 3 minutes.
2. Put into pans and bake at 350 degrees until lightly browned and center spring back. You may also use the toothpick test of inserting a toothpick into the center and checking to until a few loose crumbs attach when removed.
3. Remove cakes from oven when done and cool in pan for ten minutes. Turn onto rack and cool completely. Put cake into a large bowl and crumble into tiny bits with your fingers. Set aside.


For the icing, I made a small batch and had more than enough for mixing into the pops and decorating on top. Here is the recipe I used:
4 ounces(1 stick) unsalted butter
2 cups confectioners sugar
1 teaspoon vanilla extract
2 tablespoons heavy cream
Beat all ingredients together in a medium bowl on low speed to incorporate and then medium speed for about 3 to 4 minutes until icing is smooth and creamy. Use immediately or keep covered and re-whip slightly to restore creaminess before use.
 Depending on your climate(warmer may need less liquid and cooler may need more), you want a consistency that is spreadable, about the consistency of softened butter.


Mix together the cake crumbs and 1/2 to 3/4 cup of the icing. Now you have to mix this with your hands so take off those rings and bring out your best "mud pie" behavior. I find that if you really mush up the mixture and blend, it will take on almost a cookie dough appearance and feel. This is an important part. You do not want any large cake crumbs in the mix at this point because that will cause your pops to crumble and fall apart later.


 Roll your mixture into balls. I used 1 1/2 inch  for the snowman body and 1 inch balls for snowman heads. Set the balls  on parchment  or wax paper  lined cookie sheet with raised sides and chill for at least 30 minutes. I am impatient so I chilled for 15 in the freezer. Longer chilling is better!
 Dip cookie sticks (I used 6-inch sticks)  in melted white chocolate or candy melts and then insert about a 1/4 inch into the pop. I found that the deeper I inserted the stick, the less stable the pop was for dipping. It needs to be deep enough to hold the pop but not deep enough to crack the pop. The pops that I did push the the stick in to deeply cracked later.  Allow the pops to chill for at least 20 minutes. During pop production, try to keep the pops chilled when not working on them.


I used Wilton White Candy Melts for dipping the pops. I find that I have to add oil to thin the coating enough for dipping.  I melted the wafers first and then added the oil (canola for me-just don't use a fragrant oil like sesame or olive) a tablespoon at a time to reach a smooth dipping consistency. You can use a pop to experiment. There is a fine line between dipping to coat smoothly versus dipping and having all the chocolate slide right off the pop. If you cross that line, add some more candy melts and adjust till you feel you have a nice coating. You can also use chocolate but I am used to the melts and like that I can get them already colored.

I lined a Styrofoam block with foil to catch any drips and sprayed a wire rack with food release spray  for  the heads. I dipped the bodies first and then used a toothpick to hold the heads and dip them. I dipped some of the heads twice to get a nice even coating. Little imperfections are nice because they give the guys a bit of personality.The melts harden quickly and here in the northeast, I left them on the counter for about 10 minutes and they were solid.Then I dipped the base of the  heads in melted white chocolate(I used the dipping chocolate and it was fine) and attached the heads to the bodies.


I had some pre-colored fondant which made life real easy.I used  the Wilton Ribbon Cutter and Embosser Set,  I cut some rolled fondant into 1/4 inch by 5 inch strips that were 1/8 inch thick. I attached these around the necks for scarves dabbing a little melted chocolate from the tip of a toothpick as glue. If you do not have the set, you can use a ruler and exacto knife (just be careful of the cutting surface-you don't want to cut up your counter). Then I took a 1 inch size ball of fondant, massaged it well with my hands to make it smooth and pliable. I rolled into a smooth ball and then a cone shape altering its droopiness for the hats. I flattened the wide end slightly and , dipped it in melted chocolate and placed on top of the heads.  I used some Wilton neon orange fondant to make little tiny cones for the carrot noses. I made these in different sizes and shapes to give each guy his own look.


I colored some of my reserve buttercream with black icing gel color and put it in a decorating bag with a Wilton #3 tip.  I made dots for eyes and  mouths. I loaded some white icing into another bag with a Wilton #14 tip. Using a zigzag motion, I covered the seam between the hat and head. Then I added a star at the top of the hat to look like a pom.


I let the snowmen sit in the counter for about an hour allowing the icing to crust up a bit and then loaded them into a pop container.

I loved making these pops. They are  great afternoon project. I loved that I could walk away, do other things and come back to it. If the melts hardened,putting them in the microwave a few seconds  put me back in business.
I hope you have a chance to make these!


Let It Snow!

Sunday, November 27, 2011

November Daring Bakers Challenge - Sans Rival


Catherine of Munchie Musings was our November Daring Bakers’ host and she challenged us to make a traditional Filipino dessert – the delicious Sans Rival cake! And for those of us who wanted to try an additional Filipino dessert, Catherine also gave us a bonus recipe for Bibingka which comes from her friend Jun of Jun-blog. Please stay in touch for a December post for the Bibingka.  I am making salted eggs for it and that takes a few weeks.
 
I have made both dacquoise and French Buttercream before. I opted for my Meringue Buttercream recipe for this challenge though because I did not want the dessert to be too rich for my Thanksgiving guests.  I have posted the Meringue Buttercream recipe already so follow the link for it and add 2 ounces of melted bittersweet chocolate after adding all the butter. I used Scharffen Berger chocolate. It is one of my favorites.
 
The dacquoise was very easy to make. The key is to add the sugar slowly and beat it on high til you see those shiny stiff peaks. The recipe advised putting it in cake pans but I used my usual method of drawing circle guides on parchment and filling in with the meringue mixture. It worked fine. The cooking time varied from my previous recipes. I pulled one out for testing at the prescribed time and felt that it was not quite done enough  so I left the others in for about 10 more minutes making the total cooking time about 40 minutes. The layers were nice and crunchy with a little give on the interior. They crisped up a little more as they dried. It was raining buckets that day ( meringues do not like rain as they absorb moisture from the air- a cool clear day is best for making meringues) so I let the meringues rest in a cold oven overnight and they were good to go the next day.
There were a lot of cashews in this recipe. We could not really taste them too much in the dacquoise...just a nice toasty, nutty flavor with a lovely cashew aftertaste. The cashews on the outside felt like overkill and next time, I will put on my thinking cap and add something else. Let me know if you have suggestions!
The overwhelming response to this dessert was, "I didn't think I was going to like it and I loved it!"
Although there were a lot of desserts offered, almost everyone had a second helping of the Sans Rival.
 
Thank so much,Catherine, for sharing your challenge and your culture with us. Our waistlines are a little bigger for it but our horizons are even broader for it.

Sans Rival

Ingredients:
1 cup (240 ml) (225 gm) (8 oz) white granulated sugar
1 teaspoon (5 ml) (3 gm) cream of tartar
¼ cup (60 ml) (20 gm) (2/3 oz) Dutch processed cocoa (optional and not traditional)
2 cups (480 ml) (240 gm) (8½ oz) chopped, toasted cashews - I used half , finely ground for the meringue and half coarsely ground for finishing the the sides of the cake at assembly.


Directions:
1. Preheat oven to moderate 325°F/160°C/gas mark 3.
2.Using an 8-inch cake pan, outline the diameter of the pan in pencil on parchment. Flip the parchment paper over and use as a line guide.


3. In a large clean, dry glass or metal mixing bowl, beat egg whites on medium until foamy (2 mins.). Sprinkle with cream of tartar. Gradually add sugar, a couple of tablespoons at a time, continuing to beat now at high speed until stiff shiny peaks form. (about 7-10 mins.)


4. Mix cocoa powder with the nuts.Fold nut mixture into egg mixture.
5. Divide meringue into four equal parts. Spread onto parchment rounds and spread gently with a metal spatula.


6. Bake in preheated oven for 30 minutes, or until golden brown. Remove the meringue from the baking pans while still hot; allow to cool slightly. Peel off the parchment paper while it is still warm, it is difficult to remove sometimes when they have completely cooled.


Perfectly cooked one on the left and slightly undercooked one on the right


7. When cool, trim edges so that all 4 meringue layers are uniformly shaped. Set aside.

Make Meringue Buttercream! add 2 oz. melted, cooled bittersweet chocolate to buttercream after all butter has been added. Flavor with vanilla extract or other flavoring.


Assembly:
Set bottom meringue on cake board with a dab of butter cream to hold it in place. Spread a thin layer of buttercream and then place another meringue on top. Repeat with a thin layer of buttercream, meringue, thin layer of buttercream, meringue, and finally buttercream the top and sides. Decorate with reserved nuts.


.

Tuesday, November 8, 2011

Romanesco

Romanesco showed up at the farm stand and who can resist this look? Not me!
I thought it was the wildest looking vegetable I had ever seen and would surely shock the family.

Romanesco is compared to cauliflower but it tastes more like broccoli. It has an almost nutty flavor to it.
I steamed the whole head stalk side down as I read online to do and it cooked easily. I made a topping of tomato concasse, chopped garlic and a little olive oil simmered for about 20 minutes and seasoned with salt and pepper. Then I tossed on some fresh basil  I got at the store because our crazy weather has killed off the basil outdoors.


I served this with a little penne that I buttered and shaved some fresh Parmesan on top. It was a light dinner and perfect for leaving room in my tummy for Halloween candy! The boy racked up the chocolate on his neighborhood tour of Halloween duty. He does not like candy so it is up to me to get rid of it!

I have included a link about Romanesco which is supposed to be around through November. I think it would look great on that Thanksgiving table. Maybe I could sculpt some alien looking garnishes to set around it....yeah, maybe I should cut back a little on the sugar.

Thursday, October 27, 2011

October Daring Bakers Challenge - Povitica


Traditional Povitica

The Daring Baker’s October 2011 challenge was Povitica (pronounced po-va-teet-sa), hosted by Jenni of The Gingered Whisk. Povitica is a traditional Eastern European Dessert Bread that is as lovely to look at as it is to eat!

I was a little scared of this challenge. Oh no! Another thing I have to roll super thin and has a filling, I worried, thinking back to recent baklava and croissant challenges. But this challenge proved to be crazy easy. The dough went together very nicely, although I did use more flour than the recipe called for.  The whole thing took an afternoon of here and there work. The dough rolled and stretched with ease. Next time and yes, yes, yes there will be a next time, I will let the Povitica rest in the pan for longer than 15 minutes. I think it will result in a lighter and airier bread.
The recipe below makes two loaves. I made one using the recommended traditional filling from Daring Bakers. Well, the traditional version uses English walnuts but I used pecans! I love pecans and they worked really well. I made the other using pears and blue cheese. I love this combination and thought it would make an interesting savory /sweet snack to have with cocktails.

The traditional loaf was the favorite. It was the right amount of sweetness and the filling was abundant with perky nuttiness.The pear blue cheese one needs a little tinkering but was still yummy toasted and served with a glass of Sherry. It needed more nuts in the filling. I will play around a bit with it and post again about the results. I am listing the ingredients I used for that filling at the very end of the post but you may want to bump up the nuts a bit.

My Thanksgiving crowd starts to show up around 10am on Turkey Day and I am thrilled to have something to offer them with a steaming cup of coffee. It looks stunning and the taste lives up to its good looks.

Don't be scared.  Give it a try!


Povitica:

Yeast Mixture:
1 Teaspoon (5 ml/4 ½ gm) Sugar
½ Teaspoon (2½ ml/1½ gm) All-Purpose (Plain) Flour
¼ Cup (60 ml) Warm Water
1 Tablespoon (15 ml/7 gm/¼ oz/1 sachet) Dry Yeast

Dough:
1 Cup (240 ml) Whole Milk
6 Tablespoons (90 ml/85 gm/3 oz) Sugar
1½ Teaspoons (7½ ml/9 gm/1/3 oz) Table Salt
2 Large Eggs
¼ Cup (60 ml/60 gm/½ stick/2 oz) Unsalted Butter, melted
4 cups (960 ml/560 gm/19¾ oz/1¼ lb) All-Purpose Flour, measure first then sift, divided


To Activate Yeast:


 In a small bowl, stir 2 teaspoons sugar, 1 teaspoon flour, and the yeast into ½ cup warm water and cover with plastic wrap. Allow to stand for 5 minutes.


To Make the Dough:


 In a medium saucepan, heat the milk up to just below boiling (about 180°F/82°C), stirring constantly so that a film does not form on the top of the milk. You want it hot enough to scald you, but not boiling. Allow to cool slightly, until it is about 110°F/43°C.
 In a large bowl, mix the scalded milk, ¾ cup (180 gm/170 gm/6 oz) sugar, and the salt until combined.
 Add the beaten eggs, yeast mixture, melted butter, and 2 cups (480 ml/280 gm/10 oz) of flour.
Blend thoroughly and slowly add remaining flour, mixing well until the dough starts to clean the bowl.
Turn dough out onto floured surface and knead, gradually adding flour a little at a time, until smooth and does not stick.
 Divide the dough into 2 equal pieces (they will each weight about 1.25 pounds/565 grams)

 Place dough in 2 lightly oiled bowls, cover loosely with a layer of plastic wrap and then a kitchen towel and let rise an hour and a half in a warm place, until doubled in size.


Filling Ingredients -enough filling for the two loaves:To Make the Filling:


3½ Cups (840 ml/560 gm/1¼ lb/20 oz) Ground English Walnuts (or Pecans)
½ Cup (120 ml) Whole Milk
½ Cup (120 ml/115 gm/1 stick/4 oz) Unsalted Butter
1 Whole Egg, Beaten
½ Teaspoon (2½ ml) Pure Vanilla Extract
1 Cup (240 ml/225 gm/8 oz) Sugar
½ Teaspoon (2½ ml/2 gm) Unsweetened Cocoa Powder
½ Teaspoon (2½ ml/1½ gm) Cinnamon


In a large bowl mix together the ground walnuts, sugar, cinnamon and cocoa.
 Heat the milk and butter to boiling.
 Pour the liquid over the nut/sugar mixture.
 Add the eggs and vanilla and mix thoroughly.
 Allow to stand at room temperature until ready to be spread on the dough.
 If the mixture thickens, add a small amount of warm milk.


To Roll and Assemble the Dough:


 Spread a clean sheet or cloth over your entire table so that it is covered. I used a flexible pastry mat from King Arthur Flour that worked beautifully for rolling out the dough and rolling up the dough. Sprinkle with a couple of tablespoons to a handful of flour (use flour sparingly)
Place the dough on the sheet and roll the dough out with a rolling pin, starting in the middle and working your way out, until it measures roughly 10-12 inches (25½ cm by 30½ cm) in diameter.
 Spoon 1 to 1.5 teaspoons (5ml to 7 ½ ml/4 gm to 7 gm) of melted butter on top.Using the tops of your hands, stretch dough out from the center until the dough is thin and uniformly opaque. You can also use your rolling pin, if you prefer.
 As you work, continually pick up the dough from the table, not only to help in stretching it out, but also to make sure that it isn’t sticking. When you think it the dough is thin enough, try to get it a little thinner. It should be so thin that you can see the color and perhaps the pattern of the sheet underneath. 
Spoon filling evenly over dough until covered.
Lift the edge of the cloth and gently roll the dough like a jelly roll.
Once the dough is rolled up into a rope, gently lift it up and place it into a greased loaf pan in the shape of a “U”, with the ends meeting in the middle. You want to coil the dough around itself, as this will give the dough its characteristic look when sliced.
Repeat with remaining loaf.


Dough rolled thinly-I used a rolling pin for it all!
All rolled up


Resting before baking!

Topping: Brush the top of each loaf with a mixture of ½ cup (120 ml) of cold STRONG coffee and 2 tablespoons (30ml/28 gm/1 oz) of sugar. If you prefer, you can also use egg whites in place of this.
Cover pans lightly will plastic wrap and allow to rest for approximately 15 minutes.
 Preheat oven to moderate 350°F/180°C/gas mark 4.
Remove plastic wrap from dough and place into the preheated oven and bake for approximately 15 minutes.
Turn down the oven temperature to slow 300°F/150°C/gas mark 2 and bake for an additional 45 minutes, or until done.
 Remove bread from oven and brush with melted butter.
Check the bread every 30 minutes to ensure that the bread is not getting too brown. You may cover the loaves with a sheet of aluminum foil if you need to.
Remove from the oven and allow to cool on a wire rack for 20-30 minutes.
It is recommended that the best way to cut Povitica loaves into slices is by turning the loaf upside down and slicing with a serrated knife.


This lasted a nanosecond!

Filling Ingredients for the Pear Version:

3/4 cup finely chopped pecans (or walnuts)
1/4 cup light brown sugar
2 pears(I used Bosc) peeled and shredded.
2 tbsp lightly beaten egg
1/4 cup milk
4 TBSP butter
2 TBSP crumbled blue cheese

Prepare as method for traditional filling.


Pear/ blue cheese version


Tuesday, September 27, 2011

September Daring Bakers- Croissants

The Daring Bakers go retro this month! Thanks to one of our very talented non blogging members, Sarah, the daring bakers were challenged to make Croissants using a recipe from the Queen of French cooking, none other than Julia Child.

I wanted to like this recipe, really I did. I have always admired Julia Child and have had the pleasure of meeting her several times during my culinary tours of  duty.
But I was not wild about this recipe. I found the dough very hard to work with. The dough was tough and the method very tedious, even for croissant. The batch I made cooked too quickly and was doughy on the inside. Even Hubbie who eats anything would not eat them.
 I have made croissants a lot over the years and even bought a roller that cut out the triangles to get even shapes. I always used the recipe from The Village Bakers Wife and found it wonderful to work with. The top picture is one of the second batch of croissants I made using my tried and true recipe. The croissant came out a lot better and I promised myself to make them every month now just to keep in practice and justify keeping that behemoth roller cutter in the drawer.
The Village Bakers Wife is a great book and I recommend it for many recipes.
Here is a look at my croissant in progress.
And Hubbie ate two for breakfast!


Step one of many!

First rise of the day


Guess how many turns?

Yes, it is as big as it looks!


Cute as Croissant
Worth the effort!

Sunday, September 25, 2011

Husk Cherries

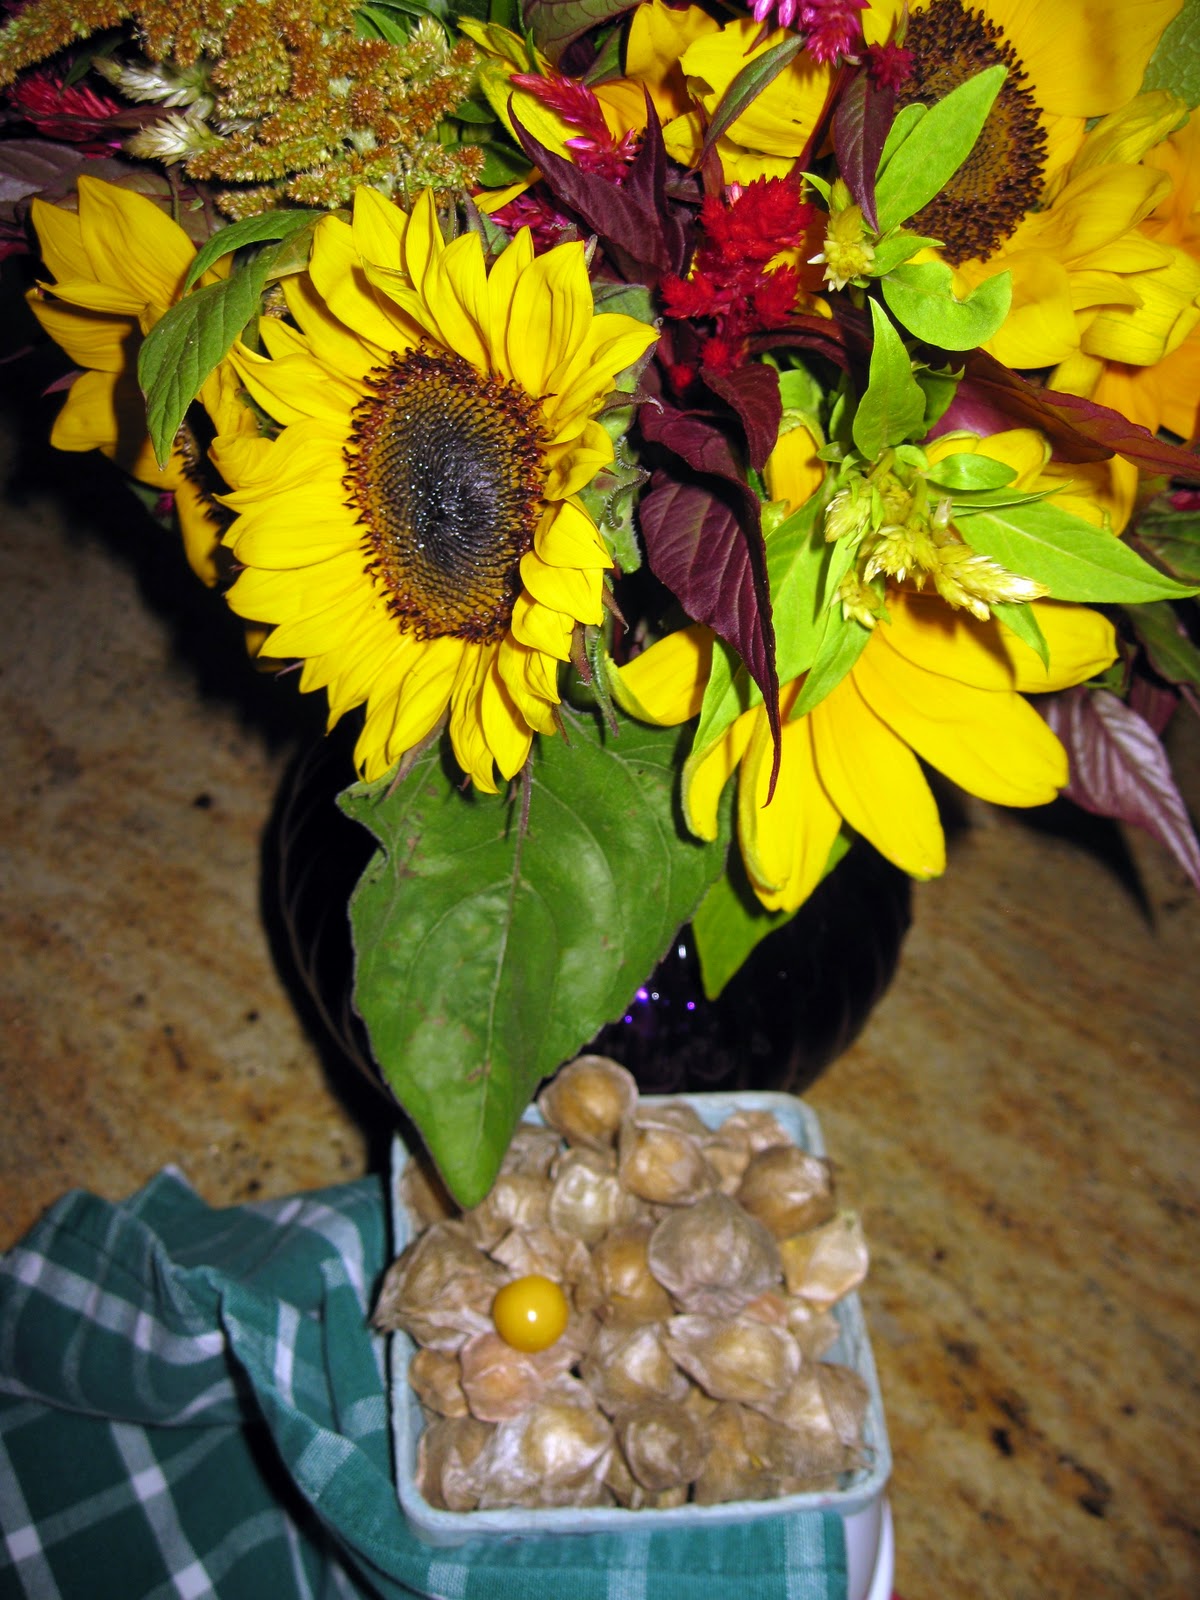
Recently, I searched the local Farmers Market for something interesting to take to our friends who had invited us to their lake for the weekend. One of the ladies at the stand gave me a husk cherry to try. I have to say I was not impressed because they were a little dull looking among the vibrant colors of tomatoes, corn, eggplant and profusion of flowers. I got a little rush when I opened the husk to find a spotless yellow berry all shiny and plump. The taste was not that of a cherry, though it had the texture of a cherry. The taste was more like plum, cherry and melon all mixed together. It was addictive and I grabbed the last container.

Weekends at my friend's lake are always filled with food, drink, fun and definitely no fuss about any of those activities. The husk cherries were a perfect end to the meal, almost like eating little candies as we unwrapped them easily from the husk and tossed the natural wrapper over the porch railing.

I did a little research about the husk cherry and found it is also known as a Cape gooseberry. I had never had a gooseberry before and now think of the recipes I have seen for gooseberry pie with a little less skepticism.
Here is a great link to learn more about the husk cherry/cape gooseberry.
The lady at the market said there would be another batch to be harvested but as the days grow shorter and the leaves on the trees change their colors daily, I think that I may have missed their short appearance and will have to wait another winter or get them online.
Oh well, that gives me time to look for that gooseberry pie recipe.

Friday, September 9, 2011

Heirloom Tomatoes

Clockwise from top left: Striped German, Arkansas Traveller, Evergreen, Speckled Roman
Our little town here in MA has a couple of Farmers Markets. One of those is right on my way home from the grocery store. I feel almost obligated to check in each day that I pass it. It has a few very young enthusiastic workers who smile almost continuously as they inquire of each customer the destination dish of the produce they are getting. I have to admit to getting  many menu ideas just by standing in line and being a good listener.

Recently, I noticed the heirloom tomato display. As a tomato lover from childhood when I used to eat tomato sandwiches so juicy, it would dribble down my chin, I decided I needed to do some research. I am the only tomato lover in my family so the results are totally subjective and unscientific findings.

I sliced the tomatoes and adorned them with a little kosher salt, fresh ground black pepper, extra virgin olive oil and chopped fresh basil. Of the four varieties chosen simply for eye appeal, the Evergreen and Striped German were the tastiest in the sliced tomato tasting.


Summer!
Evergreen
Hands down - my favorite. It had all the things I look for in a tomato. The skin was thin and tender. The flesh was juicy, almost a little floral but packing a huge tomato flavor and had a smooth finish. I ate it all and wished I had bought more than the one.

Speckled Roman
was the smallest tomato of the group. It reminded me of a plum tomato. It was very juicy but not sweet at all.  The skin was the thickest and toughest of the group and the flesh was almost mushy. I might use this one as a concasse to help thicken a sauce.

Arkansas Traveller

I thought this one was going to be my favorite when I picked it at the farm stand. It looked like the perfect sandwich tomato and I could envision its brilliant redness layering with some crunchy lettuce and crispy bacon between the sheets of beefy bread..yummmmm. But it was a big disappointment. It tasted like nothing..just wetness. It had a thick skin, almost unchewable. The flesh was a nice texture of firm/soft but there was no flavor at all and I didn't need a second bite when that beautiful Evergreen was still on the plate.


Striped German
If a tomato can be fun, this is my party girl tomato. It looks adorable sliced and the flesh was glistening!
It was a big beefsteak tomato that demands attention on the plate. The skin was thin and melted in the mouth. The flesh was firm but also melted in the mouth with almost a buttery feel to it. I ate all of this one too even though I was very full by the time I got to this tomato. I would love to use this one in a Panzanella with a really nice bread to dance with it.

Well there you have it. Heirloom Tomatoes have been getting very popular. Follow the link I created for more information about them. I found the site really useful. I am planning my tomato garden for next year almost halfheartedly. I think I might prefer to support my local stand instead and get some more menu ideas.

If you have a favorite tomato variety, I would love to hear about it! I am always game for more "research".