Showing posts with label desserts. Show all posts

Friday, November 27, 2015

THE DARING BAKERS’ NOVEMBER, 2015 CHALLENGE: CHEESE CAKE CRUMBLE PIE


Today is the day after Thanksgiving. While I love Thanksgiving  with the gathering of friends sharing lots of food and fun, my most thankful feeling is that it is over. I cook too much. I eat too much and I make a monumental mess. The mess is not limited to the kitchen where thankfully my dear friends help straighten my mess. I will be sorting through piles of  mess throughout the house for a week.

Today is also Black Friday where everyone goes shopping and stands in line to save a penny. Not me!  I am waiting for Cyber Monday although I think Cyber Monday actually started last Thursday and Black Friday started last August. I find it hard to keep up as every business seems to have its particular spin on the dates and deals.
So what has this got to do with this month's challenge?? Umm nothing really, I am just ranting.

For the month of November Krista & Nicole of “Two Cups of Sugar.”challenged us to make our own version of cheesecake crumble pie.
This month's challenges was very interesting to me and I made the pie  early in the month. I did not make it for Thanksgiving because I experimented a bit, as challenged by Krista and Nicole, and found a cheesecake pie that worked a little better for me .


Here is the link to their challenge. The last recipe in the challenge, BLT cheesecake Pie,  is now on my bucket list.  I need to recover from cream cheese overload for a little while before I tackle the recipe so I am keeping the recipe on file for the rapturous time when tomatoes are in season here again.
Making the cheesecake pies is fairly easy. I used my usual pie crust recipe which works well for me.


Add caption


The filling recipe is really nice and there were no unsightly lumps of cream cheese floating in the batter. Yes, that sort of thing happens if I do not coddle and hover over my cheesecake batter.


 I used raspberries and blackberries and they seemed most appropriate for a crumble pie which is typically very sweet. The lemon zest in the recipe also blended nicely with the fruit. The recipe for the topping made a lot and seemed drier than the the challenge picture. I covered the pie as much as I thought useful and
kept the rest for another project. It should freeze well.

The pie came out really nice. The baking method is to start with a high heat, reduce the heat after 10 minutes and baking for an hour. Then, turn the heat off and  leave in the oven with the door ajar. for 30 minutes.


 I think that I should have turned the heat off in the oven  sooner. I think a little less cooking would have given creamier filling results though the longer cooking time created a nice pie crust and a lovely golden topping. The taste was sweet, fruity and very rich. Small slices of pie  are manageable which is great is you are serving a crowd.

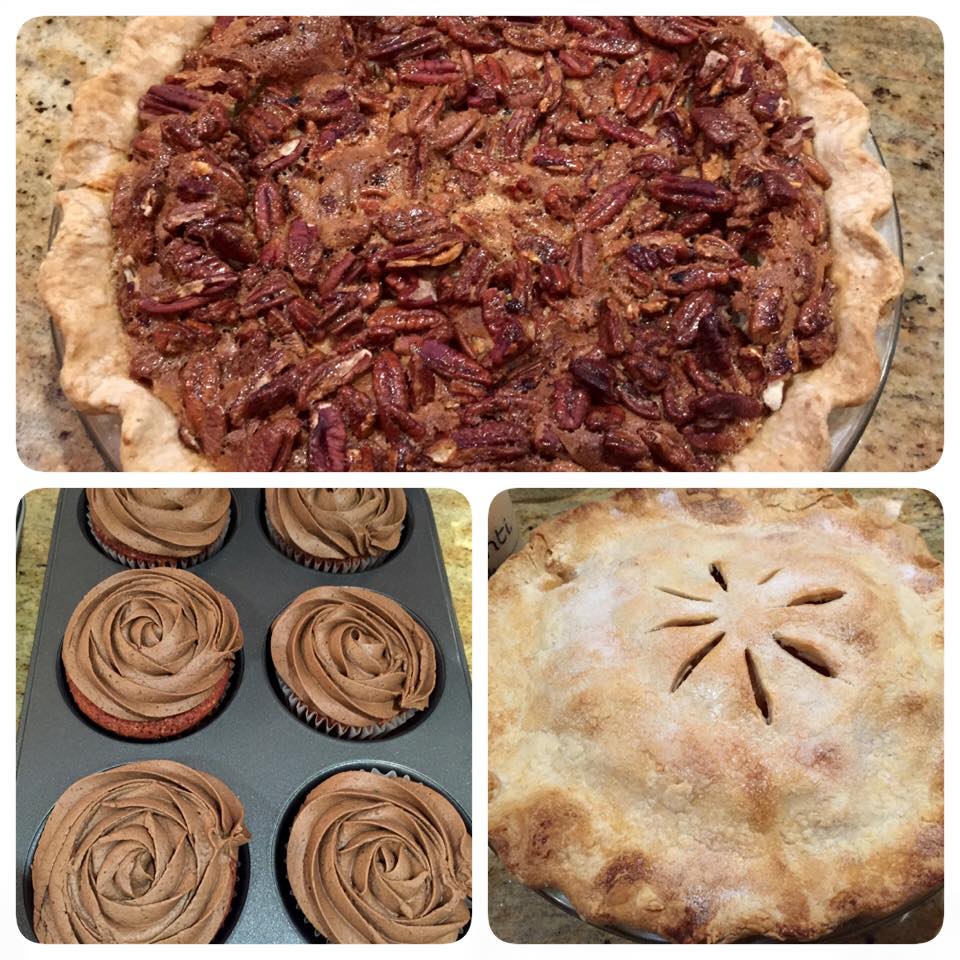
The second pie recipe is Pecan Cheesecake Pie that I got from a Southern Living magazine and combines my two favorite desserts, pecan pie and cheesecake. There is a layer of cheesecake and a layer of pecan pie that magically transforms into a plate of pure joy. This pie has a couple of separate elements that at first sight might seem cumbersome but whip together easily.  I did serve this pie(along with a lot of other desserts) for Thanksgiving. This is one recipe I will make again next year.
When making the Pecan Cheesecake Pie, be sure to use a deep dish pie pan or else there won't be enough room for both fillings. I made that mistake on my first try with the pie. If you don't have a deep dish pan, then I recommend that you use all the cream cheese mixture, top with the pecans and  fill to the top with the corn/syrup egg mixture. You will have some leftover corn syrup/egg mixture but the pie will still be really good. I believe this is best served slightly chilled so I advise removing the pie from the fridge about an hour before serving. Unlike most cheesecakey desserts, this pie will keep well in the fridge for a few days or until you have sneaked enough "slivers" while cleaning up the Thanksgiving mess. Not that I would know anything about that!
Pecan cheesecake pie is top picture and  top dessert dog over red velvet cupcakes and apple pie!

Wednesday, May 27, 2015

THE DARING BAKERS’ MAY, 2015 CHALLENGE: LAMINGTONS


For the May challenge Marcellina from Marcellina in Cucina dared us to make Lamingtons. An Australian delicacy that is as tasty as it is elegant.

I knew this was going to get messy but I am not afraid of a mess, especially a chocolate one. There was a  rumor that went around the catering kitchen I worked in many years ago that when Evelyn worked with chocolate , everyone wore chocolate home that day. The rumor was started by my beloved co-worker and I do believe that there was a lot of truth to it. So, I waited for a day when I could leisurely make a mess and then just as leisurely clean it up. I recommend this tactic when you decide to make Lamingtons. 

I have attached the PDF for the challenge here in case you want the full scoop about the history and assorted recipes/ troubleshooting for the Lamingtons.

I veered away from the recipes a bit. I made a coffee raspberry butter cake as my cake base. You can get that recipe here and to that recipe add 1 tablespoon espresso powder to the milk and 1/2 teaspoon raspberry extract along with the vanilla extract. Also, as an aside, you can tinker different flavoring with the base recipe quite a bit; it is very forgiving.

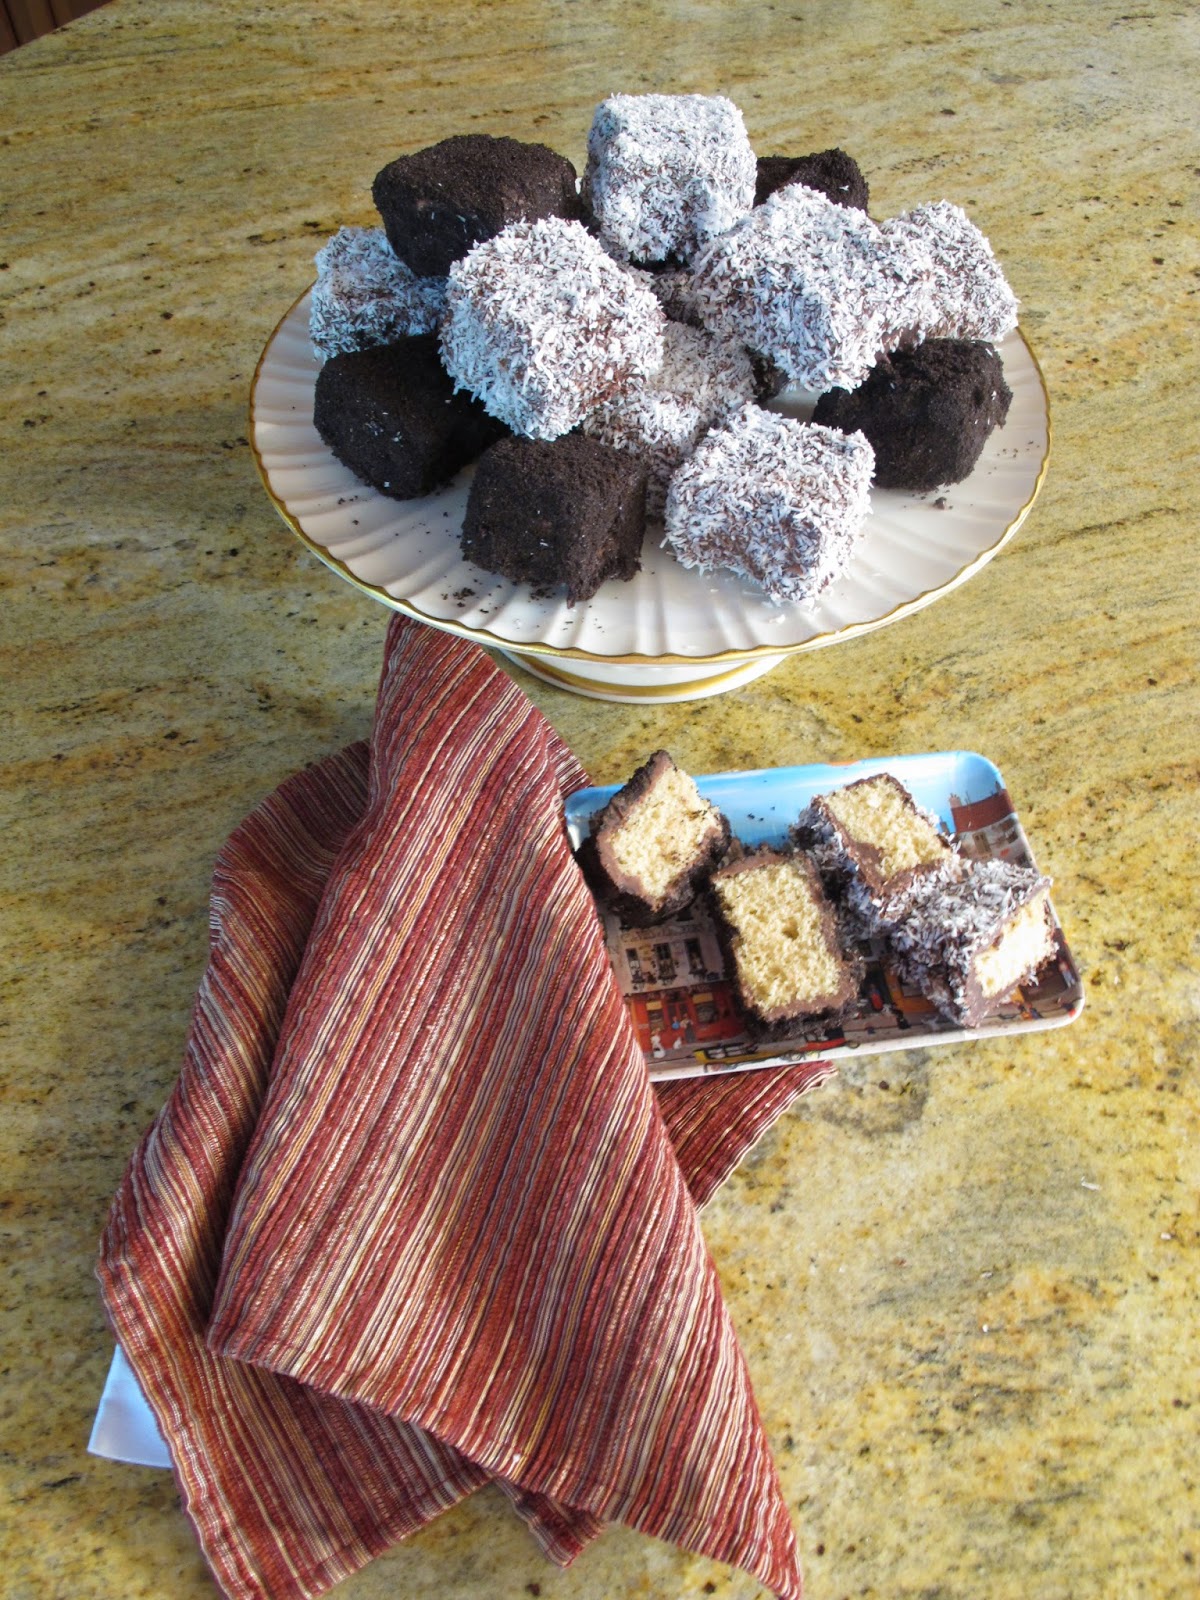
One other difference was that I rolled some of the Lamingtons in crushed chocolate cookie crumbs. I was not convinced that the coconut would be well received. I was wrong. The coconut versions were adored and devoured.  They were also the prettiest so I am sure I will stay classic with the coconut in future baking.

Here are a few of my own troubleshooting recommendations(lessons learned the hard way):
1. Make sure the cake is a day old. Freshly baked cake will fall apart during the chocolate dipping phase.
2. Don't skimp on the chocolate! Also, I added a bit of safflower oil to the chocolate to thin it a bit. I cannot give an amount as it depends on the brand chocolate and how old it is. I can tell you that for one pound of Ghiradelli morsels, I used 2 tablespoons oil. I advise adding a tablespoon at a time until you get your desired consistency. And what is that?? I like the consistency where it drops evenly and quickly from a fork but leave a thin coating on that fork. 
3. Use a cake rack and put parchment paper or wax paper underneath it to catch the drippings. That way you can reuse the chocolate. I dipped the Lamingtons and then let them sit on the rack for a few minutes before tossing in the coconut. This reduced the globbing of chocolate in the coconut for me. After dipping about 10 Lamingtons, the first ones were ready for coconut coating. 
4. Make sure you have a crowd waiting for these. There will be a lot of them. I cut my cake into  approximately 1 1/2 inch squares and I practically fed the neighborhood. Here are a few photos to get you excited or if you are a neat freak, send you running and screaming. I hope you get excited.


Friday, March 27, 2015

Daring Bakers' Challenge March 2015: Tarte Tatin

Welcome to March in New England...
Come on in and see what is cooking.


This month's daring Bakers' Challenge is a classic. For the March Daring Bakers’ Challenge, Korena from Korena in the Kitchen taught us that some treats are best enjoyed upside down. She challenged us to make a tarte tatin from scratch.
The last time I made a tarte tatin was in culinary school about a thousand years ago. I admit that I have become lazy with puff pastry and buy it when I need it. I justify my laziness by buying really good quality pastry,  Dufours,  and saying probably correctly that it is better than any I could make. But here is Korena daring us to make it from scratch and giving an "easy to use" recipe.

I loved the rough puff pastry recipe and it will be a keeper. I had some definite challenges with the rest of the recipe. For the recipe that we were given, Click here

I started by making a Pear Tarte Tatin. I used the recipe and had trouble right off the bat with the sugar/butter mixture crystallizing. I also did not cook the pastry long enough so the dessert was a bit doughy.

Pear Tarte Tatin
I did a bit of reading. I went back to my basic knowledge of how to work puff pastry and I saw this hilarious video of Julia Child making a Tarte Tatin. Click here if you want to see this video. She flips the tarte at 18:00 minutes and that is where your confidence will balloon. She is classic like the tarte tatin and a testament to life's beautiful imperfections.Watching her flip that tart onto the plate made me laugh out loud. I am a huge Julia lover mainly for her enthusiasm and her attitude towards fearless cooking. I was laughing with love. So, I went back for another try. I decided to stay classic this time. There is a reason the tart is done with apples. They have flavor and firmness. I used the puff pastry recipe from Korena. I just love this puff pastry and may never buy Dufours again. The only change I made was with the butter. I grated the butter and then put it in the freezer for 10 minutes before mixing. I find this method makes the mixture stay chilled and I don't have to work the mixture as much because the butter is already in small pieces.


For the filling, I made a few changes. I added 2 tablespoons of water to the cup
of sugar in the saucepan and cooked that on low heat until the sugar dissolved.


Then I increased the heat to high and cooked the sugar mixture without stirring until it became a light amber color, swirling the pan to evenly distribute the caramel color.
Then I lowered the heat to medium and added the butter that I had cut into tablespoon portions and let that melt, stirring all the while with a wire whip.


I add the apples and cooked according to Korena's instructions.


I let the mixture sit off the heat for about ten minutes while I rolled out the puff pastry and preheated the oven.


 I heated the oven to 425 degrees Fahrenheit which is different from the recipe. I have always cooked puff pastry at a high temperature to keep the butter from melting and weighing down the pastry before the trapped air pockets in the pastry have a chance to expand. I covered the apples with the pastry, cut the air vents and popped that pan in the oven. After fifteen minutes of cooking, I lowered the heat to 375 degrees and continued to bake it for another fifteen minutes. The pastry got a beautiful deep golden color and a crisp puffy texture. I was feeling good about my second try.


 I  waited for the bubbling caramel to subside and then flipped it onto the plate.


 It was really pretty.


 I served the tart with a scoop of candied ginger ice cream and I was transported to dessert heaven. 


My husband ate half the tart and I am sure he was not just being kind...he loved it. I did not mention the caloric content because he looked so happy. 
Tarte Tatin is a challenge. I hope you will try it but my advice is not to try it on the fly, that is, read about it, look at pictures and give yourself plenty of time. The classic dishes are beautiful, thoughtful  concoctions that will, I guarantee, give you a sense of place in the world. 

Looking for adventure? Make a Tarte Tatin. Thank you Korena!


Tuesday, January 27, 2015

The Daring Bakers’ January 2015 Challenge: Esterhazy Torte


For the month of January Jelena from A Kingdom for a Cake invited us to start this year with a dreamy celebration cake. She challenged us to make the Esterhazy cake a.k.a the Hungarian dream. What better way to start the year than with a sweet dream?

Today in New England we had quite the weather. It has been snowing since noon on Tuesday and there have been periods of blizzard conditions that prompted advice from authorities to stay inside. Having procrastinated this month's challenge to the very last minute, I thought it a perfect day to fire up the ovens and make this house smell delicious. And the Esterhazy torte certainly filled that bill. The recipe has several stages. If you don't want to spend all day in the kitchen, do the torte over a couple of days as advised by Jelena.

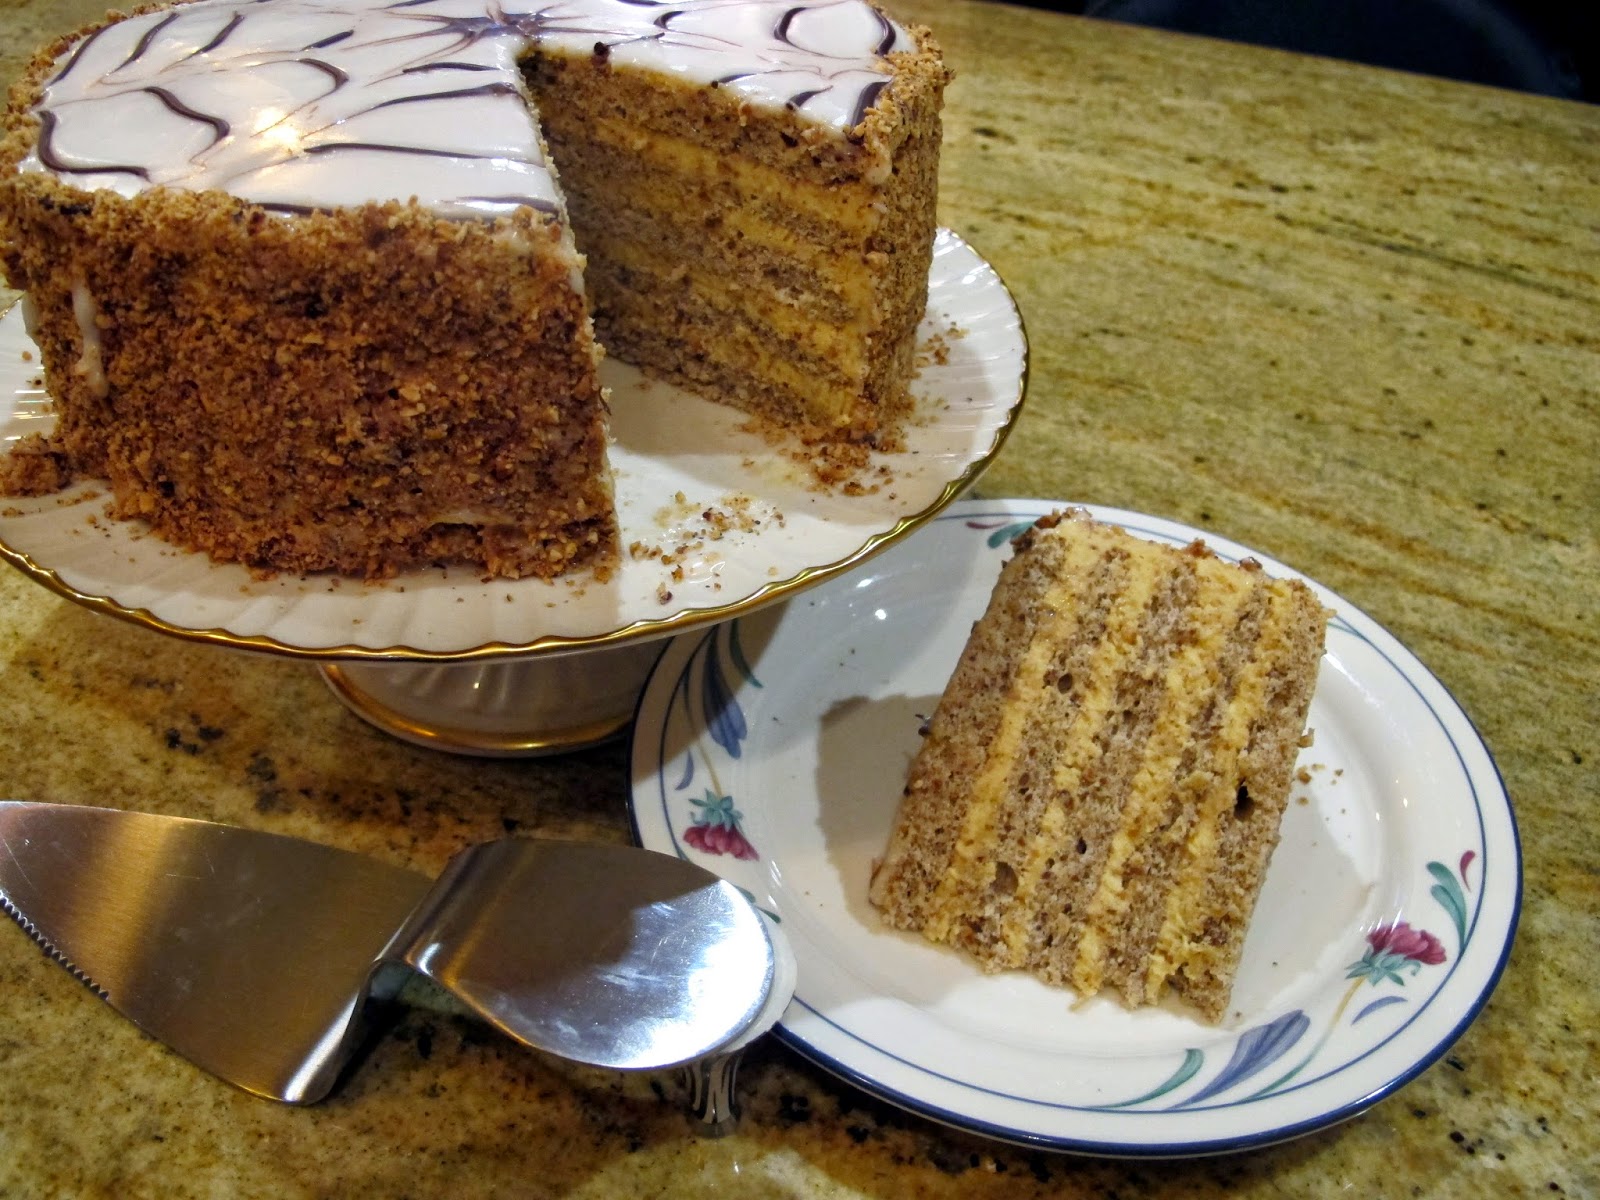
Because the torte filling is made with lots of egg yolks, I recommend keeping the torte chilled until serving and refrigerating leftovers...if there are any. I thought the torte would be very sweet with all the sugar but the nuts really balanced it all out. 

Here is the recipe from Jelena:


Esterhazy Torte

Servings: 10-12, Original recipe in metric 
Ingredients
HAZELNUT SPONGE LAYERS
12 large egg whites
1 cup plus 1 tablespoon (9 oz) (250 gm) caster (superfine) sugar
2 tablespoons (2/3 oz) (20 gm) vanilla sugar
2½ cups (9 oz) (250 gm) ground hazelnuts
2/3 cup (2¾ oz) (80 gm) plain (all purpose) flour
HAZELNUT CREAM
12 large egg yolks
1 cup plus 1 tablespoon (9 oz) (250 gm) caster (superfine) sugar
2 tablespoons (2/3 oz) (20 gm) vanilla sugar
1 -1/3 cups (10½ oz) (300 gm) butter at room temperature
1½ cups (5-1/3 oz)(150 gm) toasted ground hazelnuts
APRICOT JAM GLAZE
around 3 tablespoons (45 ml) (1-2/3 oz) (45 gm) apricot jam
1 teaspoon (5 ml) water


WHITE ICING
2½ to 3¼ cups (10-2/3 to 14 oz) (300-400 gm) icing (powdered) (confectioners') sugar
2 teaspoons (10 ml) sunflower oil
3-4 teaspo
ons water(15-20 ml) lemon juice
around 4 tablespoons (60 ml) hot 
CHOCOLATE DECORATION
¼ cup (1¾ oz) (50 gm) dark chocolate
1 teaspoon (5 ml) oil
HAZELNUTS
¾ cup (3½ oz) (100 gm) roughly chopped hazelnuts


Directions:
Place the hazelnuts on an oven tray in a cold oven, increase the temperature to moderate 180°C/350°F/gas mark 4, and bake until a nice aroma starts to come out of the oven and the nuts have become darker.
Continue until their skins almost turn black or dark brown and the hazelnut 'meat' becomes a caramel color. You will need to watch the oven carefully since the nuts can easily burn. From time to time, just open the oven and carefully try one to see if the center is nice and crispy, but be careful not to burn yourself. It should take about 15-25 minutes.
This baking process brings out the aroma of the hazelnuts needed for the cake. (If you are using almonds instead of hazelnuts, they need to stay white. Hazelnuts are not good in this cake if their aroma is not present.)
Let them cool.
Set aside ¾ cup (3½ oz) (100 gm) toasted nuts and roughly chop them. These will go around the cake at the end.
The rest need to be ground. A grinding machine is best since a food processor might turn the hazelnuts into a creamy mush. If you are using a processor do it in short pulses so they do not have the consistency of peanut butter but of fine powder.
Divide the ground hazelnuts into 2 batches of 2½ cups (9 oz) (250 gm) and 1½ cups (5-1/3 oz) (150 gm) for the sponge layers and the filling respectively.
HAZELNUT LAYERS  (Dacquoise layers)
With an electric mixer beat the egg whites while gradually adding the sugar and vanilla sugar for about 5 minutes until stiff peaks form.
Turn the mixer to the lowest speed and add in the hazelnuts mixed with the flour and beat until just combined.
Cut baking paper into five squares large enough to draw a circle of 10 inch (25cm) in diameter on the squares.
Turn the paper over and place one piece onto an up-side down oven tray and delicately spoon inside the circle one-fifth of the beaten egg white mixture.
Place the tray into an preheated moderate 325°F/160°C/gas mark 3 (no fan) oven and bake for 14 minutes. It will look soft but that is how we want them. Your finger should not stick to the layer when you touch it.
Take the layer out together with the paper and place on an even surface
Cool the oven tray and repeat with the next 4 layers. It is important that the up-side down oven tray is cool when you start to bake the layers.
If you have a 10 inch (25cm) diameter spring form pan with a removable bottom just cut out five pieces of baking paper to fit the bottom and spoon the mixture in the pan.
Make sure to cool the bottom of the pan after removing each layer and before placing the egg white mixture for the next layer into it.
Place all the layers next to each other.
HAZELNUT FILLING
The filling is cooked in a double boiler. If you do not have a double boiler just take two pots so that the smaller one fits perfectly in the larger one and there is no gap between them.
Fill the larger pot with about 1-inch (2 cm) water place on the stove and bring the water to a slow boil, the water should not touch the smaller pot bottom.
Beat the egg yolks and the sugar with an electric mixer in the smaller pot for 30 seconds. Place the smaller pot into the larger one and cook for 14-15 minutes. Stir every 2-3 minutes for a short while with a wooden spoon always scraping the sides and the bottom. Stir constantly, near the end.
Let the filling cool.
Beat the cooked yolks for 30 seconds with an electric mixer.
Beat the room temperature butter for 2 minutes until light and fluffy then beat into the cooked yolks.
Add in the ground hazelnuts and beat again until combined.
Set aside 2 tablespoons of the filling to spread around the torte at the end.
Divide the rest of the filling into 4 cups.
Line a large tray with some baking paper.
Remove the baking paper from one of the dacquoise and place it onto the tray, spread one quantity of filing evenly over the dacquoise, then place another layer on the top.
Repeat, making sure that the last layer is placed bottom-side-up (do not place filling on this surface) which will make it easier to obtain a smooth looking finish.
Place some baking paper over the torte. Press a bit with your hands to even it out, put another tray over the torte and now place something heavy on the top to allow the torte to level up. A pan half-filled with water will be fine.
Place the whole torte with the pot in the fridge for one hour.
APRICOT JAM GLAZE
Heat the apricot jam and water on the stove.
Remove the top baking paper from the torte and spread the jam on top of it. We want a very thin layer, just barely covering the torte.
Place the torte back in the fridge for 30 minutes for the jam to cool.
When the 30 minutes is up, spread the 2 tablespoons of reserved hazelnut filling around the cake.
By hand mix the powdered (icing) (confectioners') sugar, oil, lemon juice while adding teaspoon by teaspoon of hot water until the mixture is creamy, but not runny. Mix vigorously for a couple of minutes. The sugar should be lemony.
With a hot wet large knife quickly spread the icing over the apricot layer.
You will need around 2½ to 3¼ cups of powdered sugar but it is better to have more than less, since when you start spreading you cannot go back. You will have some left over icing. If it is a bit uneven just turn on the hair dryer and heat the icing so it will smooth out a bit.
Before starting with the icing have the chocolate ready since it needs to go onto the soft icing in order to get the web.
Melt the chocolate with a teaspoon of oil, place in a pipping bag, or a  plastic bag with a cut in the corner that will act as the tip.
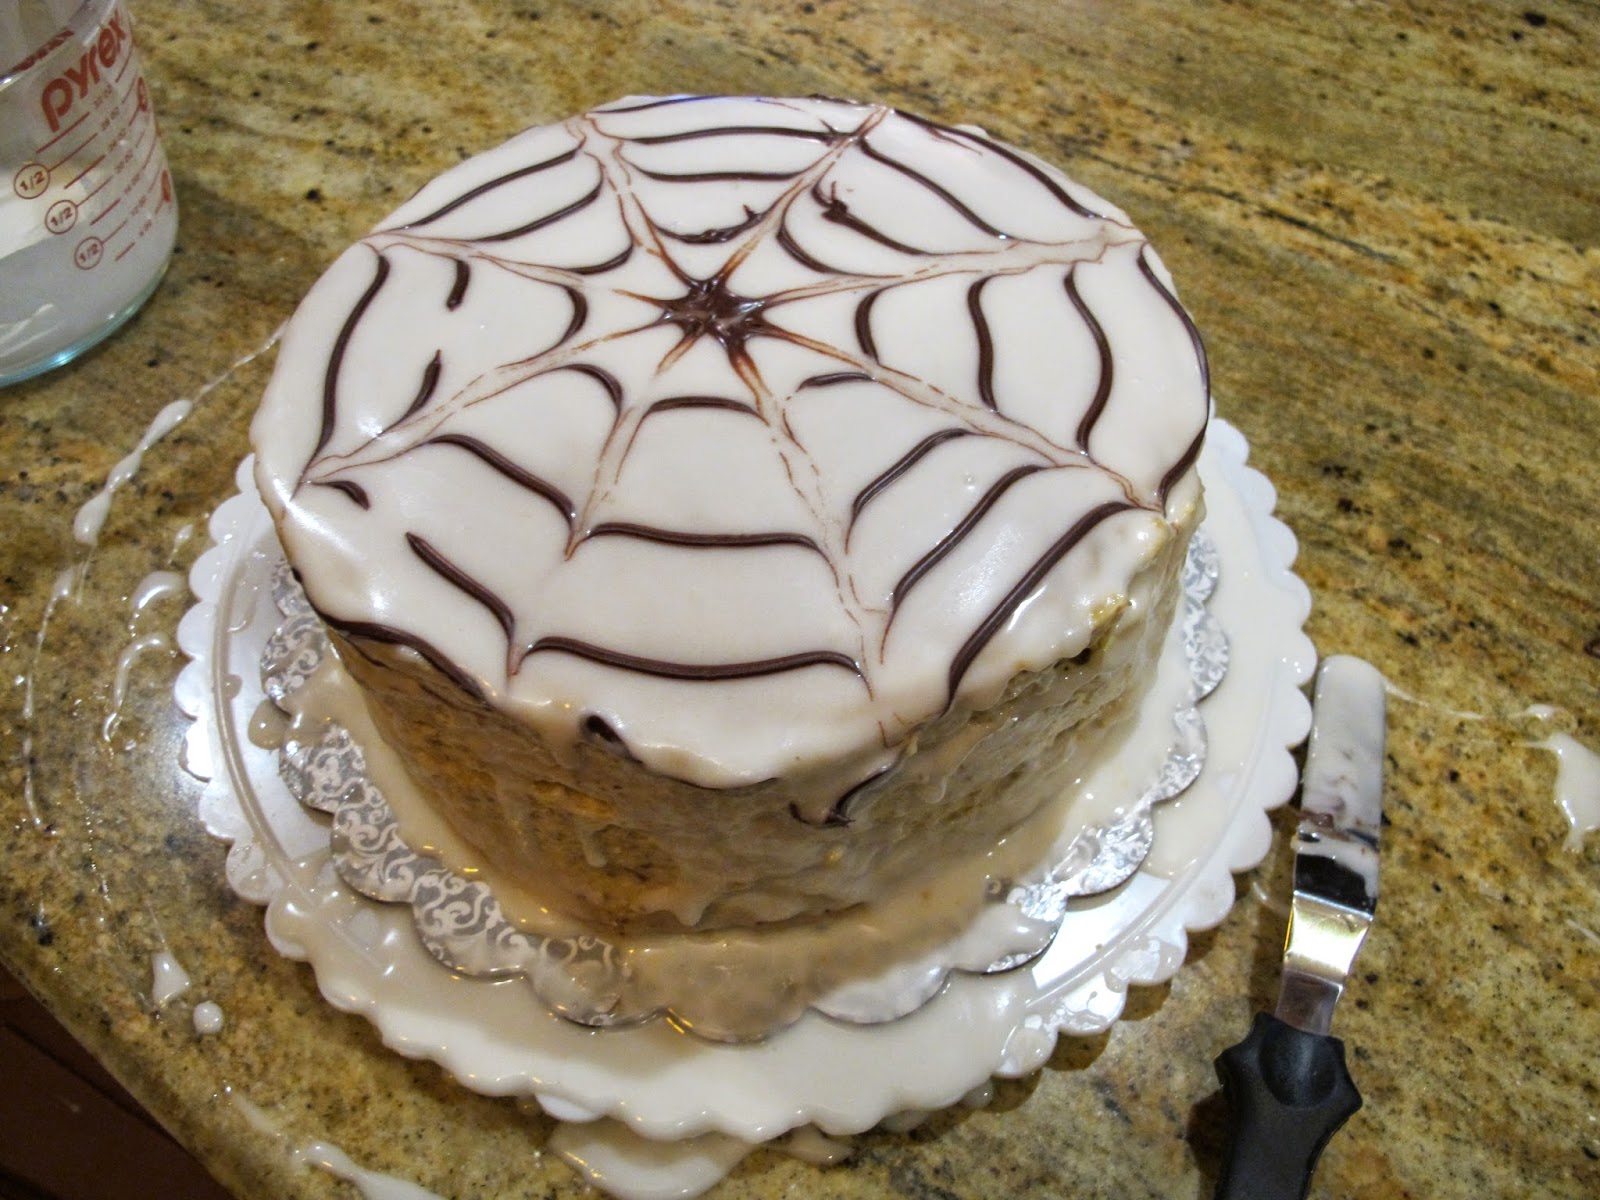
Draw four (4) concentric circles onto the cake, then with a knife (not the sharp side) or a wooden skewer run six (6) lines at 30 degree angle to the cake to get the decoration (see pictures for more details). Each line should be in a different direction. One running away from you and the next one running to you.
Press the remaining crushed hazelnuts around the cake to complete the decoration.
Let rest in the fridge for at least 24 hours before tasting. This cake that gets better as times goes by. We usually enjoy ours for 7 days.
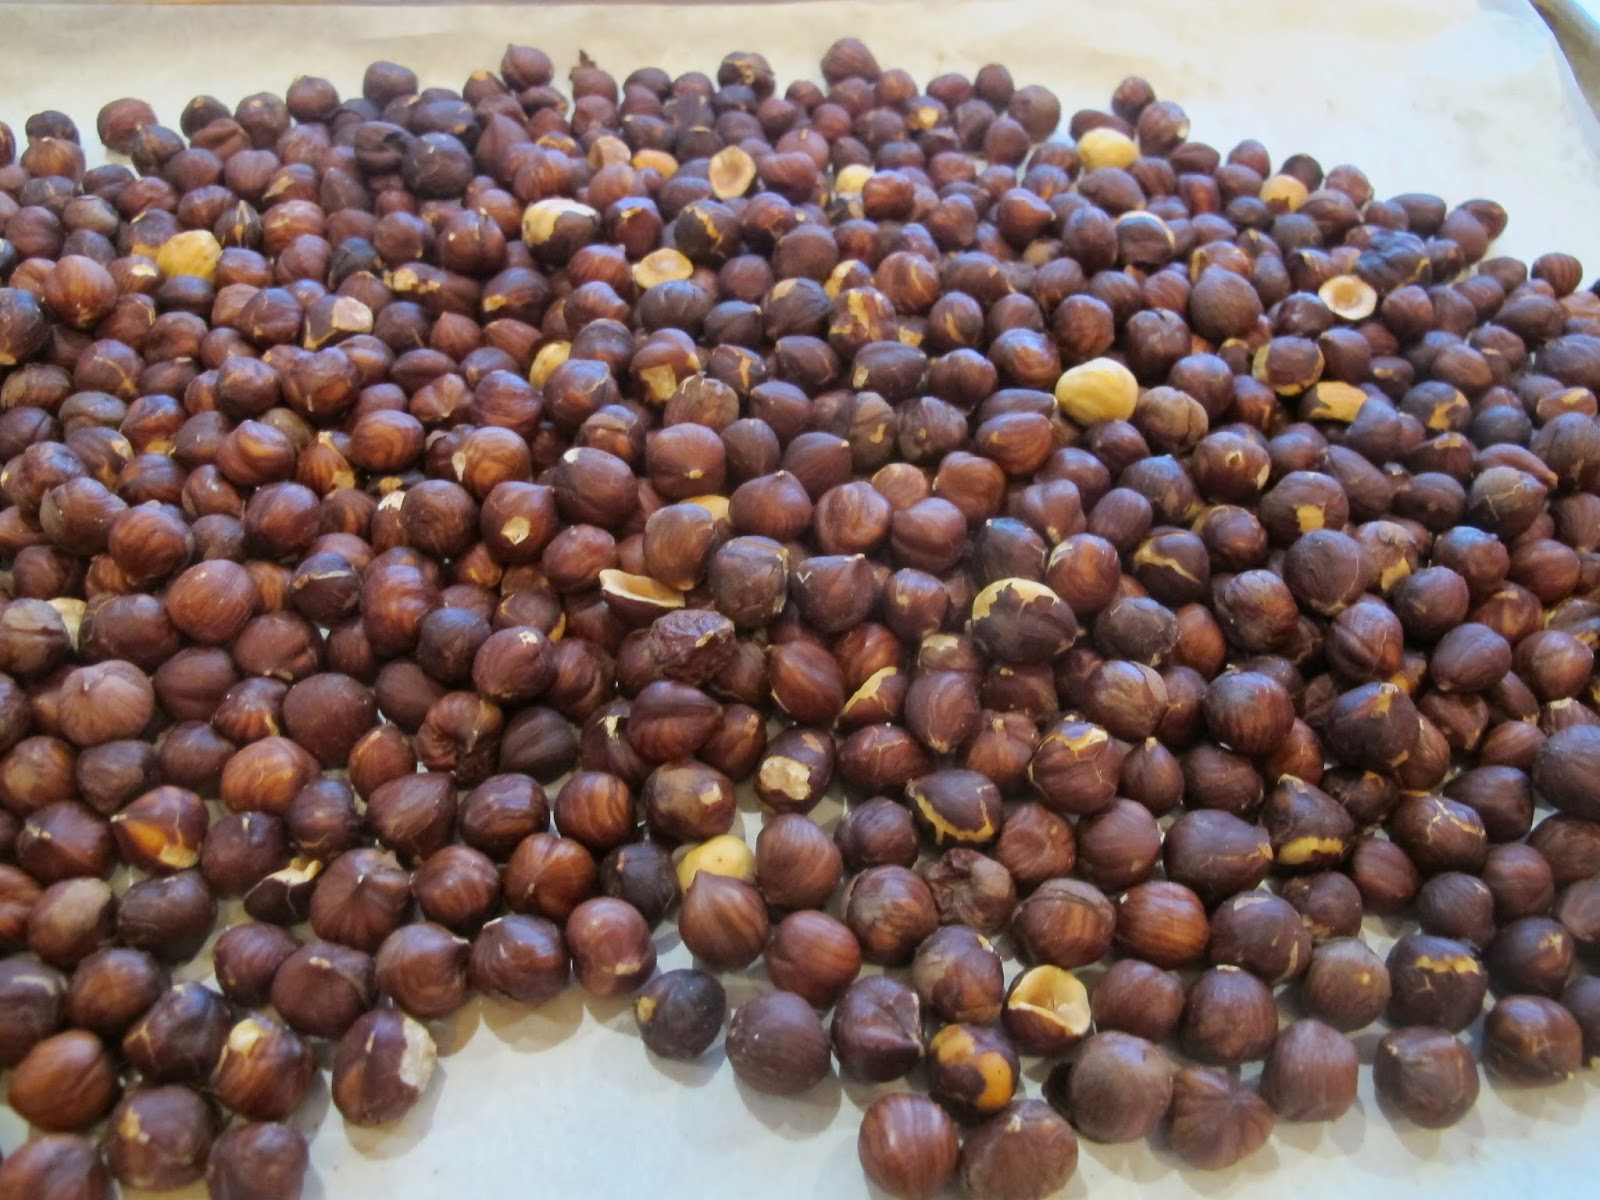
Toasted hazelnuts

Cooking the Cream Filling
Butter and Nuts Added to Cream Filling

Meringues ready to be baked
Baked meringue
Assembly time

Looks good but needs some cream filling to fill in those gaps

That is better

Apricot jam with sugar icing over it

I need to work faster!!!

Looked good for a moment..then I put chopped hazelnuts around the sides and it looked great


Tired snow angel: too much snow shoveling and not enough cake


Friday, June 27, 2014

Daring Bakers Challenge June 2014 - Sweet Rolls


This month the Daring Bakers kept our creativity rolling with cinnamon bun inspired treats. Shelley from C Mom Cook dared us to create our own dough and fill it with any filling we wanted to craft tasty rolled treats, cinnamon not required! 

I was a bit ahead of the game on this one as I have spent the last couple of months working on a sourdough  cinnamon roll. I felt like, with this challenge, I would omit the cinnamon and go for something different. That's when I started dreaming about the orange rolls from The Club in Birmingham, Alabama.  My grandmother, Mimi, was a member of The Club ( pronounced Thee Club), a dancing and dining venue on top of a big hill overlooking downtown Birmingham.
 The Club was considered very luxurious and added to your cache if you belonged there,which of course needed mentioning to anyone who may not have been informed of the prized membership.
 I loved The Club for the food. Well maybe I did not love all the food...maybe just the orange rolls. They were super sweet and my grandmother would say they were more a dessert than a side bread. She said this while waiting for lunch to arrive and munching on them with sweet tea that was so sweet, it made your head hurt. My Mimi loved her sweets. I got to go to lunch with her each year when the doll show came to The Club. My grandmother loved looking at the antique and modern doll displays with their fancy dressings. She towed me along as the excuse to attend. I loved it too.
Let's get back to today though. I found a recipe online for the authentic The Club orange sweet rolls. They were easy to prepare and did not take much time. No one liked them...not even me. They were sickening sweet to me. We don't eat like that anymore and they just tasted like sugar. So, I started tweaking a bit. I halved the filling of coconut and sugar and whirled it in the food processor so it was finer textured. I increased the amount of liquid in the glaze as well as doubling the glaze.The recipe said that it made twelve rolls but I cut them so they made twenty four. They were smaller...cuter and popped right in the mouth.
The new version of orange rolls were a huge hit with family and co workers. I ate one just after the glaze set but still warm. The roll melted in my mouth yet I did not feel like I just ate one of the most decadent breads ever. These rolls are well worth the minimal effort. Make them fresh. I made a batch and formed the rolls leaving them in the fridge overnight. I gave the rolls about 30 minutes outside of the fridge before baking and they were delicious for breakfast.

 Here is my adapted version to what I am sure was an adapted version of The Club's Orange Sweet Rolls. I am not great with conversions for those of you outside of the U.S. but I gave it a big effort!


Orange Sweet Rolls


 - adapted from a recipe called The Club Sweet Rolls

1/4 ounce (6 gm.) dry yeast, 1 package
1/4 cup warm water, about 125 degrees
1/3 cup (60 ml) (2 oz) (50 gm) unsalted butter, melted
1 cup p (240 ml) (8 oz) (200 gm) sour cream
1/4 cup (60 ml) (2 oz) (50 gm) sugar
2 eggs
1 teaspoon (5 ml) (1/4 oz) salt
3 1/2 cups (840 ml) (12 oz) (450 gm) all-purpose flour
1/4 cup (60 ml) (2 oz) (50 gm) sugar
1/2 cup (120 ml) (4 oz) (100 gm) coconut, flaked
2 teaspoons (10 ml) orange rind, grated
2 tablespoons (30 ml) unsalted butter, melted
Glaze:
1 cup  (240 ml) (8 oz) (200 gm) confectioner's sugar
1 tablespoon (15 ml) orange rind, grated
3 tablespoons (45 ml) fresh squeezed orange juice


  1. Dissolve the yeast in warm water in a large bowl. Add the next five ingredients, mix well. Gradually stir in enough flour to make a soft dough. mix well.
  2.  Place dough in a greased bowl turning to grease the top.
  3.  Cover and let rise until double in bulk, about 90 minutes to 2 hours.
  4. Combine sugar, coconut and orange rind in a food processor and use the pulse feature to make a finer texture,set aside.(If you don't have a food processor, chop the flaked coconut a bit with a knife to make a finer texture.)
  5.  Punch down the dough. Knead until smooth and elastic on a floured surface.
  6.  Divide the dough in half. Roll each half into a rectangle(I rolled it to about 12 inches by 10 inches).
  7.  Brush the rectangle with melted butter. Sprinkle coconut and orange rind mixture over top. 
  8. Roll up from the long side. Cut into approximately 1 inch pieces (30 mm), turn on end and place in a greased pan. Cover with wax paper and let rise until doubled, about 30 minutes. 
  9. Bake in a preheated oven at 350°F/180°C/gas mark 4 degrees for about 20 minutes.
  10. Cool 5 minutes. Turn out onto a rack.
  11. While still warm, drizzle with glaze.


I like to use active dry yeast

Just throw the dough ingredients in a bowl!

I mixed with a dough hook on low speed for about 3 to 4 minutes.

Getting ready to rise!

The dough has arisen!!!!

Pulsing in the processor gives the rolls a finer filling texture.

Ready to roll!

Slathered in melted butter.

This smells amazing, by the way!

Ready for second rising..you can chill at this point for later baking.

Glaze in progress!

Fresh from the oven...only lightly browned!

Glistening with glaze

You know you want one!!!


Your turn to make them, Enjoy!