Thursday, October 27, 2011

October Daring Bakers Challenge - Povitica


Traditional Povitica

The Daring Baker’s October 2011 challenge was Povitica (pronounced po-va-teet-sa), hosted by Jenni of The Gingered Whisk. Povitica is a traditional Eastern European Dessert Bread that is as lovely to look at as it is to eat!

I was a little scared of this challenge. Oh no! Another thing I have to roll super thin and has a filling, I worried, thinking back to recent baklava and croissant challenges. But this challenge proved to be crazy easy. The dough went together very nicely, although I did use more flour than the recipe called for.  The whole thing took an afternoon of here and there work. The dough rolled and stretched with ease. Next time and yes, yes, yes there will be a next time, I will let the Povitica rest in the pan for longer than 15 minutes. I think it will result in a lighter and airier bread.
The recipe below makes two loaves. I made one using the recommended traditional filling from Daring Bakers. Well, the traditional version uses English walnuts but I used pecans! I love pecans and they worked really well. I made the other using pears and blue cheese. I love this combination and thought it would make an interesting savory /sweet snack to have with cocktails.

The traditional loaf was the favorite. It was the right amount of sweetness and the filling was abundant with perky nuttiness.The pear blue cheese one needs a little tinkering but was still yummy toasted and served with a glass of Sherry. It needed more nuts in the filling. I will play around a bit with it and post again about the results. I am listing the ingredients I used for that filling at the very end of the post but you may want to bump up the nuts a bit.

My Thanksgiving crowd starts to show up around 10am on Turkey Day and I am thrilled to have something to offer them with a steaming cup of coffee. It looks stunning and the taste lives up to its good looks.

Don't be scared.  Give it a try!


Povitica:

Yeast Mixture:
1 Teaspoon (5 ml/4 ½ gm) Sugar
½ Teaspoon (2½ ml/1½ gm) All-Purpose (Plain) Flour
¼ Cup (60 ml) Warm Water
1 Tablespoon (15 ml/7 gm/¼ oz/1 sachet) Dry Yeast

Dough:
1 Cup (240 ml) Whole Milk
6 Tablespoons (90 ml/85 gm/3 oz) Sugar
1½ Teaspoons (7½ ml/9 gm/1/3 oz) Table Salt
2 Large Eggs
¼ Cup (60 ml/60 gm/½ stick/2 oz) Unsalted Butter, melted
4 cups (960 ml/560 gm/19¾ oz/1¼ lb) All-Purpose Flour, measure first then sift, divided


To Activate Yeast:


 In a small bowl, stir 2 teaspoons sugar, 1 teaspoon flour, and the yeast into ½ cup warm water and cover with plastic wrap. Allow to stand for 5 minutes.


To Make the Dough:


 In a medium saucepan, heat the milk up to just below boiling (about 180°F/82°C), stirring constantly so that a film does not form on the top of the milk. You want it hot enough to scald you, but not boiling. Allow to cool slightly, until it is about 110°F/43°C.
 In a large bowl, mix the scalded milk, ¾ cup (180 gm/170 gm/6 oz) sugar, and the salt until combined.
 Add the beaten eggs, yeast mixture, melted butter, and 2 cups (480 ml/280 gm/10 oz) of flour.
Blend thoroughly and slowly add remaining flour, mixing well until the dough starts to clean the bowl.
Turn dough out onto floured surface and knead, gradually adding flour a little at a time, until smooth and does not stick.
 Divide the dough into 2 equal pieces (they will each weight about 1.25 pounds/565 grams)

 Place dough in 2 lightly oiled bowls, cover loosely with a layer of plastic wrap and then a kitchen towel and let rise an hour and a half in a warm place, until doubled in size.


Filling Ingredients -enough filling for the two loaves:To Make the Filling:


3½ Cups (840 ml/560 gm/1¼ lb/20 oz) Ground English Walnuts (or Pecans)
½ Cup (120 ml) Whole Milk
½ Cup (120 ml/115 gm/1 stick/4 oz) Unsalted Butter
1 Whole Egg, Beaten
½ Teaspoon (2½ ml) Pure Vanilla Extract
1 Cup (240 ml/225 gm/8 oz) Sugar
½ Teaspoon (2½ ml/2 gm) Unsweetened Cocoa Powder
½ Teaspoon (2½ ml/1½ gm) Cinnamon


In a large bowl mix together the ground walnuts, sugar, cinnamon and cocoa.
 Heat the milk and butter to boiling.
 Pour the liquid over the nut/sugar mixture.
 Add the eggs and vanilla and mix thoroughly.
 Allow to stand at room temperature until ready to be spread on the dough.
 If the mixture thickens, add a small amount of warm milk.


To Roll and Assemble the Dough:


 Spread a clean sheet or cloth over your entire table so that it is covered. I used a flexible pastry mat from King Arthur Flour that worked beautifully for rolling out the dough and rolling up the dough. Sprinkle with a couple of tablespoons to a handful of flour (use flour sparingly)
Place the dough on the sheet and roll the dough out with a rolling pin, starting in the middle and working your way out, until it measures roughly 10-12 inches (25½ cm by 30½ cm) in diameter.
 Spoon 1 to 1.5 teaspoons (5ml to 7 ½ ml/4 gm to 7 gm) of melted butter on top.Using the tops of your hands, stretch dough out from the center until the dough is thin and uniformly opaque. You can also use your rolling pin, if you prefer.
 As you work, continually pick up the dough from the table, not only to help in stretching it out, but also to make sure that it isn’t sticking. When you think it the dough is thin enough, try to get it a little thinner. It should be so thin that you can see the color and perhaps the pattern of the sheet underneath. 
Spoon filling evenly over dough until covered.
Lift the edge of the cloth and gently roll the dough like a jelly roll.
Once the dough is rolled up into a rope, gently lift it up and place it into a greased loaf pan in the shape of a “U”, with the ends meeting in the middle. You want to coil the dough around itself, as this will give the dough its characteristic look when sliced.
Repeat with remaining loaf.


Dough rolled thinly-I used a rolling pin for it all!
All rolled up


Resting before baking!

Topping: Brush the top of each loaf with a mixture of ½ cup (120 ml) of cold STRONG coffee and 2 tablespoons (30ml/28 gm/1 oz) of sugar. If you prefer, you can also use egg whites in place of this.
Cover pans lightly will plastic wrap and allow to rest for approximately 15 minutes.
 Preheat oven to moderate 350°F/180°C/gas mark 4.
Remove plastic wrap from dough and place into the preheated oven and bake for approximately 15 minutes.
Turn down the oven temperature to slow 300°F/150°C/gas mark 2 and bake for an additional 45 minutes, or until done.
 Remove bread from oven and brush with melted butter.
Check the bread every 30 minutes to ensure that the bread is not getting too brown. You may cover the loaves with a sheet of aluminum foil if you need to.
Remove from the oven and allow to cool on a wire rack for 20-30 minutes.
It is recommended that the best way to cut Povitica loaves into slices is by turning the loaf upside down and slicing with a serrated knife.


This lasted a nanosecond!

Filling Ingredients for the Pear Version:

3/4 cup finely chopped pecans (or walnuts)
1/4 cup light brown sugar
2 pears(I used Bosc) peeled and shredded.
2 tbsp lightly beaten egg
1/4 cup milk
4 TBSP butter
2 TBSP crumbled blue cheese

Prepare as method for traditional filling.


Pear/ blue cheese version


Tuesday, September 27, 2011

September Daring Bakers- Croissants

The Daring Bakers go retro this month! Thanks to one of our very talented non blogging members, Sarah, the daring bakers were challenged to make Croissants using a recipe from the Queen of French cooking, none other than Julia Child.

I wanted to like this recipe, really I did. I have always admired Julia Child and have had the pleasure of meeting her several times during my culinary tours of  duty.
But I was not wild about this recipe. I found the dough very hard to work with. The dough was tough and the method very tedious, even for croissant. The batch I made cooked too quickly and was doughy on the inside. Even Hubbie who eats anything would not eat them.
 I have made croissants a lot over the years and even bought a roller that cut out the triangles to get even shapes. I always used the recipe from The Village Bakers Wife and found it wonderful to work with. The top picture is one of the second batch of croissants I made using my tried and true recipe. The croissant came out a lot better and I promised myself to make them every month now just to keep in practice and justify keeping that behemoth roller cutter in the drawer.
The Village Bakers Wife is a great book and I recommend it for many recipes.
Here is a look at my croissant in progress.
And Hubbie ate two for breakfast!


Step one of many!

First rise of the day


Guess how many turns?

Yes, it is as big as it looks!


Cute as Croissant
Worth the effort!

Sunday, September 25, 2011

Husk Cherries

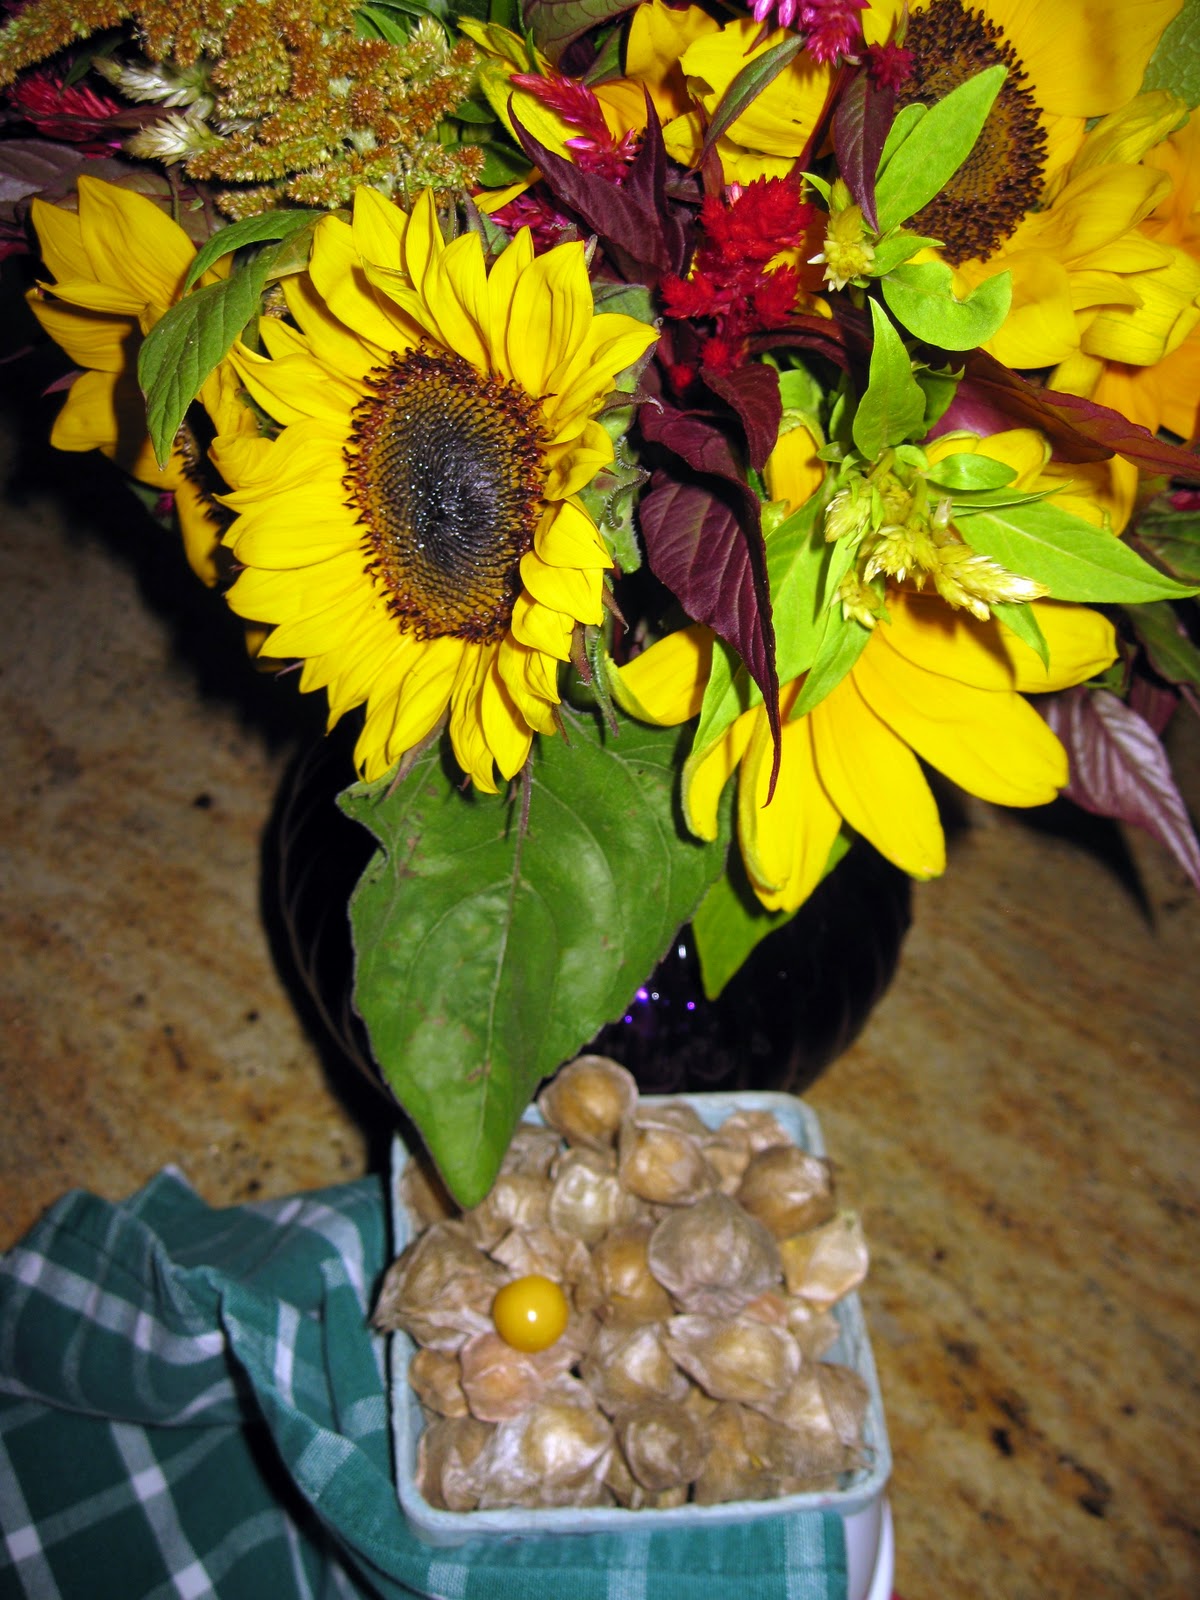
Recently, I searched the local Farmers Market for something interesting to take to our friends who had invited us to their lake for the weekend. One of the ladies at the stand gave me a husk cherry to try. I have to say I was not impressed because they were a little dull looking among the vibrant colors of tomatoes, corn, eggplant and profusion of flowers. I got a little rush when I opened the husk to find a spotless yellow berry all shiny and plump. The taste was not that of a cherry, though it had the texture of a cherry. The taste was more like plum, cherry and melon all mixed together. It was addictive and I grabbed the last container.

Weekends at my friend's lake are always filled with food, drink, fun and definitely no fuss about any of those activities. The husk cherries were a perfect end to the meal, almost like eating little candies as we unwrapped them easily from the husk and tossed the natural wrapper over the porch railing.

I did a little research about the husk cherry and found it is also known as a Cape gooseberry. I had never had a gooseberry before and now think of the recipes I have seen for gooseberry pie with a little less skepticism.
Here is a great link to learn more about the husk cherry/cape gooseberry.
The lady at the market said there would be another batch to be harvested but as the days grow shorter and the leaves on the trees change their colors daily, I think that I may have missed their short appearance and will have to wait another winter or get them online.
Oh well, that gives me time to look for that gooseberry pie recipe.

Friday, September 9, 2011

Heirloom Tomatoes

Clockwise from top left: Striped German, Arkansas Traveller, Evergreen, Speckled Roman
Our little town here in MA has a couple of Farmers Markets. One of those is right on my way home from the grocery store. I feel almost obligated to check in each day that I pass it. It has a few very young enthusiastic workers who smile almost continuously as they inquire of each customer the destination dish of the produce they are getting. I have to admit to getting  many menu ideas just by standing in line and being a good listener.

Recently, I noticed the heirloom tomato display. As a tomato lover from childhood when I used to eat tomato sandwiches so juicy, it would dribble down my chin, I decided I needed to do some research. I am the only tomato lover in my family so the results are totally subjective and unscientific findings.

I sliced the tomatoes and adorned them with a little kosher salt, fresh ground black pepper, extra virgin olive oil and chopped fresh basil. Of the four varieties chosen simply for eye appeal, the Evergreen and Striped German were the tastiest in the sliced tomato tasting.


Summer!
Evergreen
Hands down - my favorite. It had all the things I look for in a tomato. The skin was thin and tender. The flesh was juicy, almost a little floral but packing a huge tomato flavor and had a smooth finish. I ate it all and wished I had bought more than the one.

Speckled Roman
was the smallest tomato of the group. It reminded me of a plum tomato. It was very juicy but not sweet at all.  The skin was the thickest and toughest of the group and the flesh was almost mushy. I might use this one as a concasse to help thicken a sauce.

Arkansas Traveller

I thought this one was going to be my favorite when I picked it at the farm stand. It looked like the perfect sandwich tomato and I could envision its brilliant redness layering with some crunchy lettuce and crispy bacon between the sheets of beefy bread..yummmmm. But it was a big disappointment. It tasted like nothing..just wetness. It had a thick skin, almost unchewable. The flesh was a nice texture of firm/soft but there was no flavor at all and I didn't need a second bite when that beautiful Evergreen was still on the plate.


Striped German
If a tomato can be fun, this is my party girl tomato. It looks adorable sliced and the flesh was glistening!
It was a big beefsteak tomato that demands attention on the plate. The skin was thin and melted in the mouth. The flesh was firm but also melted in the mouth with almost a buttery feel to it. I ate all of this one too even though I was very full by the time I got to this tomato. I would love to use this one in a Panzanella with a really nice bread to dance with it.

Well there you have it. Heirloom Tomatoes have been getting very popular. Follow the link I created for more information about them. I found the site really useful. I am planning my tomato garden for next year almost halfheartedly. I think I might prefer to support my local stand instead and get some more menu ideas.

If you have a favorite tomato variety, I would love to hear about it! I am always game for more "research".


Sunday, August 28, 2011

Hurricane Irene At Our House


Well, it has been a whirlwind day here at our house in the Boston area! We moved all potential projectiles from around the outside of the house. We have been watching the news constantly and jumping every time the lights flicker holding our breath til thankfully they stayed on.

Periodically we would look around outside to see what was happening. Our property backs up to conservation land which means there are a lot of trees.

Then my hubbie spotted part of a  tree down that landed smack across the extra car that we have. We kept the third car,after buying my beloved Flex last year, for emergencies and family that might want their own wheels when visiting. It got me around for 128,000 miles only to be downed in the driveway.

The wind is still blowing and howling but we are told the worst is over.
After speaking to the insurance people about the car and being told that they have already started processing hundreds of claims before ours, we feel like the worst may be yet to come.

Sunday, August 14, 2011

Tiger Lily


I was making a cake for a friend and she asked me to make gumpaste Tiger Lilies for the decoration. Coincidentally, I was experimenting with some gumpaste Asian lilies  because the lilies were all blooming in the garden and I was inspired. I felt it was a nice jump to making the Tiger Lilies.
I thought I would do some instructional photos and post them here. Then I noticed the video camera the boy had set up and I thought I would give taping it a whirl. This is my second attempt at taping something for YouTube and it always amazes me how much time it takes me to get something done. Please be kind with your critique. I am hoping the more I do, the better I will get!

I am listing the links to the YouTube uploads.

Part One shows how to make the flower petals.
Part Two shows how to floral tape the petal wires and make the flower center stem and put together the flower.
Part Three shows how to color the flower.


I used the Wilton Ready to Use Gumpaste and the Gumpaste Flower Kit. I am a Wilton Instructor after all!!
I used lily flower stamens from The International Sugar Art Collection.

 Give the lilies a try. The  lilies in the garden are gone but the sugar  lilies are always in bloom!

Sunday, August 7, 2011

Gazpacho


Gazpacho is my my favorite summer dish. It takes less than 30 minutes to put together. I whip up a big container of it and have it for lunch every day. It is refreshing, easy, and loaded with the season's best ingredients. I blend this version of the recipe for a smoother soup. You could easily just chop the ingredients for a chunkier version. I prefer to add in toppings for texture and  to vary the interest. This version has cooked shrimp and avocado. Sometimes, I will add croutons or french fried onions. This soup lends itself to many variations. I think it would make a good picnic item although I cannot even remember the last time I went on a picnic?!? Hmmmm, if this rain we seem to have woken up to stops, perhaps I will test that picnic theory.
Hope it's sunny where you are!

Summer Gazpacho

1 clove garlic, peeled
5 ripe tomatoes, peeled, seeded and rough copped(concasse)
1/2 vidalia onion, rough chopped
1 english cucumber, peeled seeded and rough chopped
1/2 green pepper, chopped
1 slice whole wheat bread slice, torn into large chunks
24 ounces v-8® vegetable juice
4 ounces beef broth, canned is fine
1 tablespoon lemon, juice
2 tablespoons extra virgin olive oil
1 teaspoon Worcestershire sauce, optional
1 teaspoon Tabasco sauce
1/4 cup italian parsley, chopped


Pour half of the V-8 juice in a blender and add the bread slice. Allow the bread to sit for about 5 minutes to completely saturate. Add the vegetables ( garlic, tomatoes, onion, cucumber, green pepper) in 2 batches and blend untiltil smooth.


Remove to a large bowl.

 Stir in the rest of the v-8, beef broth, lemon juice, olive oil, Worcestershire sauce, tabasco. Stir well. Taste for seasoning and add salt or pepper to taste.

Add parsley and stir to combine.

 Chill until serving. Ladle soup into a bowl and garnish as desired. I added chopped cooked shrimp and chopped avocado.

About 6 servings.