Showing posts with label chocolate. Show all posts
Wednesday, May 27, 2015
THE DARING BAKERS’ MAY, 2015 CHALLENGE: LAMINGTONS
For the May challenge Marcellina from Marcellina in Cucina dared us to make Lamingtons. An Australian delicacy that is as tasty as it is elegant.
I knew this was going to get messy but I am not afraid of a mess, especially a chocolate one. There was a rumor that went around the catering kitchen I worked in many years ago that when Evelyn worked with chocolate , everyone wore chocolate home that day. The rumor was started by my beloved co-worker and I do believe that there was a lot of truth to it. So, I waited for a day when I could leisurely make a mess and then just as leisurely clean it up. I recommend this tactic when you decide to make Lamingtons.
I have attached the PDF for the challenge here in case you want the full scoop about the history and assorted recipes/ troubleshooting for the Lamingtons.
I veered away from the recipes a bit. I made a coffee raspberry butter cake as my cake base. You can get that recipe here and to that recipe add 1 tablespoon espresso powder to the milk and 1/2 teaspoon raspberry extract along with the vanilla extract. Also, as an aside, you can tinker different flavoring with the base recipe quite a bit; it is very forgiving.
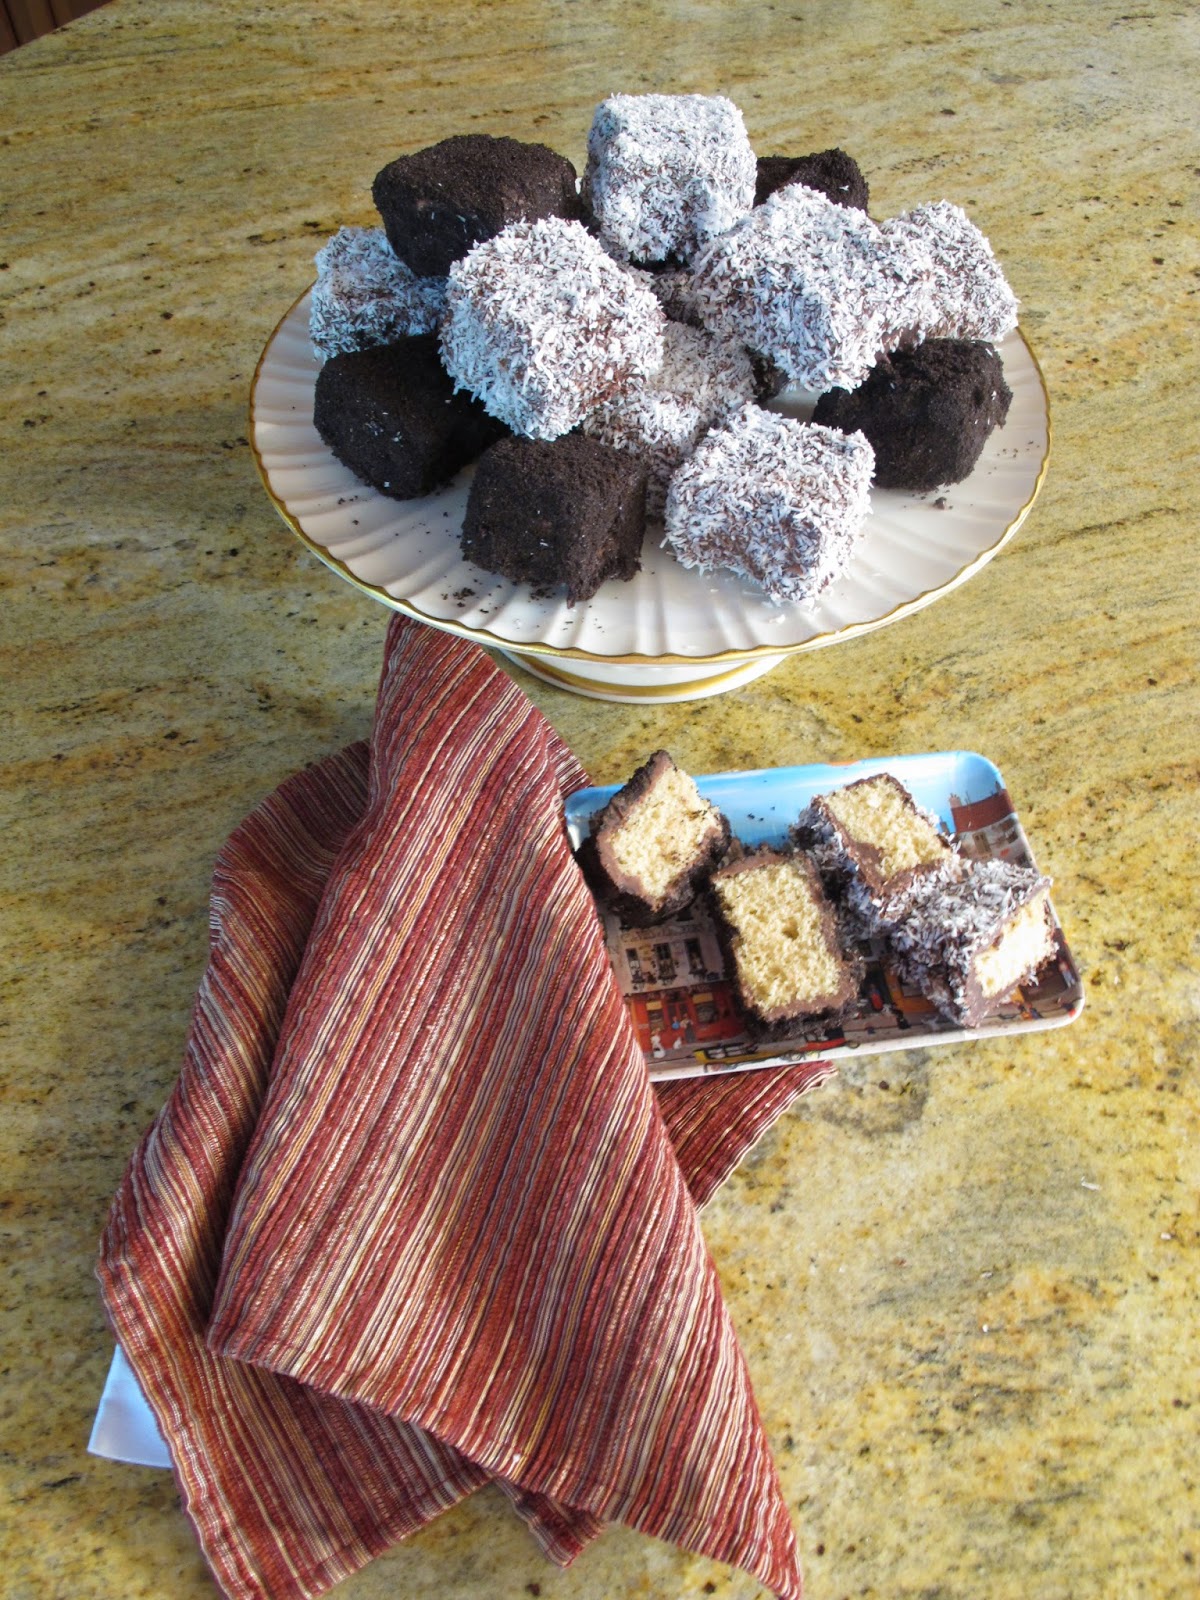
One other difference was that I rolled some of the Lamingtons in crushed chocolate cookie crumbs. I was not convinced that the coconut would be well received. I was wrong. The coconut versions were adored and devoured. They were also the prettiest so I am sure I will stay classic with the coconut in future baking.
Here are a few of my own troubleshooting recommendations(lessons learned the hard way):
1. Make sure the cake is a day old. Freshly baked cake will fall apart during the chocolate dipping phase.
2. Don't skimp on the chocolate! Also, I added a bit of safflower oil to the chocolate to thin it a bit. I cannot give an amount as it depends on the brand chocolate and how old it is. I can tell you that for one pound of Ghiradelli morsels, I used 2 tablespoons oil. I advise adding a tablespoon at a time until you get your desired consistency. And what is that?? I like the consistency where it drops evenly and quickly from a fork but leave a thin coating on that fork.
3. Use a cake rack and put parchment paper or wax paper underneath it to catch the drippings. That way you can reuse the chocolate. I dipped the Lamingtons and then let them sit on the rack for a few minutes before tossing in the coconut. This reduced the globbing of chocolate in the coconut for me. After dipping about 10 Lamingtons, the first ones were ready for coconut coating.
4. Make sure you have a crowd waiting for these. There will be a lot of them. I cut my cake into approximately 1 1/2 inch squares and I practically fed the neighborhood. Here are a few photos to get you excited or if you are a neat freak, send you running and screaming. I hope you get excited.
Friday, December 27, 2013
Daring Bakers December Challenge - Whoopie Pies
The December Daring Bakers' Challenge had us all cheering - the lovely and talented Bourbonnatrix of Bourbonnatrix Bakes was our hostess and challenged us to make fun, delicious and creative whoopie pies! Delicious little cake-like cookies sandwiching luscious filling in any flavors we chose... What else is there to say but "Whoopie!"
I was super busy this month but more than determined to do this challenge. Lis, one of the founders of Daring Bakers', unexpectedly died in November. I never met her or communicated with her but I felt her wonderful presence every month as she cheered our current challenges and rooted for our future challenges. I could feel her energy in every post she gave us. Two Daring Baker members , Shelley and Ruth, have stepped forth to carry on her project and I dedicate this challenge to them as well as Lis.
So, I was making lots of whoopie this holiday season!!
I have a very good friend who makes wonderful whoopie pies and brings them to all our gatherings. I have never had a reason to make them. I got my Woopie fix from her. I was surprised how easily they came together. I am thinking that the recipe from Bourbonnatrix is a great part of that reason. I made her chocolate version and it is deeelish! I experimented with German Chocolate filling to make it a little exciting. The whoopies were delicious and filling!!! I may make them a little smaller next time. There will definitely be a next time. I love my friends whoopie pies but I don't need to wait for a party anymore...I can make whoopie anytime!
German Chocolate Whoopie Pies
For the Whoopie Pies
1/2 cup (120 ml) (4 oz) (115 gm) butter
1 cup (240 ml) (7 oz) (200 gm) brown sugar, firmly packed
1 teaspoon (5 ml) (5 gm) espresso coffee powder, optional
1 teaspoon (5 ml) (5 gm) baking powder
1/2 teaspoon (3 gm) baking soda
3/4 teaspoon (4½ gm) salt
1 teaspoon (5 ml) vanilla extract
1 large egg
1/2 cup (120 ml) (1½ oz) (45 gm) Dutch-process cocoa, sifted
2 1/3 cups (560 ml) (10 oz) (285 gm) unbleached all-purpose (plain) flour
Directions:
1) Preheat oven to moderate 350°F/180°C/gas mark 4. Lightly grease (or line with parchment)
two baking sheets.
2) In a large mixing bowl, beat together the butter, brown sugar, espresso coffee powder (if
using), baking powder, baking soda, salt, and vanilla till smooth. Add the egg, again beating
till smooth.
3) Add the cocoa, stirring to combine.
4) Add the flour to the batter alternately with the milk, beating till smooth. Scrape down the sides
and bottom of the bowl, and beat again briefly to soften and combine any chunky scrapings.
5) Drop the dough by the 1/4-cupful (60 ml) onto the prepared baking sheets, leaving plenty of
room between the cakes; they'll spread. A muffin scoop works well here.
6) Bake the cakes in a preheated moderate oven for 15 to 16 minutes, till they're set and firm to
the touch. Remove them from the oven, and cool on the pans. While still lukewarm, use a
spatula to separate them from the pan or parchment; then allow to cool completely.
| Ready for baking |
| Ready for filling |
German Chocolate Filling (adapted from Original Whistlestop Cafe Cookbook by Fannie Flagg)
1 1/3 cups (315 mL) heavy cream
1 1/3 cups (315 mL) sugar
4 large egg yolks, beaten
2/3 cup ( 158 mL)butter
2 teaspoon (10 mL) vanilla extract
1 1/3 cups (315 mL) flaked coconut
1 1/3 cups (315 mL) chopped toasted pecans
2 ounces (56 gm)sweet baking chocolate, grated
Combine first four ingredients in a saucepan ans cook over low heat, stirring constantly until butter and sugar melt. Bring to a boil over medium heat and cook for 12 minutes, stirring constantly. Remove from heat; add vanilla, coconut, and pecans. Let the filling stand until cool and of spreading consistency., stirring frequently. Stir in the chocolate when cool. Spread one one side of the whoopie with about 2 tablespoons of the filling and top with another whoopie half.
| Custard cooking |
| Chopped toasted pecans |
| Filling cooling down |
| Cooled filling ready for chocolate-much thicker now! |
| Grated chocolate-a big pain! |
| Yummy filling ready for Whoopie |
Monday, September 2, 2013
Still Summer Zucchini Cake
OK, so it is the end of summer and the kids are going back to school and the hurricane weather is in full force and the garden is looking sickly while the fall mums at the garden store are looking really fine.
You still have mounds of zucchini to remind you that summer is still here and very green. I am not a big zucchini fan, I will admit, but I love this cake recipe for the very fact that it tastes like chocolate cake and NOT zucchini. It has a little spice to it to elevate it from a typical chocolate cake and it goes with just about every flavor of ice cream. I know...I have done the experiments.
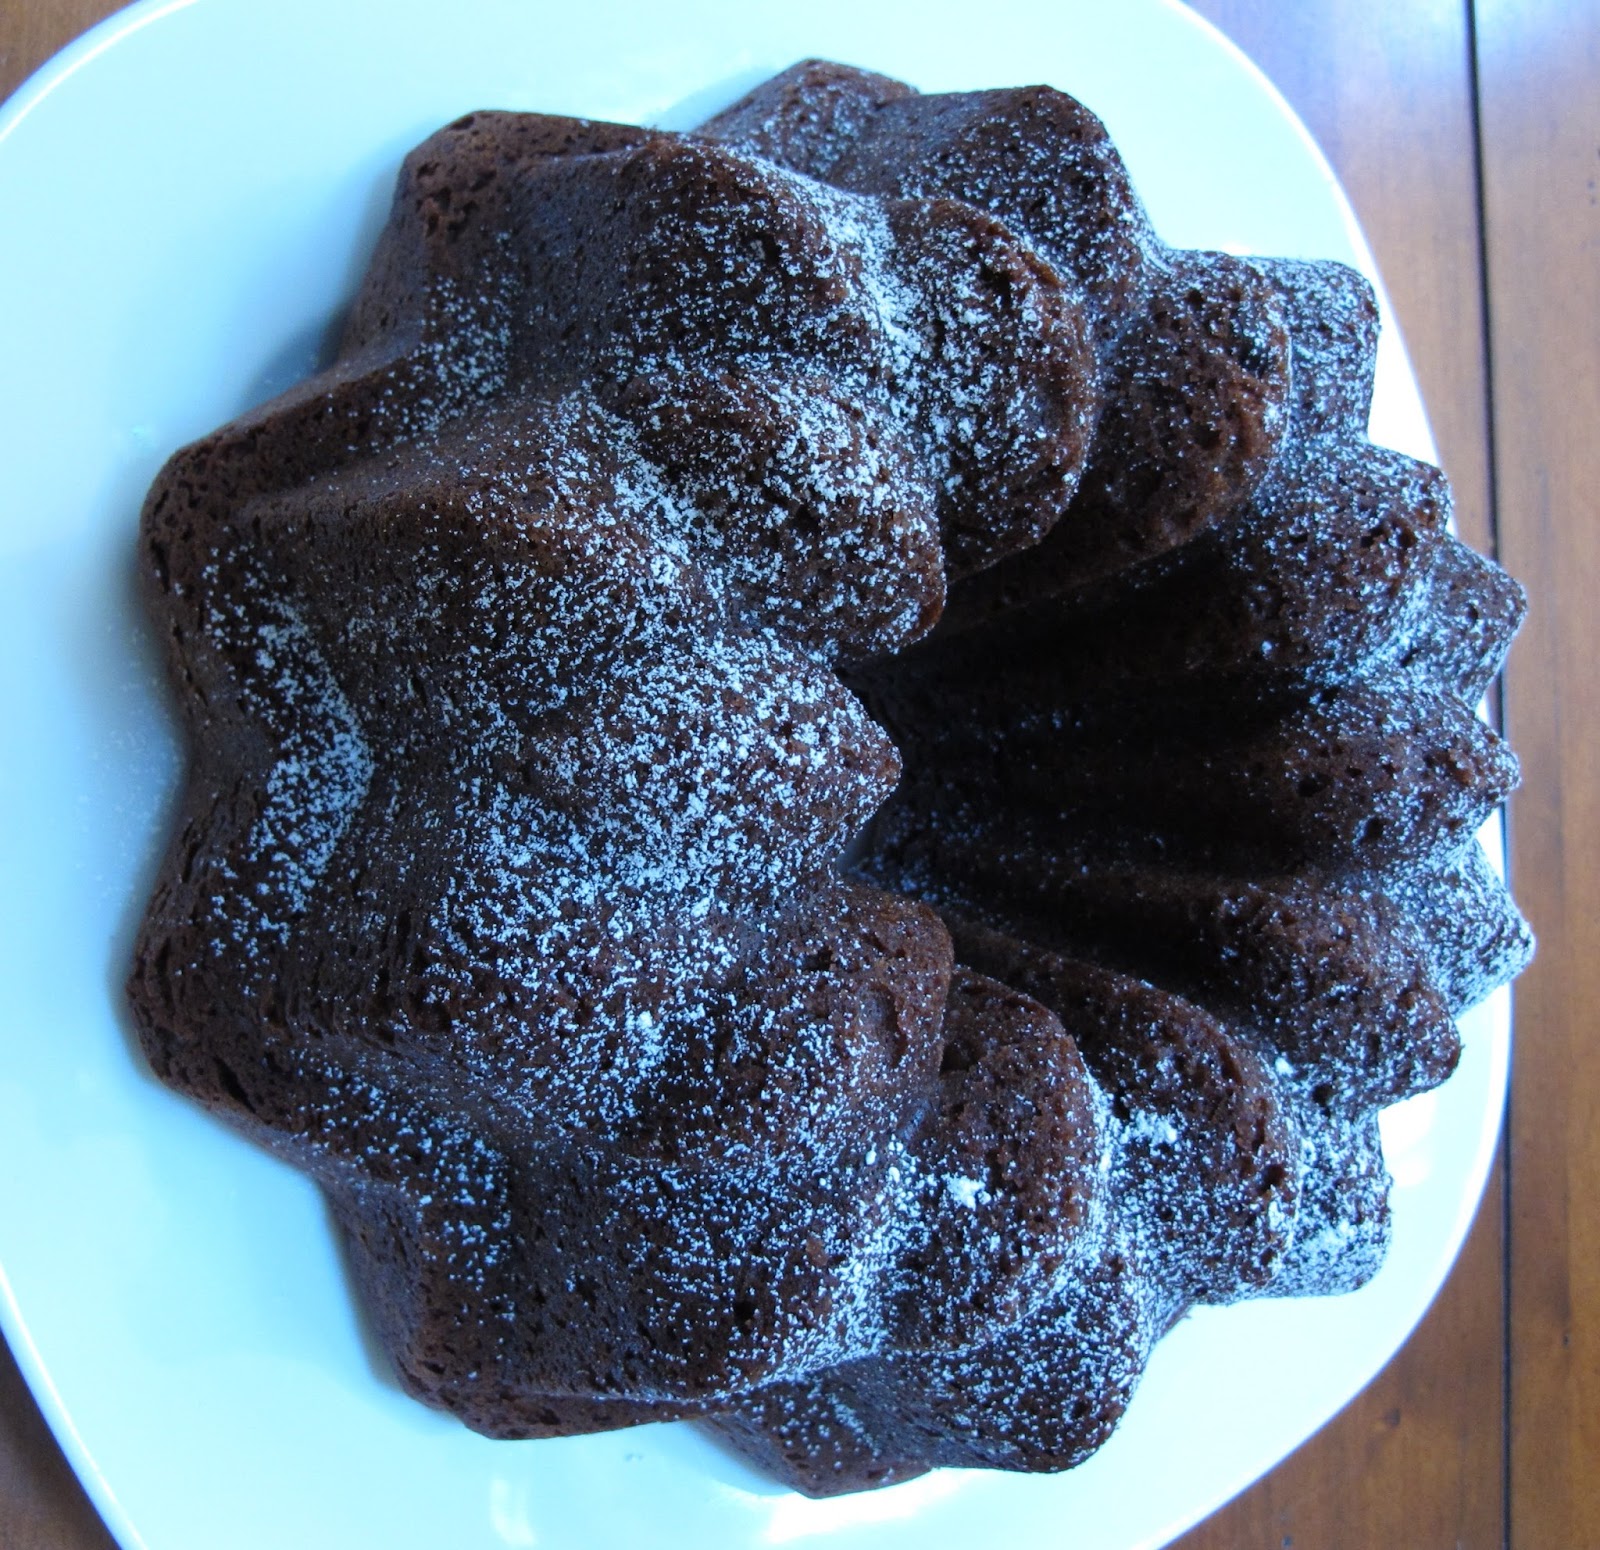
Baking in a fluted Bundt pan gives the cake a beautiful look without having to do anything more that dust it with confectioners sugar. Find your favorite accompaniment ( mine is a hot cup of coffee splashed with whipped cream) and enjoy still slightly warm from the oven or room temperature.
Zucchini Cake
6 ounces unsalted butter, room temperature
1 3/4 cups granulated sugar
2 ounces unsweetened chocolate, melted
4 eggs, room temperature
1 teaspoon vanilla extract
1 3/4 cups all-purpose flour
2 1/2 teaspoons baking powder
1 teaspoon baking soda
1/2 teaspoon salt
1/2 teaspoon ground cinnamon
1 cup half and half,room temperature
1 3/4 cups zucchini, unpeeled and shredded
1/2 cup semisweet chocolate chips
Prepare a 10-cup Bundt pan by spraying the pan with a baking release spray such as Pam. Preheat the oven to 350 degrees.
1.Beat butter and sugar with a mixer on medium speed for about five minutes. The mixture will not look smooth at this point but do not worry.
2.Add the melted chocolate and beat until combined.
3.Add the eggs, one at a time, beating well in between.
4.Add the vanilla extract.
5.Sift together the flour, baking powder, baking soda, cinnamon and salt. Add the flour mixture alternately with the half and half. Stir in the zucchini and chocolate chips.
6.Pour mixture in to prepared pan and bake for about 45 minutes.
7.Remove the cake from the oven to a cooling grid. Allow to cool for about 20 minutes and then turn out of pan onto cooling grid. Cool to room temperature. Dust top with sifted confectioners sugar or a chocolate glaze. I have nasturtiums from the garden on occasion and these make lovely edible decorations.
*Note: Not sure if you have a 10-cup Bundt pan? Use water in a measuring cup to fill the pan and see how many cups you get. This will give you a good idea how many cups your pan will hold.
Monday, May 27, 2013
May 2013 Daring Bakers' Challenge - Prinsesstårta
Korena of Korena in the Kitchen was our May Daring Bakers’ host and she delighted us with this beautiful Swedish PrinsesstÃ¥rta!
Sometimes when we get a challenge, I immediately start thinking of ways to change it and make it unique. I made all kinds of plans for this one, especially after reading a bit of history about it. Korena gave us some nice background information which I will share.
A little research revealed that the original recipe was created in the 1930s by a Swedish home economics teacher named Jenny Ã…kerström, who taught the three Swedish princesses of the time. She published a series of four cookbooks called “The Princess Cookbooks” and in one of the editions, there was a recipe for “Grön TÃ¥rta” (green cake). One story is that this later became known as “princess cake” (prinsesstÃ¥rta) because the three princesses are said to have loved it so much. Another story is that Ms. Ã…kerström actually created three very elaborate “princess cake” recipes – a different one for each princess – and that the current version is a simplified combination of all three. That explains the princess connection, but the reason for the cake being green still seems to be a mystery. Today, prinsesstÃ¥rta is popular in Finland as well as Sweden – so much so that the third week in September is officially PrinsesstÃ¥rta Week!
I have a beautiful book called A World of Cakes by Krystina Castella in which Prinsesstårta is featured. She writes that , in Sweden, you can find the Prinsesstårta everywhere, in every variation and for every holiday:birthdays, anniversaries, national holidays, and more.
The Prinsesstårta is commonly made with sponge cake, apricot preserves, pastry cream and whipped cream. It is usually covered in marzipan that has been colored green for reasons that are not verified.
The results are "over the top" delicious and I can see why this is a celebratory dessert.It is very rich tasting, looks beautiful on the plate and gives a festive feel to the occasion of eating it. I can just imagine the nostalgic, homey feel it gives those who grew up with birthdays celebrated with a Prinsesstårta
So, create an occasion to makePrinsesstårta and find a group of people too share this wonderful traditional treat of a dessert.
Start by making the components. You can make the pastry cream and cake the day before to ease the workload.
I decided to make my Prinsesstårta with devils food cake and raspberry preserves as my variations. I love my Devils food cake recipe and look for any opportunity to make it.The cake is soft and moist and not too sweet, perfect with almost any type of icing. I covered the cake with rolled fondant mixed with pink modeling chocolate. I find that modeling chocolate gives fondant a nice sheen and wonderful taste. You can use rolled fondant, or modeling chocolate or the traditional marzipan instead..
Korena gave us some wonderful recipes for guidance. I have a pastry cream that I have used for years. It makes a lot of pastry cream but a friend of mine was making Boston Cream pie and promised to take the extra pastry cream.
Here are the recipes with pictures.
Pastry Cream
Ingredients:
6 large egg yolks
¾ cup (170 gr.) sugar
1/3 cup (75.6 grams)cornstarch
2 cup (480 ml)milk
Procedure:
Split the vanilla bean lengthwise and add to the milk.
Heat the milk gently to scalding.
Remove the vanilla bean and scrape the seeds into
the milk mixture using a knife or small metal spatula.
Stir the egg yolks with the sugar and cornstarch.
Add the milk, a few drops at first to temper and
then the rest.
Return the mixture to the heat (medium) and cook,
stirring continuously with a wire whip until the
mixture bubbles for about 10 seconds.
Strain into another container through a fine mesh
strainer. I like to use a ladle to swirl around the strainer to push the pastry cream though easily.
Cover with plastic wrap flush against the pastry
cream and chill.
Devils Food Cake: (Sorry I do not have the conversions)
Ingredients:
2 Cups All-purpose Flour
3/4 Teaspoon Baking Powder
1 1/2 Teaspoons Baking Soda
3/4 Teaspoon Salt
12 Tablespoons Unsalted Butter, room temperature
2 Cups Sugar
3/4 Cup Cocoa Powder, non alkalized
2 Teaspoons Vanilla Extract
3 Large Eggs
1 1/4 Cups Water
1/4 Cup Milk
Procedure:
Ingredients:
2 Cups All-purpose Flour
3/4 Teaspoon Baking Powder
1 1/2 Teaspoons Baking Soda
3/4 Teaspoon Salt
12 Tablespoons Unsalted Butter, room temperature
2 Cups Sugar
3/4 Cup Cocoa Powder, non alkalized
2 Teaspoons Vanilla Extract
3 Large Eggs
1 1/4 Cups Water
1/4 Cup Milk
Procedure:
Preheat oven to 350 degrees. Grease 9 -inch spring form pan and line the bottom with parchment paper. Cover the outside of the pan with aluminium foil to catch any seepage.
2. Sift together the flour, baking soda, baking powder and salt. Set aside,
3. In a mixer fitted with the paddle, cream butter adding sugar slowly continuing to beat for about 4 minutes. Turn off mixer and scrape down sides.
4. Add the cocoa powder and the vanilla and beat at low speed until smooth.
5. Add the eggs one at a time beating well in between on medium speed and scraping the sides constantly.
6. Combine the milk and water in a saucepan and bring just to a boil.
7. Add the flour a 1/4 cup at a time on low speed. Add hot milk mixture slowly in a stream alternately with the flour beginning and ending with the flour and mix until smooth.
2 cups (480 ml) heavy cream, chilled
granulated white sugar, to taste used 2 tablespoons because the devils food cake is not super sweet
Cake, cooled
1/3 cup (80 ml) seedless raspberry jam
Vanilla Custard, chilled
Covering and Rose
Directions:
granulated white sugar, to taste used 2 tablespoons because the devils food cake is not super sweet
Cake, cooled
1/3 cup (80 ml) seedless raspberry jam
Vanilla Custard, chilled
Covering and Rose
Directions:
1. In a large bowl, whip the heavy cream until soft peaks form. Add sugar to taste and continue whipping the cream until stiff. You want it to be sturdy enough to provide structure to the cake, but not over-whipped enough to make butter. Set the whipped cream aside.
2. With a long serrated knife, slice the sponge cake into three even layers. I used a cake leveler that I got from Wilton as shown in picture. Set aside the middle layer – this will become the top layer of the assembled cake as it is the most flexible and therefore easiest to bend into a dome over the whipped cream.

3. Place one of remaining layers on a cake board or serving platter and spread it evenly with the raspberry jam. Spread or pipe one cup of the chilled custard over the jam in an even layer, leaving enough room around the edges so that it doesn’t spill over the sides of the cake.
4. Top the custard with another layer of cake. Spread with one cup of the custard evenly over it, again leaving some room around the edges.

5. Reserve ½ cup (120 ml) of the stiffly whipped cream. Pile the rest into a mound on top of the custard. Spread it into a thick layer with a thin, flexible spatula or off-set spatula, then hold the spatula at an angle to shape the whipped cream into a dome, piling it up in the middle of the cake as much as possible.
6. Place the final layer of sponge cake (the one cut from the middle of the cake) on top of the whipped cream. Do not press on the top of the cake – instead, gently tuck the edges of the cake layer into the whipped cream, so that they are flush with the cream. This will create a smooth, seamless dome on top of the cake.
7. Gently spread the reserved ½ cup (120 ml) of whipped cream over the entire cake to fill in any cracks and even out the surface. If necessary, refrigerate the cake to firm it up before continuing.
2. With a long serrated knife, slice the sponge cake into three even layers. I used a cake leveler that I got from Wilton as shown in picture. Set aside the middle layer – this will become the top layer of the assembled cake as it is the most flexible and therefore easiest to bend into a dome over the whipped cream.
3. Place one of remaining layers on a cake board or serving platter and spread it evenly with the raspberry jam. Spread or pipe one cup of the chilled custard over the jam in an even layer, leaving enough room around the edges so that it doesn’t spill over the sides of the cake.
4. Top the custard with another layer of cake. Spread with one cup of the custard evenly over it, again leaving some room around the edges.
5. Reserve ½ cup (120 ml) of the stiffly whipped cream. Pile the rest into a mound on top of the custard. Spread it into a thick layer with a thin, flexible spatula or off-set spatula, then hold the spatula at an angle to shape the whipped cream into a dome, piling it up in the middle of the cake as much as possible.
6. Place the final layer of sponge cake (the one cut from the middle of the cake) on top of the whipped cream. Do not press on the top of the cake – instead, gently tuck the edges of the cake layer into the whipped cream, so that they are flush with the cream. This will create a smooth, seamless dome on top of the cake.
7. Gently spread the reserved ½ cup (120 ml) of whipped cream over the entire cake to fill in any cracks and even out the surface. If necessary, refrigerate the cake to firm it up before continuing.
I got very nervous at this point as the cake was wobbly form all the creamy parts and I chilled it, rolled out the fondant and covered it without taking a picture. I am showing Korena's wonderful picture here so you can see what it should look like at this point.
8. Dust your work surface with icing (confectioners) sugar and press the marzipan or other covering into a 6-inch (15 cm) disc (knead it a bit to warm it up first). Coat both sides with icing sugar and roll it out into a 14” (35½ cm) diameter circle less than 1/8” (3 mm) thick. Use plenty of icing sugar to prevent it from sticking. Alternatively, you can roll the marzipan out between two wide sheets of parchment paper (still use plenty of icing sugar).
9. Use the rolling pin to drape the rolled-out marzipan sheet over the cake and smooth it around the cake gently with your hands.
If it seems like it wants to fold or buckle around the cake, gently lift and stretch it away from the cake with one hand while smoothing it down with the other.
Trim the excess from the bottom of the cake with a paring knife or spatula blade.
These were great instructions from Korena and can be used for modeling chocolate or fondant.
I decorated the top of the cake with a rose and leaves done in modeling chocolate. I covered the bottom with a border of green modeling chocolate and used a modeling tool to press a pretty design.
I will post a tutorial about the rose in my next post!
The rose is a traditional garnish and looks very pretty.
Thanks Korena! This challenge was a lot of fun and deeelish!
| Korena's beautiful cake covered with domed whipped cream |
8. Dust your work surface with icing (confectioners) sugar and press the marzipan or other covering into a 6-inch (15 cm) disc (knead it a bit to warm it up first). Coat both sides with icing sugar and roll it out into a 14” (35½ cm) diameter circle less than 1/8” (3 mm) thick. Use plenty of icing sugar to prevent it from sticking. Alternatively, you can roll the marzipan out between two wide sheets of parchment paper (still use plenty of icing sugar).
9. Use the rolling pin to drape the rolled-out marzipan sheet over the cake and smooth it around the cake gently with your hands.
If it seems like it wants to fold or buckle around the cake, gently lift and stretch it away from the cake with one hand while smoothing it down with the other.
Trim the excess from the bottom of the cake with a paring knife or spatula blade.
These were great instructions from Korena and can be used for modeling chocolate or fondant.
I decorated the top of the cake with a rose and leaves done in modeling chocolate. I covered the bottom with a border of green modeling chocolate and used a modeling tool to press a pretty design.
I will post a tutorial about the rose in my next post!
The rose is a traditional garnish and looks very pretty.
Thanks Korena! This challenge was a lot of fun and deeelish!
| My slice !! And now off to the gym for some calorie burning!! |
Friday, August 10, 2012
National S'Mores Day
Happy S'mores Day to You!
There seems to be a lot of attention to S'mores this year. At the supermarket, there is an entire section devoted to marshmallows for S'mores. There is another section close by the marshmallows dedicated to all things S'more. S'more flavored candies, equipment for making your own S'mores and of course, the necessary ingredients(in addition to marshmallows) that make the S'more.
I had my first S'more at summer camp about 200 years ago when we were using fire to cook our food on a regular basis. We had walked close to 500 miles,it seemed, up a rocky path to a beautiful vista called Goat something or other and dangled our tiny legs over a deep ravine while our counselors made a giant fire in the middle of the woods. So wholesome. They doled out the graham crackers, hershey bars and marshmallows. We had to find our own stick to toast the marshmallows. The S'mores were messy but chocolaty so I fell in love with them.
I have not had S'mores since that day but after enough trips past the S'more section of the supermarket, the marketing strategy reeled me in.
I wanted to make a less messy S'more however. I wanted it to be compact like a sandwich and easy to serve guests. I thought the main effort should be toasting the marshmallow followed by the big S'more reward.
I played around with a few recipes online for a chocolate chip graham cracker cookie. Then I toasted a few marshmallows and sandwiched them between two cookies. Delightful!!
The cookies, on their own are really tasty. With the toasted marshmallow, the smoky flavor comes through and elevates the cookie sandwich to nirvana. I recommend eating the cookie sandwich soon after smashing the marshmallow between two cookies. This is not a make ahead dessert or snack or breakfast item..whatever you want to label it. The marshmallow does not improve when it cools down to room temperature and the warmth of slight melting of the chocolate chips is lost. So toast up, and eat up!
Happy National S"more Day to you!
Chocolate Chip Graham Cracker Cookie
Yield: 24 cookies or 12 S'more sandwiches
1/2 cup sugar
1/2 cup light brown sugar
1 egg, room temperature
1 1/4 cups all-purpose flour
1/2 teaspoon baking soda
1/2 teaspoon salt
1 cup graham cracker crumbs
1 teaspoon vanilla extract 2 cups semisweet chocolate chips
Blend in egg and vanilla. Add combined flour, graham cracker crumbs, baking soda and salt.
Mix well. Stir in chocolate chips
Drop dough by heaping tablespoonfuls onto greased cookie sheets about 3 inches apart . Press to flatten slightly.
Bake in pre-heated oven 375 degrees F (190 degrees C) for 8-10 minutes or until lightly browned. Cool on sheet about 3 minute and remove to wire racks. Cool to room temperature.
To make a S'More sandwich:
Stick a marshmallow on the end of a skewer or a stick if you're at Goat something gulch and toast the marshmallow over an open flame being careful not to toast yourself.
Set the marshmallow on the flat side of one cookie. Lay another cookie on top sandwiching the marshmallow as you remove the skewer so you won't burn your fingers on the hot mallow. Wait a minute to eat your treat so the hot marshmallow does not singe the roof of your mouth because that is a pain that no one deserves. You can use that time to get yourself a cold glass of milk.
Enjoy!
Subscribe to:
Posts (Atom)