Showing posts with label cake. Show all posts

Friday, December 27, 2013

Daring Bakers December Challenge - Whoopie Pies


The December Daring Bakers' Challenge had us all cheering - the lovely and talented Bourbonnatrix of Bourbonnatrix Bakes was our hostess and challenged us to make fun, delicious and creative whoopie pies! Delicious little cake-like cookies sandwiching luscious filling in any flavors we chose... What else is there to say but "Whoopie!"

I was super busy this month but more than determined to do this challenge. Lis, one of the founders of Daring Bakers', unexpectedly died in November. I never met her or communicated with her but I felt her wonderful presence every month as she cheered our current challenges and rooted for our future challenges. I could feel her energy in every post she gave us. Two Daring Baker members , Shelley and Ruth, have stepped forth to carry on her project and I dedicate this challenge to them as well as Lis.

So, I was making lots of whoopie this holiday season!!
I have a very good friend who makes wonderful whoopie pies and brings them to all our gatherings. I have never had a reason to make them. I got my Woopie fix from her. I was surprised how easily they came together. I am thinking that the recipe from Bourbonnatrix is a great part of that reason. I made her chocolate version and it is deeelish! I experimented with German Chocolate filling to make it a little exciting. The whoopies were delicious and filling!!! I may make them a little smaller next time. There will definitely be a next time. I love my friends whoopie pies but I don't need to wait for a party anymore...I can make whoopie anytime!


German Chocolate Whoopie Pies

For the Whoopie Pies 

1/2 cup (120 ml) (4 oz) (115 gm) butter 
1 cup (240 ml) (7 oz) (200 gm) brown sugar, firmly packed 
1 teaspoon (5 ml) (5 gm) espresso coffee powder, optional 
1 teaspoon (5 ml) (5 gm) baking powder 
1/2 teaspoon (3 gm) baking soda 
3/4 teaspoon (4½ gm) salt 
1 teaspoon (5 ml) vanilla extract 
1 large egg 
1/2 cup (120 ml) (1½ oz) (45 gm) Dutch-process cocoa, sifted 
2 1/3 cups (560 ml) (10 oz) (285 gm) unbleached all-purpose (plain) flour 

Directions: 
1) Preheat oven to moderate 350°F/180°C/gas mark 4. Lightly grease (or line with parchment) 
two baking sheets.  
2) In a large mixing bowl, beat together the butter, brown sugar, espresso coffee powder (if 
using), baking powder, baking soda, salt, and vanilla till smooth. Add the egg, again beating 
till smooth.  
3) Add the cocoa, stirring to combine.  
4) Add the flour to the batter alternately with the milk, beating till smooth. Scrape down the sides 
and bottom of the bowl, and beat again briefly to soften and combine any chunky scrapings.   
5) Drop the dough by the 1/4-cupful (60 ml) onto the prepared baking sheets, leaving plenty of 
room between the cakes; they'll spread. A muffin scoop works well here.  
6) Bake the cakes in a preheated moderate oven for 15 to 16 minutes, till they're set and firm to 
the touch. Remove them from the oven, and cool on the pans. While still lukewarm, use a 
spatula to separate them from the pan or parchment; then allow to cool completely.


Ready for baking

Ready for filling

German Chocolate Filling (adapted from Original Whistlestop Cafe Cookbook by Fannie Flagg)

1 1/3 cups (315 mL) heavy cream
1 1/3 cups (315 mL) sugar
4  large egg yolks, beaten
2/3 cup ( 158 mL)butter
2 teaspoon (10 mL) vanilla extract
1 1/3 cups (315 mL)  flaked coconut
1 1/3 cups  (315 mL)  chopped toasted pecans
2 ounces (56 gm)sweet baking chocolate, grated 
Combine first four ingredients in a saucepan ans cook over low heat, stirring constantly until butter and sugar melt. Bring to a boil over medium heat and cook for 12 minutes, stirring constantly. Remove from heat; add vanilla, coconut, and pecans. Let the filling stand until cool and of spreading consistency., stirring frequently. Stir in  the chocolate when cool. Spread one one side of the whoopie with about 2 tablespoons of the filling and top with another whoopie half. 


Custard cooking

Chopped toasted pecans

Filling cooling down


Cooled filling ready for chocolate-much thicker now!

Grated chocolate-a big pain!

Yummy filling ready for Whoopie


Monday, September 2, 2013

Still Summer Zucchini Cake


OK, so it is the end of summer and the kids are going back to school and the hurricane weather is in full force and the garden is looking sickly while the fall mums at the garden store are looking really fine.
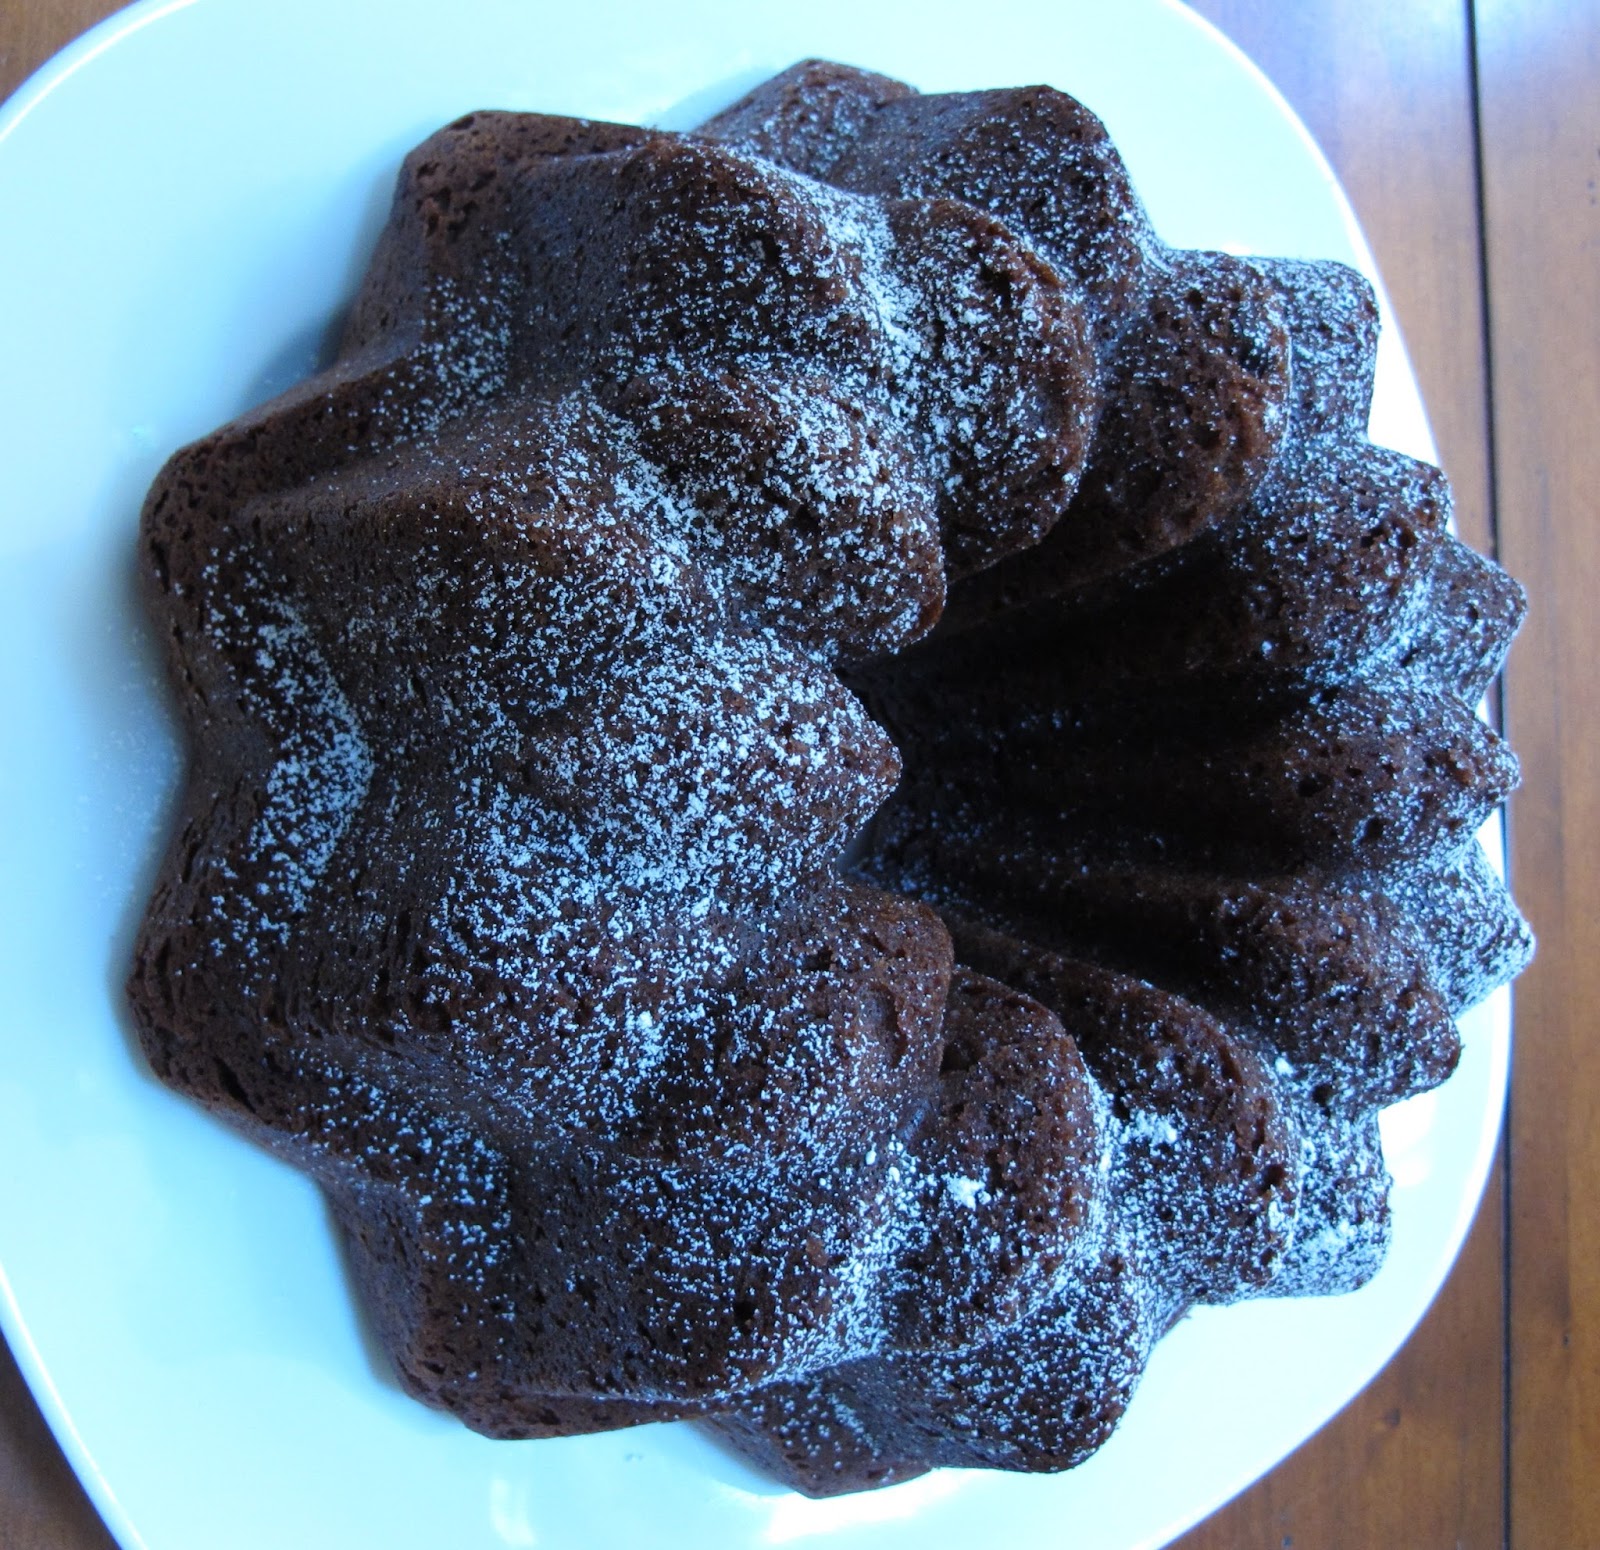
You still have mounds of zucchini to remind you that summer is still here and very green. I  am not a big zucchini fan, I will admit, but I love this cake recipe for the very fact that it tastes like chocolate cake and NOT zucchini. It has a little spice to it to elevate it from a typical chocolate cake and it goes with just about every flavor of ice cream. I know...I have done the experiments.
Baking in a fluted Bundt pan gives the cake a beautiful look without having to do anything more that dust it with confectioners sugar. Find your favorite accompaniment ( mine is a hot cup of coffee splashed with whipped cream) and enjoy still slightly warm from the oven or room temperature.
Zucchini Cake


6 ounces unsalted butter, room temperature
1 3/4 cups granulated sugar
2 ounces unsweetened chocolate, melted
4 eggs, room temperature
1 teaspoon vanilla extract
1 3/4 cups all-purpose flour
2 1/2 teaspoons baking powder
1 teaspoon baking soda
1/2 teaspoon salt
1/2 teaspoon ground cinnamon
1 cup half and half,room temperature
1 3/4 cups zucchini, unpeeled and shredded
1/2 cup semisweet chocolate chips


Prepare a 10-cup Bundt pan by spraying the pan with a baking release spray such as Pam.         Preheat the oven to 350 degrees.  

1.Beat butter and sugar with a mixer on medium speed for about five minutes. The mixture will not look smooth at this point but do not worry.
2.Add the melted chocolate and beat until combined.
3.Add the eggs, one at a time, beating well in between.
4.Add the vanilla extract.
5.Sift together the flour, baking powder, baking soda, cinnamon and salt. Add the flour mixture alternately with the half and half. Stir in the zucchini and chocolate chips.
6.Pour mixture in to prepared pan and bake for about 45 minutes.
7.Remove the cake  from the oven to a cooling grid. Allow to cool for about 20 minutes and then turn out of pan onto cooling grid. Cool to room temperature. Dust top with sifted confectioners sugar or a chocolate glaze. I have nasturtiums from the garden on occasion and these make lovely edible decorations.
*Note: Not sure if you have a 10-cup Bundt pan? Use water in a measuring cup to fill the pan and see how many cups you get. This will give you a good idea how many cups your pan will hold.

Wednesday, June 27, 2012

June Daring Bakers Challenge - Battenburg Cake


Mandy of What The Fruitcake?! came to our rescue last minute to present us with the Battenberg Cake challenge! She highlighted Mary Berry’s techniques and recipes to allow us to create this unique little cake with ease. If you want Mandy's wonderful recipes, click here.

The challenge this month was one of my favorites. Although we were given quite a specific item to make, Mandy gave us all kinds of creative freedom.  First here is a little background about Battenberg cakes that I am quoting from Mandy's challenge.

The first Battenberg cake was made to celebrate the marriage of Queen Victoria’s granddaughter, Princess Victoria, to husband Prince Louis of Battenberg.
It’s traditionally flavoured with almond and has the signature Battenberg markings, that is, the yellow and pink squares (said to represent the four princes of Battenberg). The strips of sponge are glued together using jam (normally apricot) and the whole cake is covered in marzipan. Sometimes the edges are crimped and the top is patterned with a knife.

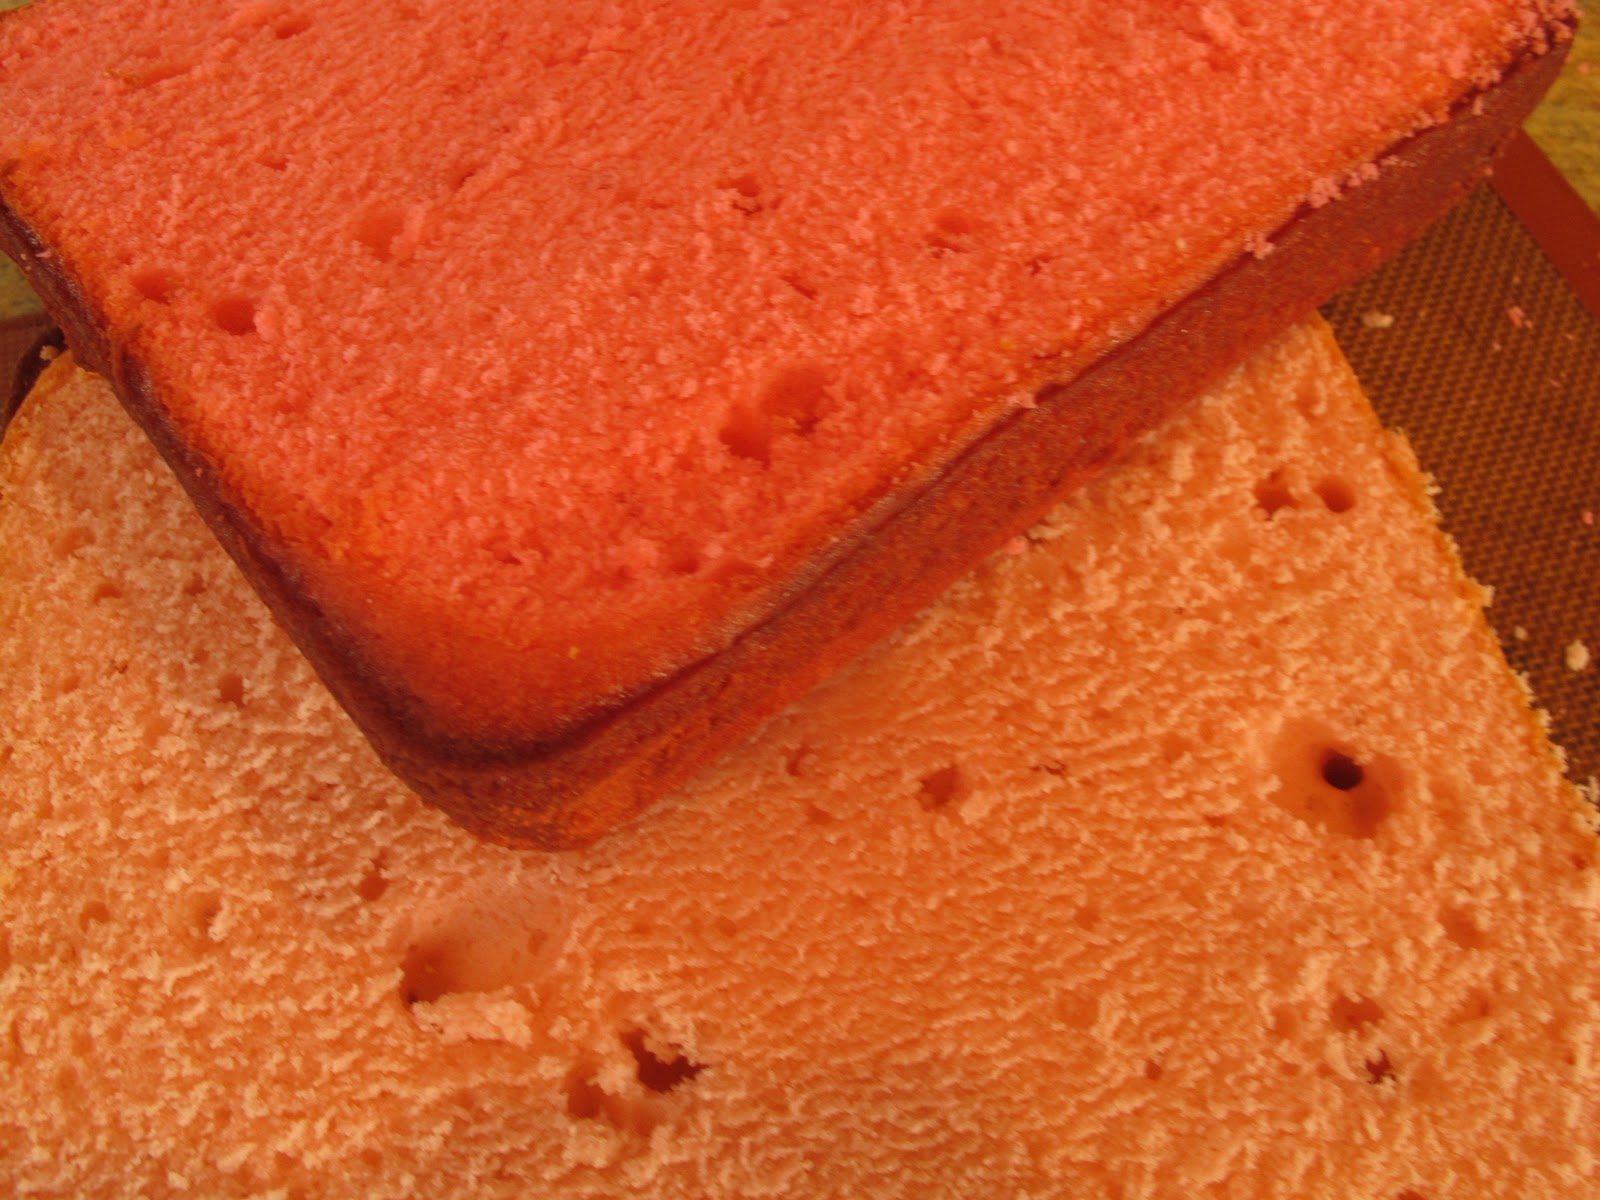
The cake is thoroughly English but being thoroughly American, I looked around for something that would appeal to my crowd.  I had a copy of Better Homes and Gardens magazine (yes, I am a magazine addict) that featured a Pink Lemonade Cake on the front cover. The cake looked so refreshing, light and summery that I knew I would have to make it. The recipe is courtesy of Karen Tack who along with Alan Richardson, has written some fun books about cupcakes and most recently cookies and cake pops. Although I was not fond of the recipes in their books, I found their creative ideas of decorating wonderful and accessible. Looking at the recipe, I was dismayed that it used red food coloring but I decided to go ahead and try it but use frozen pink lemonade and as little pink food color as possible.

The cake was really easy to make and I loved that the Battenberg is not a large cake. The recipe actually makes two cakes and that was great for sharing. Also, I felt like it was gone before it had a chance to go stale. I strayed from the traditional technique quite a bit so don't go looking for authenticity here. I used a cream cheese icing to glue everything together and covered the whole thing in fondant. I used Albert Uster's Massa Grischuna Neutral fondant. I LOVE this fondant. You can roll it thinly and it has a lovely buttery taste to it. You will also notice that I used an impression mat to make a pretty floral design on the fondant. Wilton makes several designs in impression mats and I love working with them as they are large and easy to use. I am going on and on so I should just shush up and give the recipes with pictures.

 Don't be afraid to try this cake. You will be surprised, I think, how easy, delicious and dramatic a dessert the Battenberg is to make. Mandy, please forgive this Yank but I believe I am going to use my stars impression mat and make this cake red, white and blue for Independence Day! Living in Boston has made an upstart of me.
One Batter...Two Colors

Pink Lemonade Cake

1 cup unsalted butter, or 2 sticks
2 cups sugar
4 large eggs, room temperature
3 1/2 cups all-purpose flour
1 tablespoon baking powder
1/2 teaspoon salt
1/4 cup frozen pink lemonade concentrate, thawed
1/2 teaspoon lemon extract
1 1/3 cups milk, room temperature
1/4 teaspoon pink food color
Grease and line the bottoms of two 8-inch square cakepans with parchment paper cut to fit. Pre-heat the oven to 350 degrees farenheit.
 Sift together the flour, baking powder and salt. Set aside for later.
In a large mixing bowl or stand mixer fitted with the paddle attachment, beat the butter on medium speed. add sugar slowly and continue to beat approximately five minutes. scrape the inside and bottom of the bowl with a rubber spatula.
 Add eggs one at a time beating well after each addition, scraping the inside and bottom of bowl often.
In a separate bowl, stir together the milk, lemon extract and pink lemonade concentrate. The mixture may look curdled.
 Alternately add the flour mixture and milk mixture to the butter mixture on low speed until just combined. Add 1/8 teaspoon pink food color.
Pour half the batter into prepared pan. Add another 1/8 teaspoon food color to the remaining batter and pour into other prepared pan.
 Bake approximately 25 to 30 minutes or until a toothpick inserted in the center comes out clean. Remove to a wire rack and cool 10 minutes. Remove cakes from pan onto wire rack and cool completely before decorating.
Thin consistency Icing is best for frosting a cake!
Cream Cheese Frosting
1/2 cup unsalted butter, softened
8 ounces cream cheese, softened
3 cups confectioner's sugar, sifted, if opened package
2 teaspoons vanilla extract
pinch salt
Heavy cream - optional

Beat butter and cream cheese until fluffy; beat in the sugar, salt and vanilla until smooth. Thin with heavy cream, if necessary, to achiece a spreadable consistency.


Wilton's Floral Expressions Impression Mat
Once the cake is completely cool, trim the edges of the cake with a long serrated knife.Cut each colored sponge in half lengthways so that you are left with four long strips of sponge Neaten the strips and trim as necessary so that your checkered pattern is as neat and even as possible. Spread the frosting onto the strips of cake to stick the cake together in a checkered pattern (one light pink next to one darker pink. On top of that, one darkeer pink next to one light pink).
Cover the entire cake in frosting and chill. Covering the cake in fondant is easier if the frosting is firm.
Roll the fondant about 1/8 to 1/16 inch thick and cover the cake. Smooth the sides with a fondant smoother working from the top downward. If you want to use an impression mat, roll the fondant a little thicker, transfer to the mat, press firmly with your hand or fondant smoother. Invert the impression mat over the cake, centering it so the fondant drapes evenly over the cake, and peel away the mat. Smooth gently so as not to remove the impression detail.

To smooth any wrinkles at the bottom, lift the fondant away gently fluffing as you would a tablecloth. Never pull on the fondant. Don't stress if there are a few wrinkles at the bottom though. The cake will taste just as yummy and you can hide them with a lovely garnish of edible flower petals, mint or perhaps some handmade sugar flowers.

Completed Cake with Royal Icing Flowers on top

Sunday, January 8, 2012

Back of the Box Blog 1-2-3-4 Cake


I have been fascinated with the recipes on back of the boxes and bottles that I buy. I will buy butter and inside the box are a few recipes that, on sight, look good. I started trying a few here and there and found that more often than not, the recipes were accurate and delicious.


This week I made a vanilla  cake recipe from the back of the Swans Down Cake Flour box. There was a recipe for a vanilla cake, chocolate cake and pound cake. I was impressed that they would cover the three main bases and got a good feeling about the recipe right away. Also, the ingredients and method were very appealing. I had thought that I might like to give such a plain cake a little oomph with a little almond extract only to find that ingredient already listed in the recipe.  I was really set on making it.
Making the cake is a breeze. It is as straight forward as its name. Here are a couple of things I do for cakes though to give them their best shot at yumminess. I sift the dry ingredients together as the recipe requires but then I use a wire whip and stir the flour mixture for about a minute more, ensuring that the leaven is well distributed and the mixture is aerated for a light cake. I read this trick from BakeWise by Shirley Corriher. While I like her explanations of the hows and whys of baking, I find her recipes too sweet and too  cumbersome.


The recipe for this cake called for three  9- inch pans. I do not know too many people who have this pan set up in their home kitchen. I don't and I have a lot of pans. I teach cake decorating and all of our practice cakes are 8-inch pans. I was making this cake for a class so I used  two 8-inch pans. The cakes rose beautifully. They took 30 minutes instead of the recipe's 20  minutes but that was expected. I just kept hovering after 20 minutes. The cakes did cling to the sides of the pan but that happens with almost every vanilla cake I have ever made. I let the cakes cool 10 minutes and then use a thin, flexible spatula to loosen the sides.
This cake smelled wonderful coming out of the oven. It was a beautiful color. It tasted really great if you like the almond flavor. I made a second batch using 1/4 teaspoon almond extract. It was much better with just that hint of almond.


My big test for a vanilla cake is the next day. Cakes such as these seem to deteriorate on flavor  perhaps due to their simplicity, they don't have much there to keep them fresh. I found this cake to be almost better the next day. The almond flavor  of the first batch was not as noticeable. The second batch had no real discernible almond flavor, just a richer taste.   Both batches had a bright aftertaste as opposed to that heavy tongue coating flavor that usually happens when cake goes bad.
The cake is soft in texture, I should add. Many of the vanilla cakes I make are a bit dense. I try not to refrigerate vanilla cakes if possible. I find it changes the texture a lot. But if I need to chill them, I try to choose a really creamy, flavorful filling to compensate.

I am going to keep this recipe for sure. I  plan to play with flavorings, maybe add a little orange zest here or espresso powder there. I think this recipe will adapt well. Here is the recipe with the adjustment for the almond extract.


1-2-3-4 Cake      
 adapted from the Swans Down Cake Flour box

8 ounces unsalted butter, room temperature
2 cups sugar
3 cups cake flour, sifted
4 large eggs
1 cup milk
1 tablespoon baking powder
1/2 teaspoon salt
1 teaspoon vanilla extract
1/4 teaspoon almond extract
 Preheat the oven to 350 degrees. Prepare pans by spraying with food release and lining bottoms with parchment paper.
 Cream the butter in a large bowl. Gradually add the sugar, creaming until light and fluffy. Sift the cake flour with baking powder and salt. Add the eggs, one at a time, to the creamed mixture beating well after each addition. Add the flour alternately with the milk and flavorings blending after each addition until smooth. Do not over beat. Pour into prepared pans.
 Bake for about 20 to 25 minutes or until a toothpick inserted in the center of the cake comes out with loose crumbs attached.
 Cool cakes in pans on a rack for about 10 minutes. Remove from pans and cool to room temperature before decorating.