Thursday, February 27, 2014

Daring Bakers Challenge - Beautiful Bread


Beauty surrounded the Daring Bakers this month as our host, Sawsan, of chef in disguise, challenged us to make beautiful, filled breads. Who knew breads could look as great as they taste?
February was such a cold month here in New England. I think it snowed every other day! I was thrilled to see a challenge that would get my oven turned on and warm up my kitchen. The challenge looked daunting on first sight but I have to say it was incredibly stress free and quick. Allowing the bread dough to rise was the only time consuming part. I made the dough in the morning, went off for a few errands leaving it to rise on top of my clothes dryer (the only warm place in the house) and then whipped up the bread in the afternoon.
 Thanks Sawsan for a wonderful challenge. I can say that many tasters of the breads asked for the recipes.  I preferred the Nutella filled bread over the cinnamon bread but I think that is because I waited a couple of days to taste the cinnamon bread and it does not keep well. I think if I had eaten it while a bit warm, I would have loved it. 
The Nutella bread was hands down addictive. Not only did the recipe make a large amount, it also kept for a few days with no great loss of flavor and texture. I will be making this one a lot. If you have not had Nutella, it is a hazelnut cocoa spread that is good enough to eat with a spoon from the jar, which of course I would NEVER do :)


Cinnamon Sweet Bread:

Ingredients

For the dough

1/4 cup (60 ml) warm water
3/4 cup (180 ml) warm milk
1 large egg
1/4 cup (60 ml) (60 gm) (2 oz) butter, softened
1/4 cup (60 ml) (50 gm) (1-3/4 oz) white sugar
1/2 teaspoon (3 gm) salt
3-1/4 cups (780 ml) (450 gm) (16 oz) plain (all-purpose) flour, approximately
2 teaspoons (10 ml) (8 gm) dry yeast
1/4 teaspoon (1 gm) cardamom, optional

For topping

1/4 cup (60 ml) of milk
1 tablespoon (15 gm) (1/2 oz) sugar

Between the layers

1/2 stick (4 tablespoons) (1/4 cup) (60 ml) (60 gm) (2 oz) butter
4 tablespoons (60 ml) (25 gm) (1 oz) cinnamon
1/2 cup (120 ml) (100 gm) (3-1/2 oz) sugar

For drizzling

1 can (400 gm) (14 oz) sweetened condensed milk

Directions:

1. In a bowl whisk the egg with milk, water, sugar, butter and yeast. Set aside
2. In another bowl sift the flour with the salt and the optional cardamom.
3. Add the liquid ingredients to the dry ingredients and knead until you get a smooth dough.


Note: This recipe requires between 3-1/4 and 3-1/2 cups of flour depending on the weather, humidity and the flour brand. Start with 3-1/4 cups and if you feel that the dough is too soft, add the extra 1/4 cup
4. Place the dough in a bowl you have brushed with some oil and cover it with a wet cloth and leave it in a warm place to double
(If you are tight on time you can heat your oven to 390°F/200°C then turn it off and place your dough in a glass bowl and place it in the warm oven with the wet cloth covering the bowl)


5. Turn the dough out onto a lightly floured surface
6. Divide the dough into 4 parts
7. Roll each part into a circle at least 20 cm (8 inch) in diameter


8. Brush the first layer with butter then sprinkle with sugar and cinnamon


9. Place the second layer on the first layer repeat the brushing and sprinkling and then do the same with the third layer.


10. Top with the fourth layer, this time only brush it with butter.


11. Using a knife make cuts that divide the dough circles into 8 triangles


12. Make cuts that go 2/3 of the way in the middle of each triangle. The cuts should not reach the base of the triangle nor the tip as you can see in the picture

13. Take the tip of each triangle and insert it into the cut you made and pull it from the underside


14. Arrange the triangles on your baking sheet


15. Pinch the two angles at the base of the triangle together
The end result will look like this

16. Brush the dough with milk

17. Allow to rest for 15 minutes during which you would heat your oven to very hot 500°F/240°C/gas mark 9 (rack in the middle). (Go for the hottest your oven will do).
18. Bake for 5 minutes on very hot 450°F/240°C/gas mark 9, then lower the temperature to moderately hot 400°F/200°C/gas mark 6 and bake for 15-20 more minutes
Note: ovens do differ greatly, so the time may differ,what you want is to bake it until the under side is golden brown and the bread is baked all the way to the center. If the top of the bread is not golden brown by that time and you have a broiler (grill) in your oven. Turn on the broiler (grill) for a couple of minutes until the bread is golden brown on top. If on the other hand the top is getting too dark, consider lowering the oven temperature and covering the top of the bread with foil to stop it from over browning
19. Take it out of the oven and allow to cool for 5 minutes then transfer to a wire rick and drizzle with sweetened condensed milk while it is still warm.


Cinnamon Bread just before drizzling the sweetened condensed milk


OK, now here is my favorite!!!!

Nutella Twists:


Servings:This dough recipe makes two loaves, 16 small pieces each

Ingredients

1 can (400 gm) (14 oz) sweetened condensed milk
3 large eggs
1 cup (240 ml) vegetable oil
1 cup (240 ml) warm water
3 teaspoons (15 ml) (12 gm) yeast
7 cups (1 kg) (2.2 lbs) all-purpose (plain) flour, approximately
Pinch of salt
Instead of the eggwash use
2 tablespoons (30 ml) (25 gm) (1 oz) milk powder
3 tablespoons (45 ml) lukewarm water
1teaspoon (5 ml) (5 gm) sugar
1/4 teaspoon (1 gm) instant coffee
For the filling
½ jar (200 gm) (7 oz) of nutella (or similar)


Directions:

1. Mix the condensed milk, yeast, oil, water, and eggs in the bowl of your mixer
2. Add the flour one cup at a time and knead using the kneading attachment or by hand till you get a soft dough
3. The dough will be slightly sticky due to the sweetened condensed milk, don’t worry once the dough rests it will have a wonderful consistency


4. Place the dough in a lightly oiled bowl, cover and allow to rest till it doubles in size


5. Punch down the dough and divide it into 2 parts. Wrap one part in a plastic bag and work with the other.

6. Divide the dough ball into 4 parts
7. Roll each part into a circle at least 20 cm (8 inch) in diameter


You can use a plate or any other round item as a template if you want your layers to be identical and uniform
8. Spread the Nutella (or similar filling) on the first layer
9. Place the second layer on top of the first and repeat


10. Top with the fourth layer, this time only brush it with butter.


Note:To help with the slippery Nutella, you can place the filled layers before cutting into the fridge for 20-30 minutes, this will help the nutella to firm up. That will make the cuts and twists easier.
11. Using a knife make cuts that divide the dough circles into 8 triangles starting at the center but don’t go all the way to the outer edge.


12. Then divide each triangle into two (2) . That gives you a total of 16 triangles
13. Gently lift the triangles one at a time and twist them


The end result will look like this, repeat for the other dough ball
14. Brush the dough with egg wash replacement ( I did not do this-I just brushed with more melted butter)

15. Allow to rest for 15 minutes during which you would heat your oven to very hot450°F/240°C/gas mark 9 (rack in the middle)
16. Bake for 5 minutes on very hot 4450°F/240°C/gas mark 9, then lower the temperature to moderately hot 400°F/200°C/gas mark 6 and bake for 15-20 more minutes
Note:ovens do differ greatly, so the time may differ,what you want is to bake it until the under side is golden brown and the bread is baked all the way to the center. If the top of the bread is not golden brown by that time and you have a broiler (grill) in your oven. Turn on the broiler (grill) for a couple of minutes until the bread is golden brown on top. If on the other hand the top is getting too dark, consider lowering the oven temperature and covering the top of the bread with foil to stop it from over browning

Storage Tips:

The dough for the cinnamon bread and the Nutella twists can be stored in the fridge for up to three days.
The bread, once baked can be stored in air tight container for 2-3 days at room temperature or in the fridge.

Friday, December 27, 2013

Daring Bakers December Challenge - Whoopie Pies


The December Daring Bakers' Challenge had us all cheering - the lovely and talented Bourbonnatrix of Bourbonnatrix Bakes was our hostess and challenged us to make fun, delicious and creative whoopie pies! Delicious little cake-like cookies sandwiching luscious filling in any flavors we chose... What else is there to say but "Whoopie!"

I was super busy this month but more than determined to do this challenge. Lis, one of the founders of Daring Bakers', unexpectedly died in November. I never met her or communicated with her but I felt her wonderful presence every month as she cheered our current challenges and rooted for our future challenges. I could feel her energy in every post she gave us. Two Daring Baker members , Shelley and Ruth, have stepped forth to carry on her project and I dedicate this challenge to them as well as Lis.

So, I was making lots of whoopie this holiday season!!
I have a very good friend who makes wonderful whoopie pies and brings them to all our gatherings. I have never had a reason to make them. I got my Woopie fix from her. I was surprised how easily they came together. I am thinking that the recipe from Bourbonnatrix is a great part of that reason. I made her chocolate version and it is deeelish! I experimented with German Chocolate filling to make it a little exciting. The whoopies were delicious and filling!!! I may make them a little smaller next time. There will definitely be a next time. I love my friends whoopie pies but I don't need to wait for a party anymore...I can make whoopie anytime!


German Chocolate Whoopie Pies

For the Whoopie Pies 

1/2 cup (120 ml) (4 oz) (115 gm) butter 
1 cup (240 ml) (7 oz) (200 gm) brown sugar, firmly packed 
1 teaspoon (5 ml) (5 gm) espresso coffee powder, optional 
1 teaspoon (5 ml) (5 gm) baking powder 
1/2 teaspoon (3 gm) baking soda 
3/4 teaspoon (4½ gm) salt 
1 teaspoon (5 ml) vanilla extract 
1 large egg 
1/2 cup (120 ml) (1½ oz) (45 gm) Dutch-process cocoa, sifted 
2 1/3 cups (560 ml) (10 oz) (285 gm) unbleached all-purpose (plain) flour 

Directions: 
1) Preheat oven to moderate 350°F/180°C/gas mark 4. Lightly grease (or line with parchment) 
two baking sheets.  
2) In a large mixing bowl, beat together the butter, brown sugar, espresso coffee powder (if 
using), baking powder, baking soda, salt, and vanilla till smooth. Add the egg, again beating 
till smooth.  
3) Add the cocoa, stirring to combine.  
4) Add the flour to the batter alternately with the milk, beating till smooth. Scrape down the sides 
and bottom of the bowl, and beat again briefly to soften and combine any chunky scrapings.   
5) Drop the dough by the 1/4-cupful (60 ml) onto the prepared baking sheets, leaving plenty of 
room between the cakes; they'll spread. A muffin scoop works well here.  
6) Bake the cakes in a preheated moderate oven for 15 to 16 minutes, till they're set and firm to 
the touch. Remove them from the oven, and cool on the pans. While still lukewarm, use a 
spatula to separate them from the pan or parchment; then allow to cool completely.


Ready for baking

Ready for filling

German Chocolate Filling (adapted from Original Whistlestop Cafe Cookbook by Fannie Flagg)

1 1/3 cups (315 mL) heavy cream
1 1/3 cups (315 mL) sugar
4  large egg yolks, beaten
2/3 cup ( 158 mL)butter
2 teaspoon (10 mL) vanilla extract
1 1/3 cups (315 mL)  flaked coconut
1 1/3 cups  (315 mL)  chopped toasted pecans
2 ounces (56 gm)sweet baking chocolate, grated 
Combine first four ingredients in a saucepan ans cook over low heat, stirring constantly until butter and sugar melt. Bring to a boil over medium heat and cook for 12 minutes, stirring constantly. Remove from heat; add vanilla, coconut, and pecans. Let the filling stand until cool and of spreading consistency., stirring frequently. Stir in  the chocolate when cool. Spread one one side of the whoopie with about 2 tablespoons of the filling and top with another whoopie half. 


Custard cooking

Chopped toasted pecans

Filling cooling down


Cooled filling ready for chocolate-much thicker now!

Grated chocolate-a big pain!

Yummy filling ready for Whoopie


Sunday, October 27, 2013

October Daring Bakers' Challenge - Savory Pot Pies


I was very excited to have pot pie as our challenge this month. I just love pot pies but my sweet husband does not love them. Neither one of us grew up eating pot pies and took very different directions with the concept at adulthood. He veered towards the "I don't know what's in there and I am not gonna eat it" and I veered towards the "I love everything all mixed up in there and there's pastry everywhere...yum." With such different viewpoints, I found that I just did not make them often. BUT now I had a good reason and I was going to make the most of it.
Hannah of Rise and Shine was our October 2013 Daring Bakers’ hostess and she challenged us to bake our own double crusted savory pot pies. Using any from-scratch crust and filling we choose, We were allowed to get completely creative with our recipe, showing off the savory flavors and fillings from our own home or region.

 We could basically do anything we wanted as long as there was a top and bottom crust to it. With all that freedom, I opted for the most traditional type of pot pie, turkey pot pie. Because to me, a pot pie should coincide with a refrigerator cleansing opportunity. I found bits and bobs of veggies leftover from farmers market excursions. Pieces of vegetables  that were not enough to make it on their own for a side dish but enough to add with others for a nice medley. 

I have a'tried and true' pie crust that I use for everything pie related. From quiche to banana cream pie, I use this recipe and tweak it a bit for the preparation. I located some fresh thyme to use in the pastry from under the massive amount of falling leaves that are everywhere here in New England this time of year.

For the filling, I started with  a turkey stock with a couple of turkey thighs and lots of onion along with some celery leaves and carrots.
I also used the pot pie as an excuse to get a nice bottle of sherry and add it to the pot pie sauce for flavor. I did have to taste test it and can report that a good quality sherry is a beautiful thing.
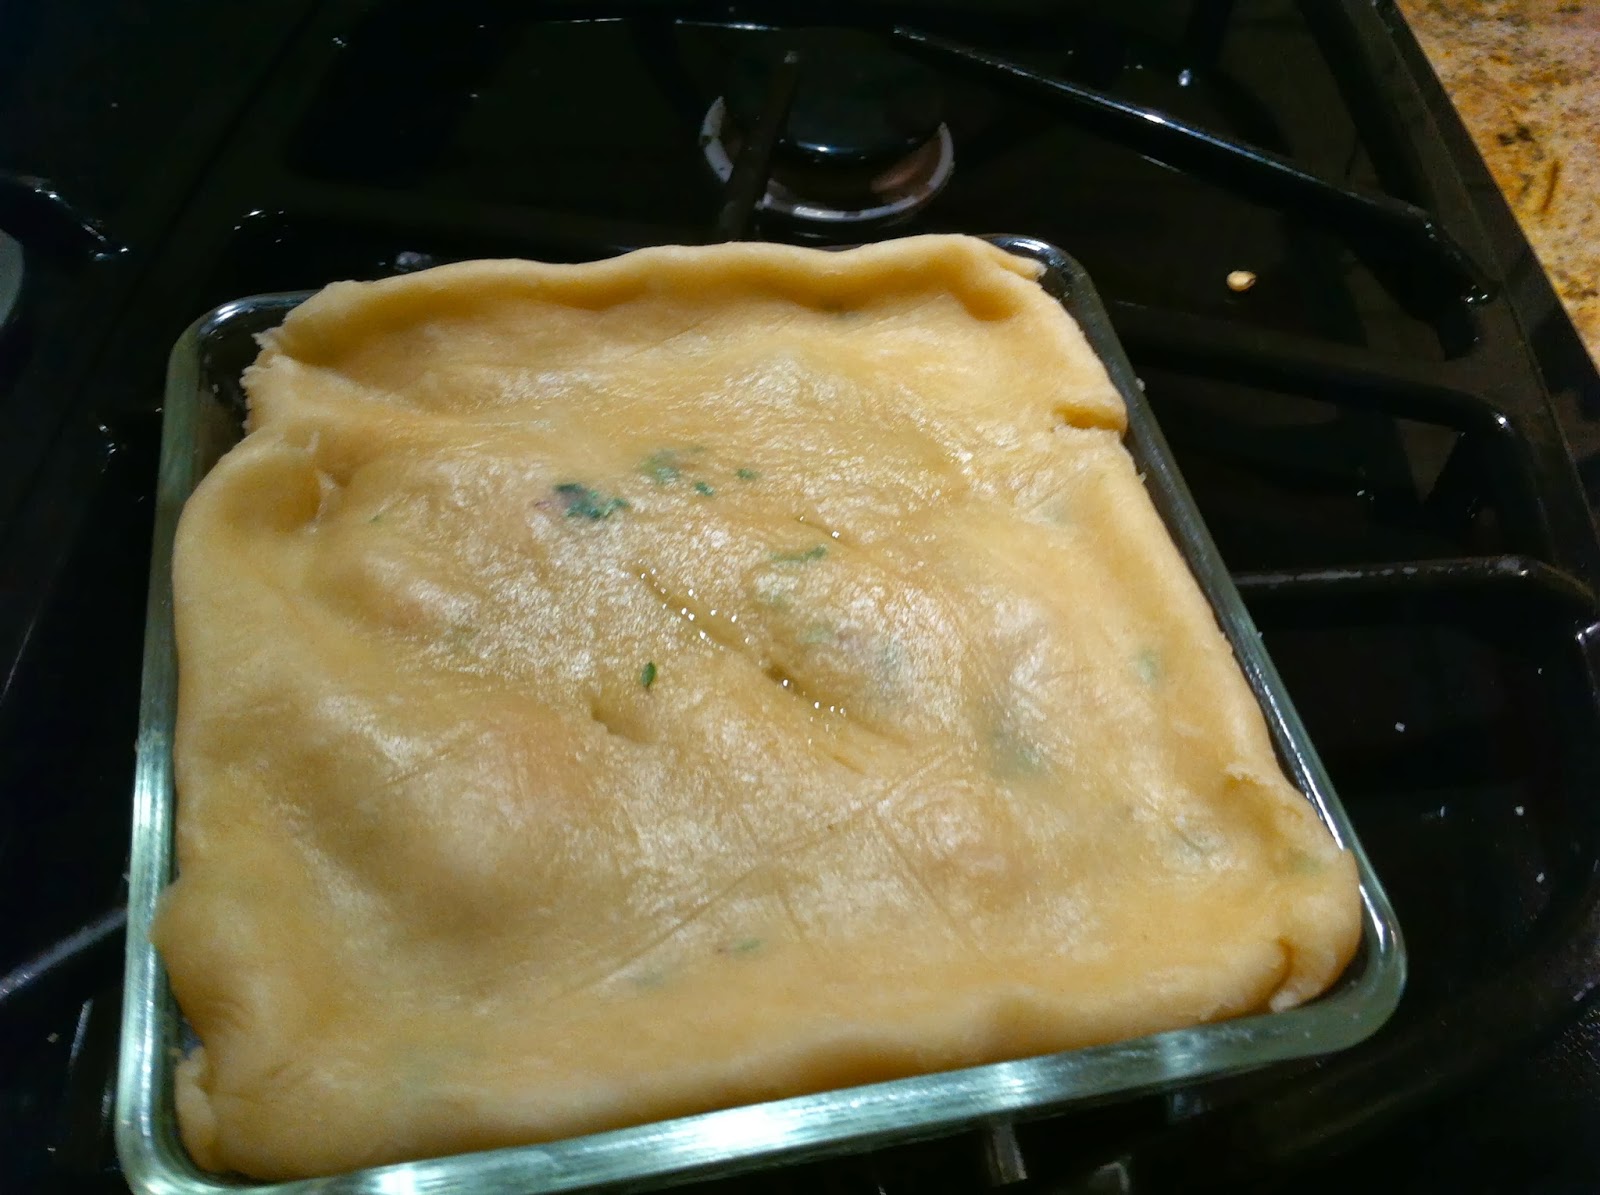
I made the pot pie in some square glass casserole dishes that I bough years ago because they were cute. I was so thrilled to be able to use them as a personal pot pie vessel.
As predicted, my hubbie ate a bit of the pot pie and pushed the rest of it around the plate while inquiring about any ice cream in the freezer...sigh... I did not win him over this time . I loved it but the personal pie dish was a little big for me and I saved a healthy portion for next days lunch.
As winter quickly approaches, I think I will attempt the pot pie again. I am thinking a lobster pie for next time...My husband is a huge lobster lover...that might do the trick.


Pastry :
2 cups flour
2/3 cup vegetable shortening
6 tablespoons ice water
1 teaspoon salt
1 teaspoon fresh thyme, chopped
Filling:
2 tablespoons olive oil
1/2 onion, chopped
1 stalk celery, chopped
1/4 green pepper, chopped
1/2 yellow pepper, chopped
1 carrot, chopped
2 tablespoons butter
2 tablespoons flour
1/4 cup sherry
1 1/2 cups turkey stock, or chicken stock
2 cups cooked turkey, chopped

Directions:

Filling:
Heat the olive oil in a medium skillet over medium high heat. Add the onion, celery, peppers and saute for about five minutes, stirring periodically.


Add the butter and garlic. When the butter has melted and the garlic has become aromatic, add the flour. Cook the flour stirring constantly for a few minutes. Add the sherry to deglaze the pan.
Add the stock slowly , stirring constantly. Reduce the heat to medium low and cook for about 20 minutes . Season with salt and pepper. Add the chopped turkey.
Set filling aside to cool slightly before adding to pastry.

Pastry:
Pre-heat the oven to 450 degrees.                                                                                                                                                                                                                                                                                                                                                                                               Mix together the flour and salt. Add the shortening and crumble with fingers til almost mixed. Add in the thyme.
Add the water and lightly mix together to form a loose dough. Turn out onto a flour dusted surface and knead the dough lightly. Do not over work the dough. 
 Roll one quarter of the dough between two sheets of wax paper to about 1/16th inch thickness. Line the dish with the dough. 


Trim the edges  along the top with a sharp knife.
 Repeat for a second dish. 
Place a sheet of foil on top of the dough in each dish. 
Add some baking beans to weight the foil. Bake the
pastry for about 8 minutes.


Remove from oven and remove foil with baking beans. Allow to cool for several minutes. Brush bottom pastry with whole grain mustard. 

Divide the filling among the two dishes. 


Split the remaining pastry into two parts and roll each one between sheets of wax paper to less than 1/16th inch thickness. top each filled dish with pastry and fold in the edges to seal. Using a sharp knife, make a couple of slits in the top pastry to create air vents.


Place dishes in 450 oven and immediately reduce the temperature to 350 degrees. Cook until top pastry is golden brown, about 25 minutes. Cool slightly and serve.


Thanks Hannah!!


Monday, September 2, 2013

Still Summer Zucchini Cake


OK, so it is the end of summer and the kids are going back to school and the hurricane weather is in full force and the garden is looking sickly while the fall mums at the garden store are looking really fine.
You still have mounds of zucchini to remind you that summer is still here and very green. I  am not a big zucchini fan, I will admit, but I love this cake recipe for the very fact that it tastes like chocolate cake and NOT zucchini. It has a little spice to it to elevate it from a typical chocolate cake and it goes with just about every flavor of ice cream. I know...I have done the experiments.
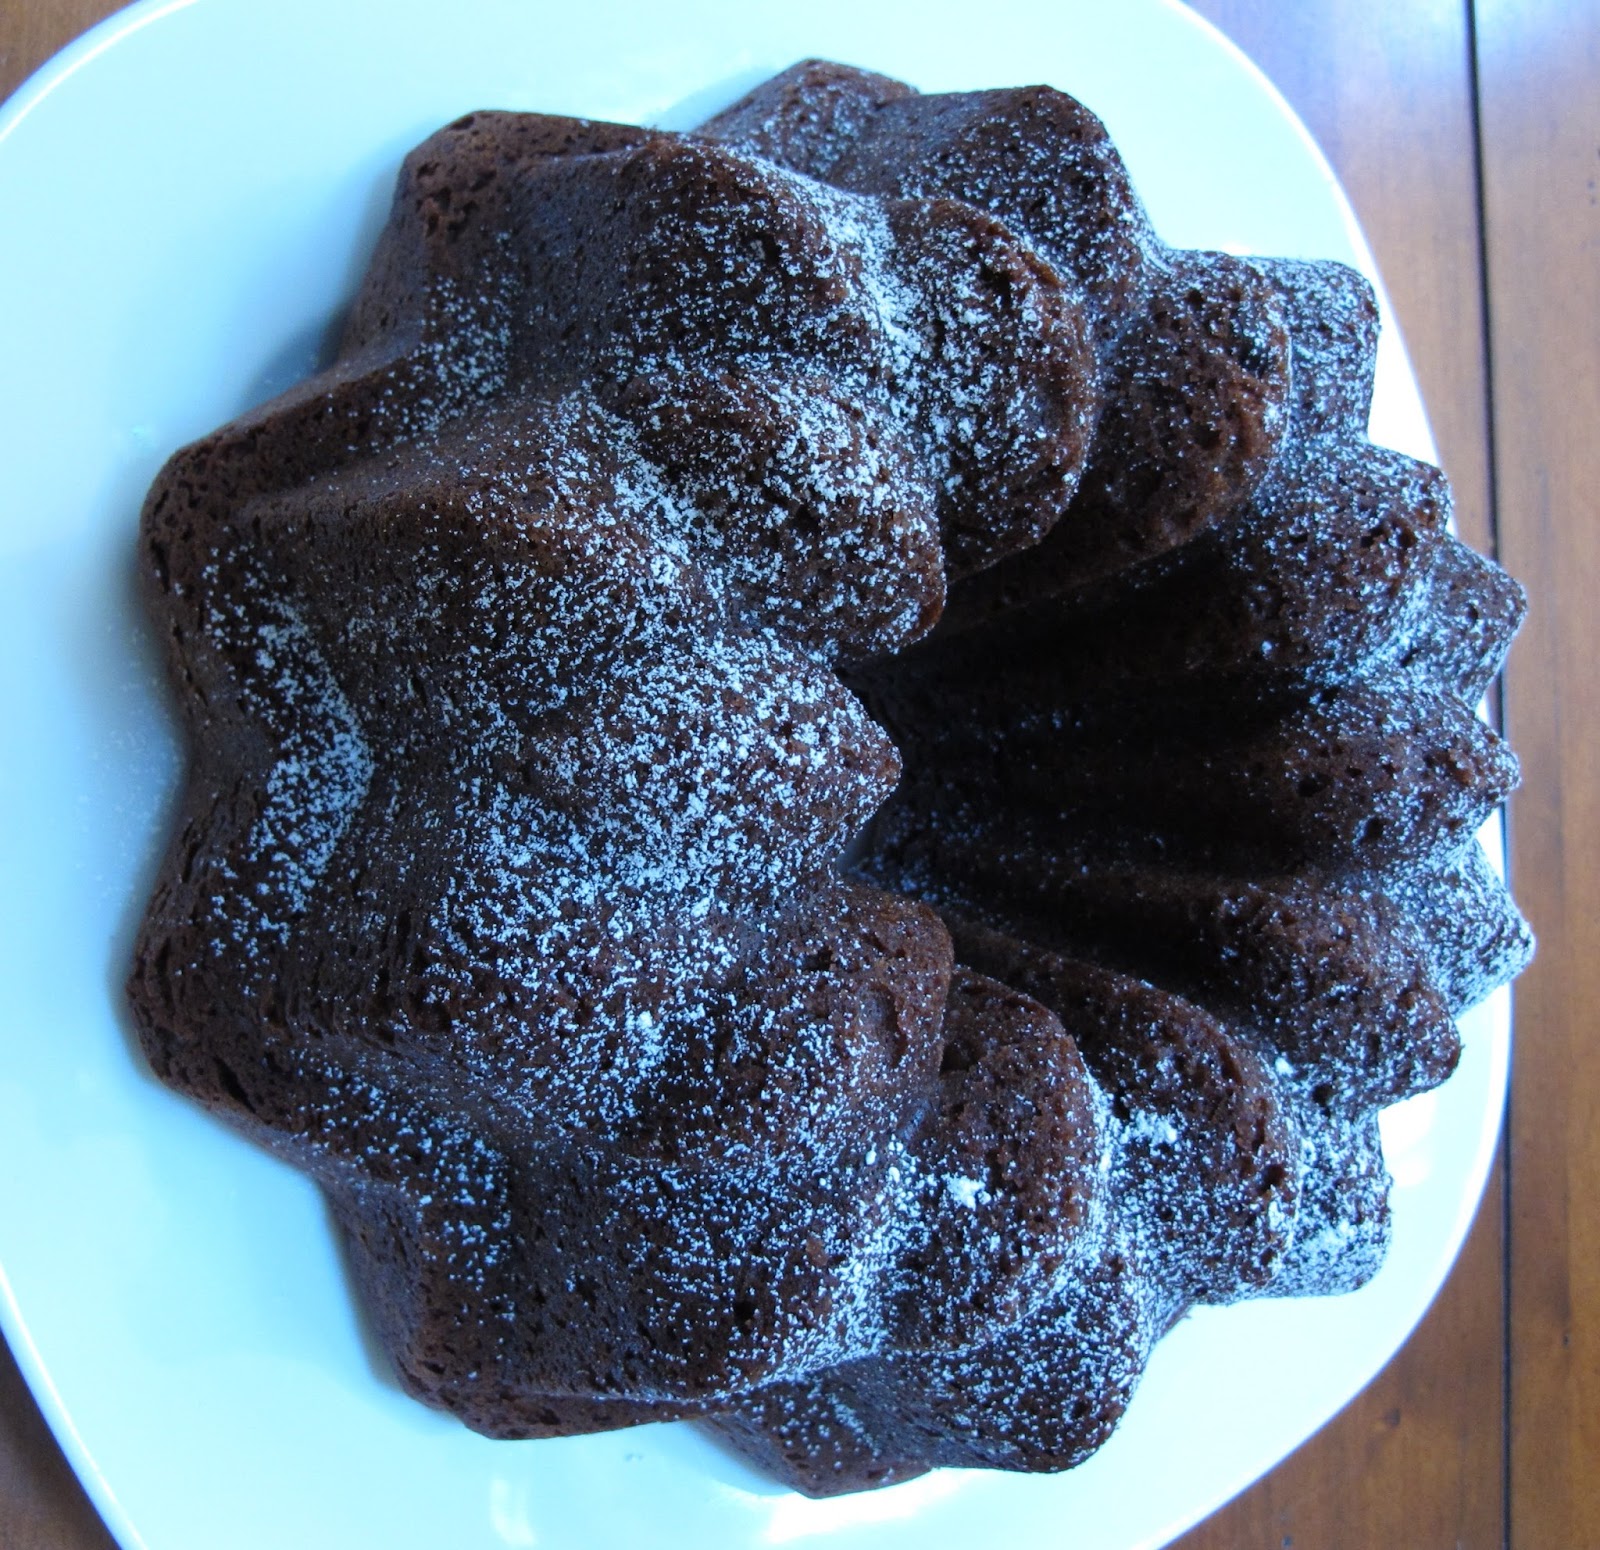
Baking in a fluted Bundt pan gives the cake a beautiful look without having to do anything more that dust it with confectioners sugar. Find your favorite accompaniment ( mine is a hot cup of coffee splashed with whipped cream) and enjoy still slightly warm from the oven or room temperature.
Zucchini Cake


6 ounces unsalted butter, room temperature
1 3/4 cups granulated sugar
2 ounces unsweetened chocolate, melted
4 eggs, room temperature
1 teaspoon vanilla extract
1 3/4 cups all-purpose flour
2 1/2 teaspoons baking powder
1 teaspoon baking soda
1/2 teaspoon salt
1/2 teaspoon ground cinnamon
1 cup half and half,room temperature
1 3/4 cups zucchini, unpeeled and shredded
1/2 cup semisweet chocolate chips


Prepare a 10-cup Bundt pan by spraying the pan with a baking release spray such as Pam.         Preheat the oven to 350 degrees.  

1.Beat butter and sugar with a mixer on medium speed for about five minutes. The mixture will not look smooth at this point but do not worry.
2.Add the melted chocolate and beat until combined.
3.Add the eggs, one at a time, beating well in between.
4.Add the vanilla extract.
5.Sift together the flour, baking powder, baking soda, cinnamon and salt. Add the flour mixture alternately with the half and half. Stir in the zucchini and chocolate chips.
6.Pour mixture in to prepared pan and bake for about 45 minutes.
7.Remove the cake  from the oven to a cooling grid. Allow to cool for about 20 minutes and then turn out of pan onto cooling grid. Cool to room temperature. Dust top with sifted confectioners sugar or a chocolate glaze. I have nasturtiums from the garden on occasion and these make lovely edible decorations.
*Note: Not sure if you have a 10-cup Bundt pan? Use water in a measuring cup to fill the pan and see how many cups you get. This will give you a good idea how many cups your pan will hold.

Tuesday, August 27, 2013

Daring Bakers" August Challenge - Mawa Cake, Bolinhas De Coco


Aparna of My Diverse Kitchen was our August 2013 Daring Bakers’ hostess and she challenged us to make some amazing regional Indian desserts. The Mawa Cake, the Bolinhas de Coco cookies and the Masala cookies – beautifully spiced and delicious!

I chose the Mawa Cake and the Bolinhas de Coco cookies for the challenge.I started the Mawa Cake first since it seemed the most complicated and time consuming. Both desserts took a couple days each to complete so these are definitely NOT last minute thoughts.  I was surprised how easily the Mawa came together and how wonderful it made the house smell.  I added chopped dates to half of the cake just to see how it would fare. I do not think the dates added anything to the flavor and I liked the half without them better.The cake was very plain Jane looking but was very tasty with an afternoon cup of coffee. I dressed it up a little more that evening for dessert. I added a scoop each of blood orange sorbet and ginger ice cream. all the flavors blended nicely and gave the cake a rich feel. The cake did not keep well. The next day it was a little stale tasting and the third day, not even ice cream could save it. I would make this for a party occasion where I would not expect leftovers.


This is mawa, greatly reduced milk!


Can you smell the aromatic cardamon?


The Bolinhas de Coco cookies were a complete disaster for me. I just could not get my head around what was expected. I think looking back on it now, I should have cooked a bit more liquid out of the mixture. Whacking the coconut was tons of fun though and I volunteer to The cookies tasted OK but not being a huge coconut fan, I was not the main taster.My main tasters agreed that the cookies were a bit heavy and dry...most likely my fault for not cooking out that darn liquid.  I find, even though it is out of my comfort zone, that the Daring Bakers teaches me to appreciate the care and uniqueness of cuisines I don't know well. I love having a great excuse to try out new techniques with the sweet guidance of fellow Daring Bakers.
Here is a link to the  recipes:


Should have kept cooking???

The dough was very loose.I knew I was in trouble.


A bit flat...they should have been puffy.


Saturday, July 27, 2013

July Daring Bakers' Challenge - Choose your own Adventure


In a "celebration" of past Daring Baker and Daring Cook challenges, Lisa challenged all of us to search through the Daring Kitchen archives and pick any one we'd like! The REAL challenge was picking which delicious recipe(s) to try!
I got very excited with this challenge because I wanted to make pie for last months's challenge hosted by Rachael from pizzarossa but was unable to participate. We were off on a vacation adventure and I could not figure out how to blog from an IPAD. So, I made Peach Pie for this month's challenge and it is a happy pie time over here. The peaches were calling my name at the store. I smelled their sweet scent before I even saw them. I practiced the technique of putting them in boiling water for about 30 seconds before ice water shocking them. The skins just slipped away from the pulp for the most part. I had a couple of naughty ones that required manual peeling   I used the recommended crust recipe that our June host specified. I have a pie crust recipe that I have used for years but I actually prefer the recipe given for fruit pies.

Below is the recipe. Hurry to the market if you are in the summer side of the world and get some juicy peaches. If you are not, use what is in season at your spot in the world and bake yourself up a pie using this crust. You know you've been" pie"ning for one, hehehe.


Peach Pie

Crust:
2/3 cup (160 ml) (150 gm) (5-1/3 oz) unsalted butter 
1¾ cups (420 ml) (250 gm) (8-2/3 oz) all-purpose flour 
2 teaspoon (10 ml) (10 gm) (1/3 oz) sugar 
1/4 teaspoon (1½ gm) salt 
3-8 tablespoons (45-120 ml) cold water 

1 – 1½ kg (2¼ to 3-1/3 pounds) peaches (depending on the depth of your pie dish) 
1/2 cup (120 ml) (200 gm)4 oz) light brown sugar, lightly packed (more or less to taste) 
1/2 tsp ground cinnamon 
1/2 teaspoon grated fresh ginger
1 Tablespoon flour
1 - 2 teaspoons (5-10 ml) (5-10 gm) white sugar for sprinkling (optional)

Filling:
1. Weigh/measure out the correct amount of butter, wrap it in foil and freeze it for at least 30 minutes. 
2. Sift the flour, sugar and salt into a large bowl. 
3. Using the large holes on a box grater, grate the frozen butter directly over the flour in the 
bowl. Hold the butter by the foil to avoid warming it up too much and work as quickly as 
possible.  Using a table fork, toss the grated butter in the flour until it's all coated. 
 Alternatively, finely chop the butter and rub in with your fingertips, working quickly to avoid 
 warming it. This is best left to those lucky folk with cool hands! 
4. Sprinkle 3 tablespoons (45 ml) of cold water over the mixture and mix together with the fork. 
Add more water, spoon by spoon, as needed - it will depend on temperature, humidity and a 
million other factors, but the finished dough should be moist and starting to come together, 
but not wet. I used 7 tablespoons (315 ml). Use your fingertips to test if it's sticking together. 
5. Finish by using your hands to quickly bring the dough together into a ball. Just press, don't 
knead. 
6. Wrap dough in plastic and refrigerate for at least 30 minutes. 


1. Preheat oven to hot 220°C/425°F/gas mark 7 . Lightly grease a deep 9"/24cm ceramic or metal pie dish. Note that a dish this size results in quite a thin top crust - if you want a sturdier top which cuts more cleanly, then you should use a smaller dish so you don't need to roll it out so thinly. I like to use a glass pie plate so I can monitor the cooking of the bottom crust.
2. Take 2/3 of the pastry dough (I weighed my dough and 2/3 was about 12oz/340g) and roll out to fit pie dish, right up to the rim. Line the pie dish with it, prick all over the bottom with a fork and set aside.


3. Peel, pit  and chop the peaches into large chunks and place in a bowl. How tightly you can pack them into the pie depends on how thinly they are sliced - I like them chunky
4. Sprinkle the brown sugar , spice and flour over the peaches and toss well to coat. 


5. Pack the peaches tightly into the lined pie dish. The filling can come up above the rim of the dish in a mound. 


6. Roll out the remaining pastry dough to fit over the peaches. 
7. With a wet finger, moisten the edge of the pastry in the dish. Place the dough lid on the pie and press the edges together. Trim the edges as necessary and crimp the seam closed with your fingers or the back of a fork. 
8. With a pair of kitchen scissors, cut three vents in the top of the dough. You can either cut leaf shaped vents and use the pieces you removed to fashion decorative leaves, or you can cut straight vents and use any pastry trimmings to fashion decorations as desired. Moisten the back of the decorations with a wet finger and gently press onto the top of the pie. 
9. Glaze the top of the pie with a beaten egg or milk, then sprinkle the top with a little white sugar. 
10. Place pie dish on a baking sheet and put it into the center of the oven. Bake for 20 minutes, then reduce heat to moderate 180°C/350°F/gas mark 4 and bake for a further 30 minutes. The top should be light golden brown. The bottom should be golden brown as well.